Not much time these days to get things up on the blog, but here’s a quick update:
Kitchen cabinets are going in!
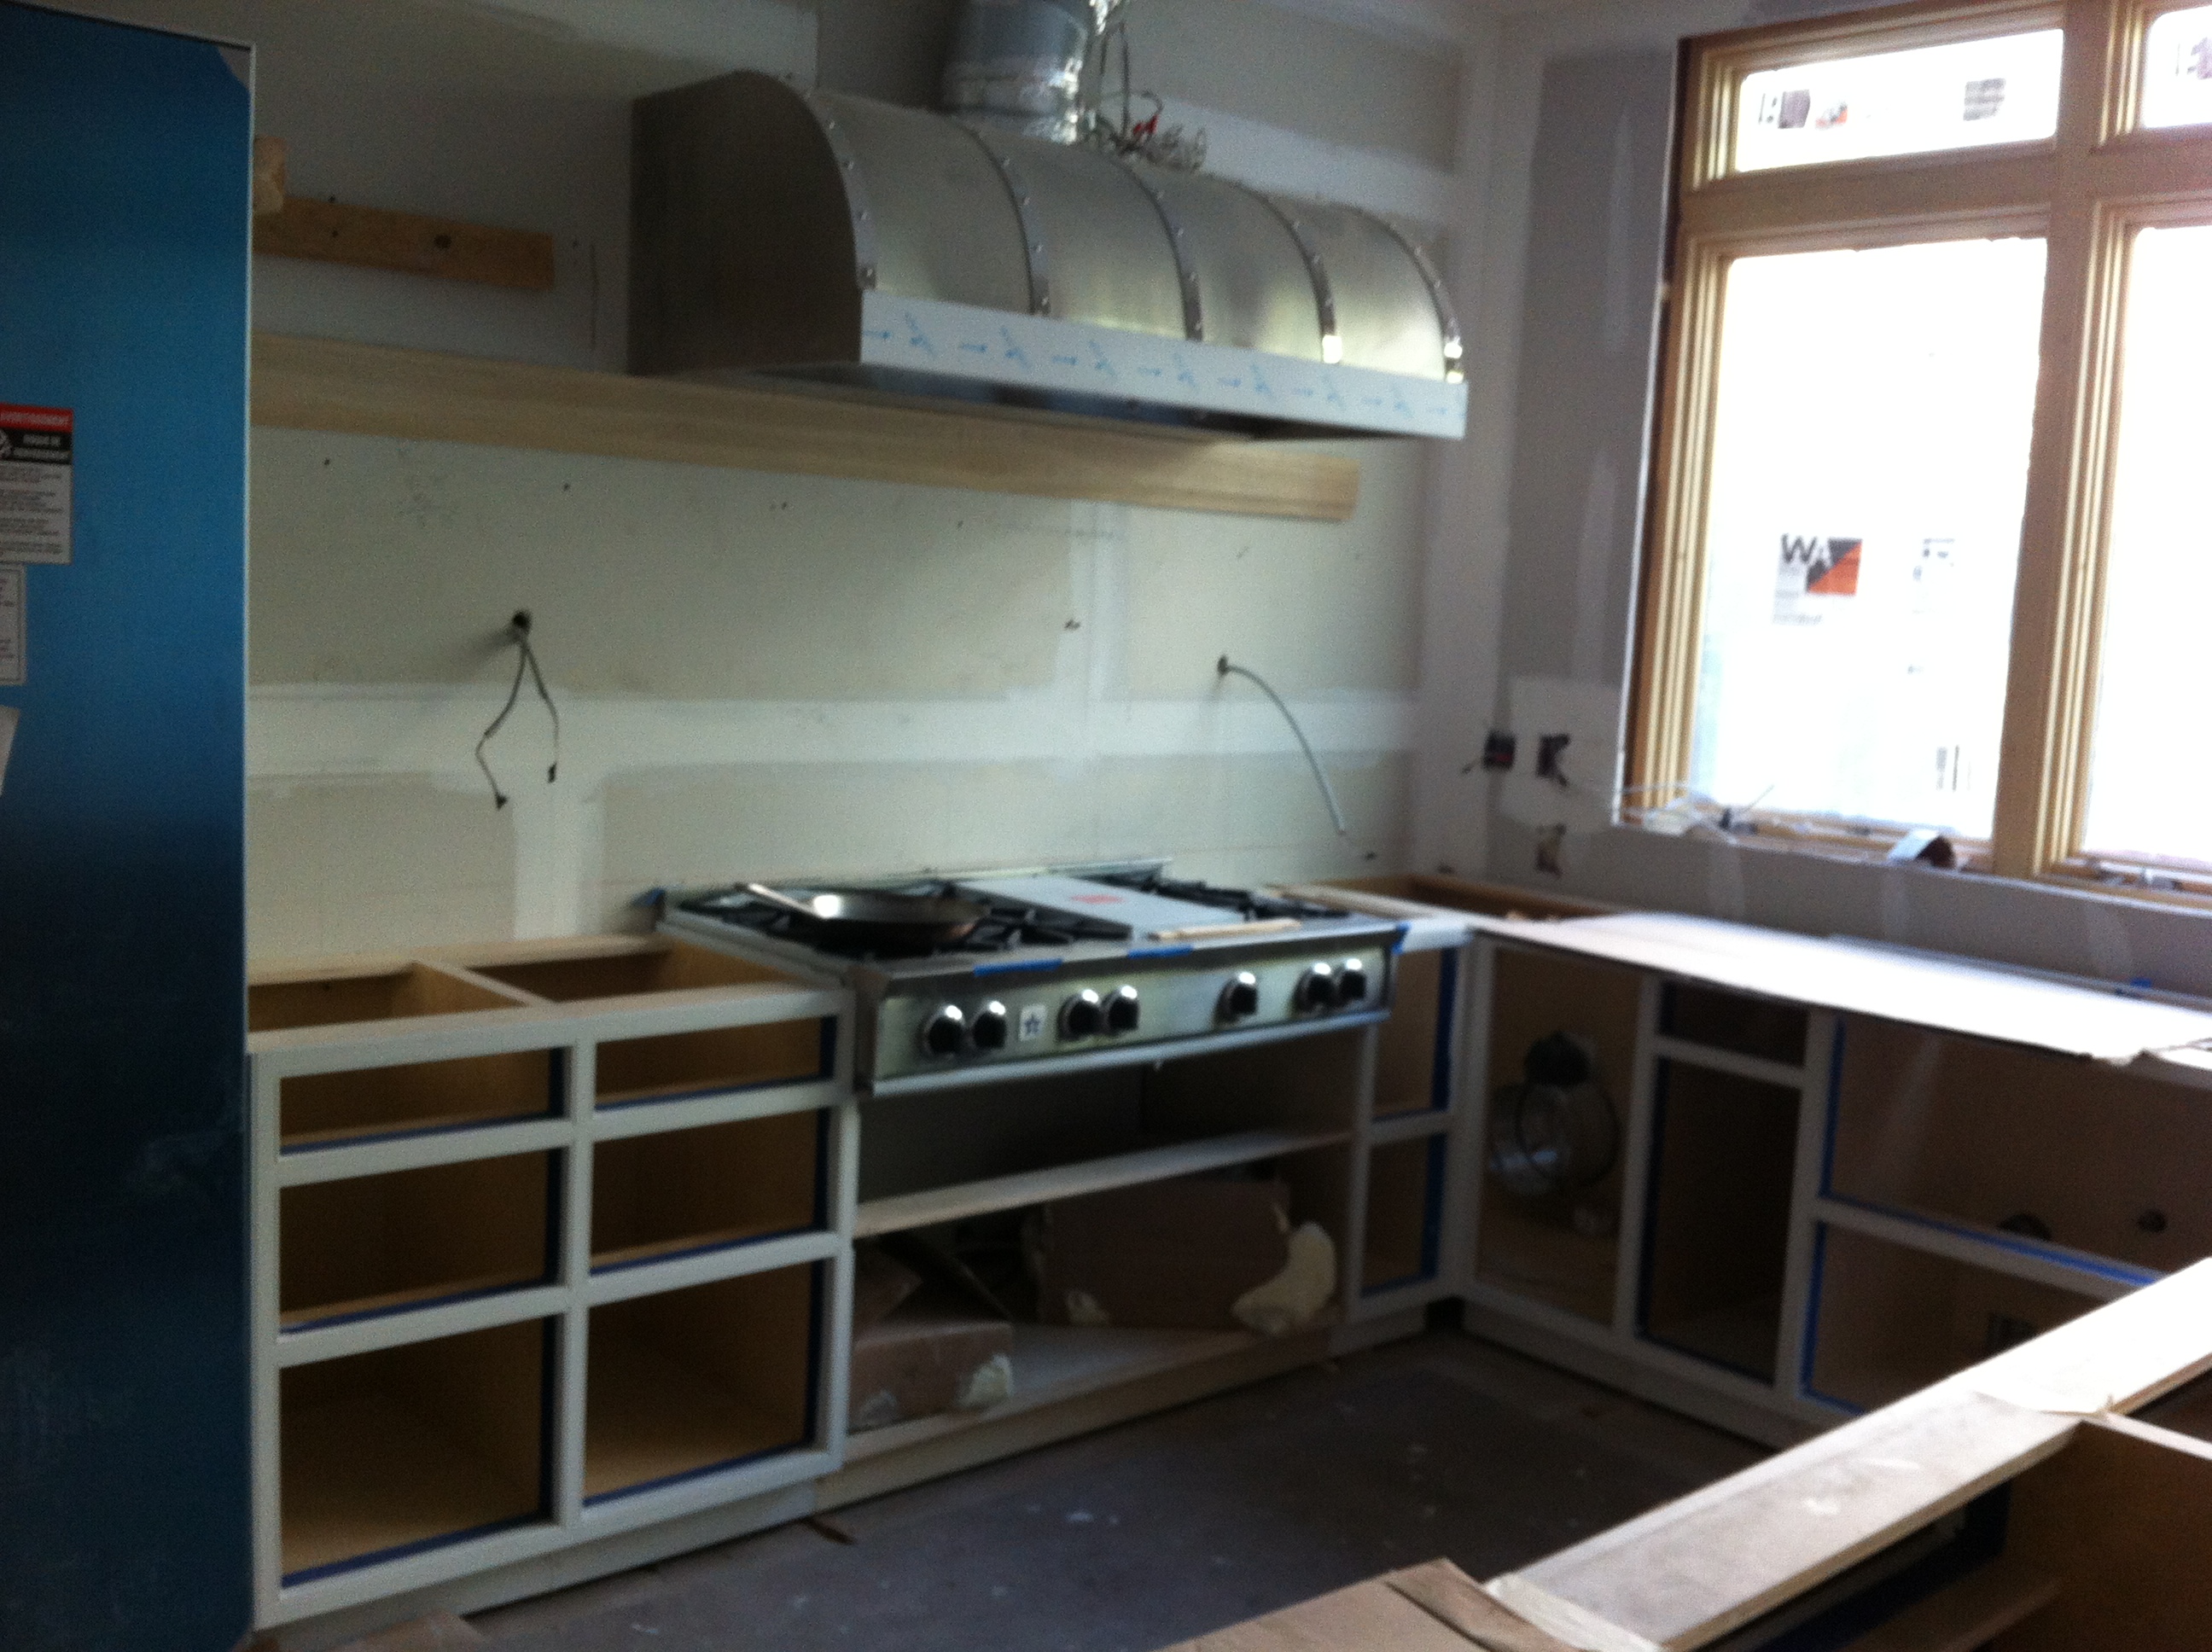
Kitchen base cabinets, our beautiful custom Modern Aire hood and Bluestar commercial range.
Beaded face frame cabinet base. Paint color is Benjamin Moore White Dove in Matte Finish.
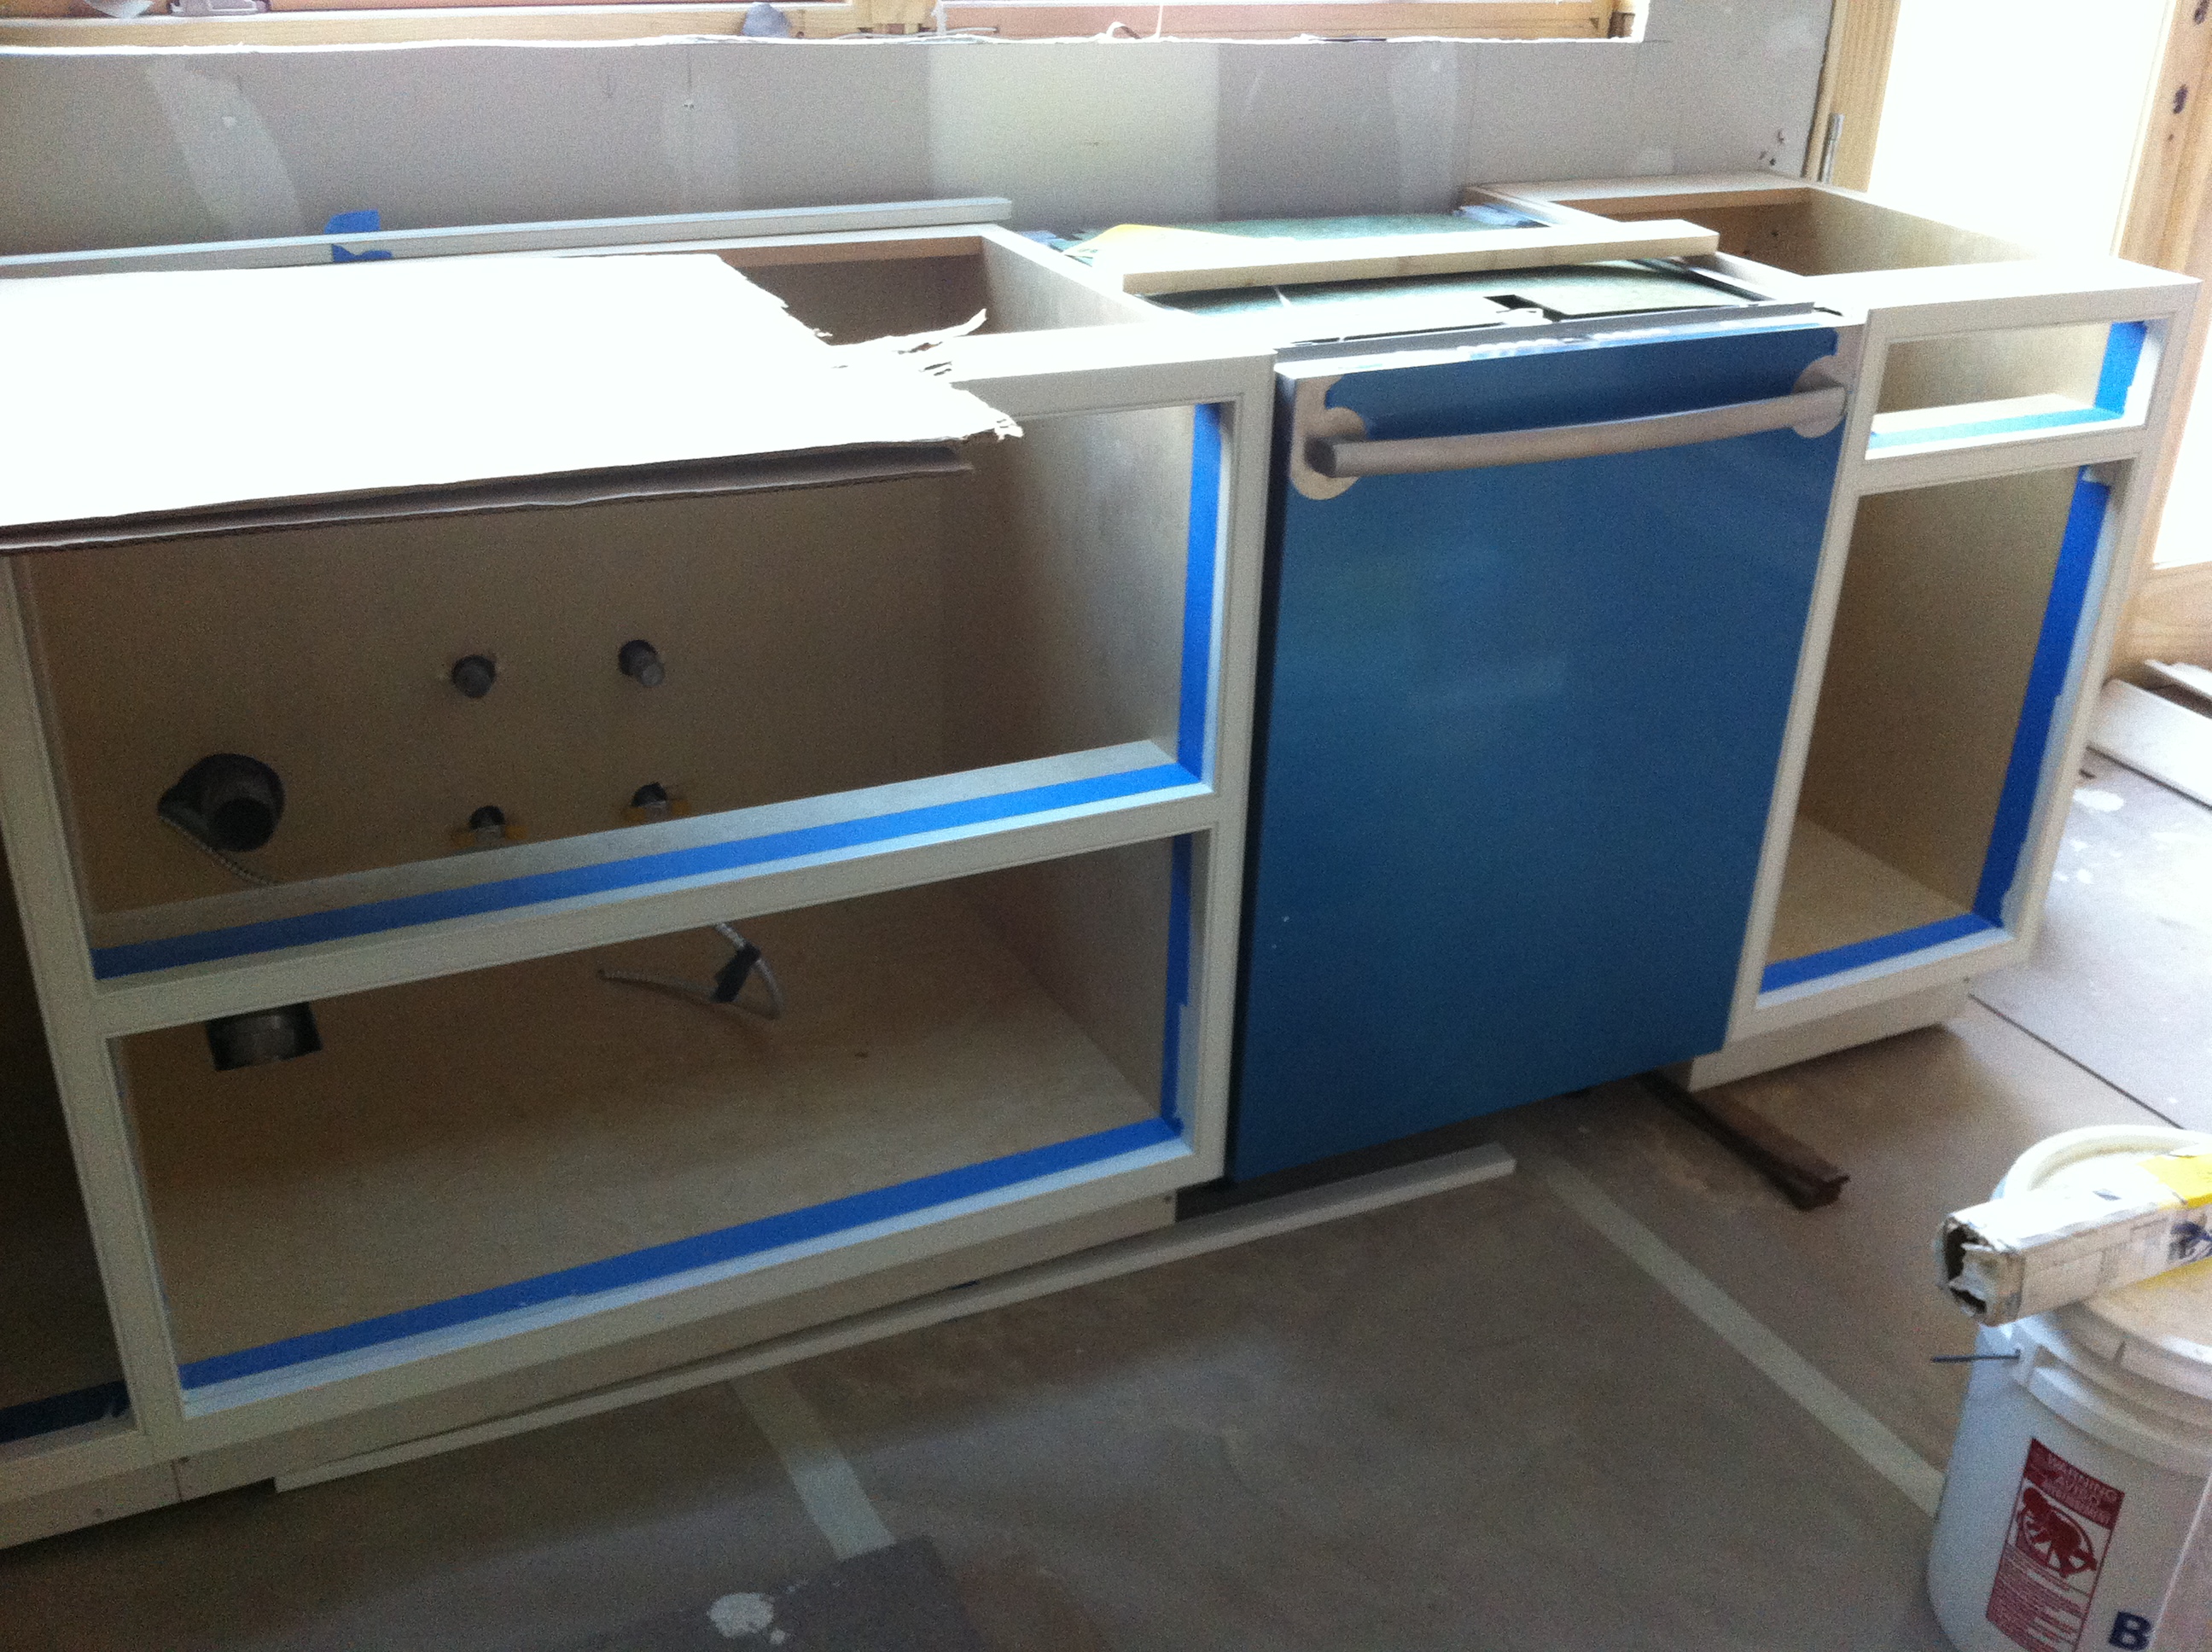
Sink base, garbage pullout and dishwasher.
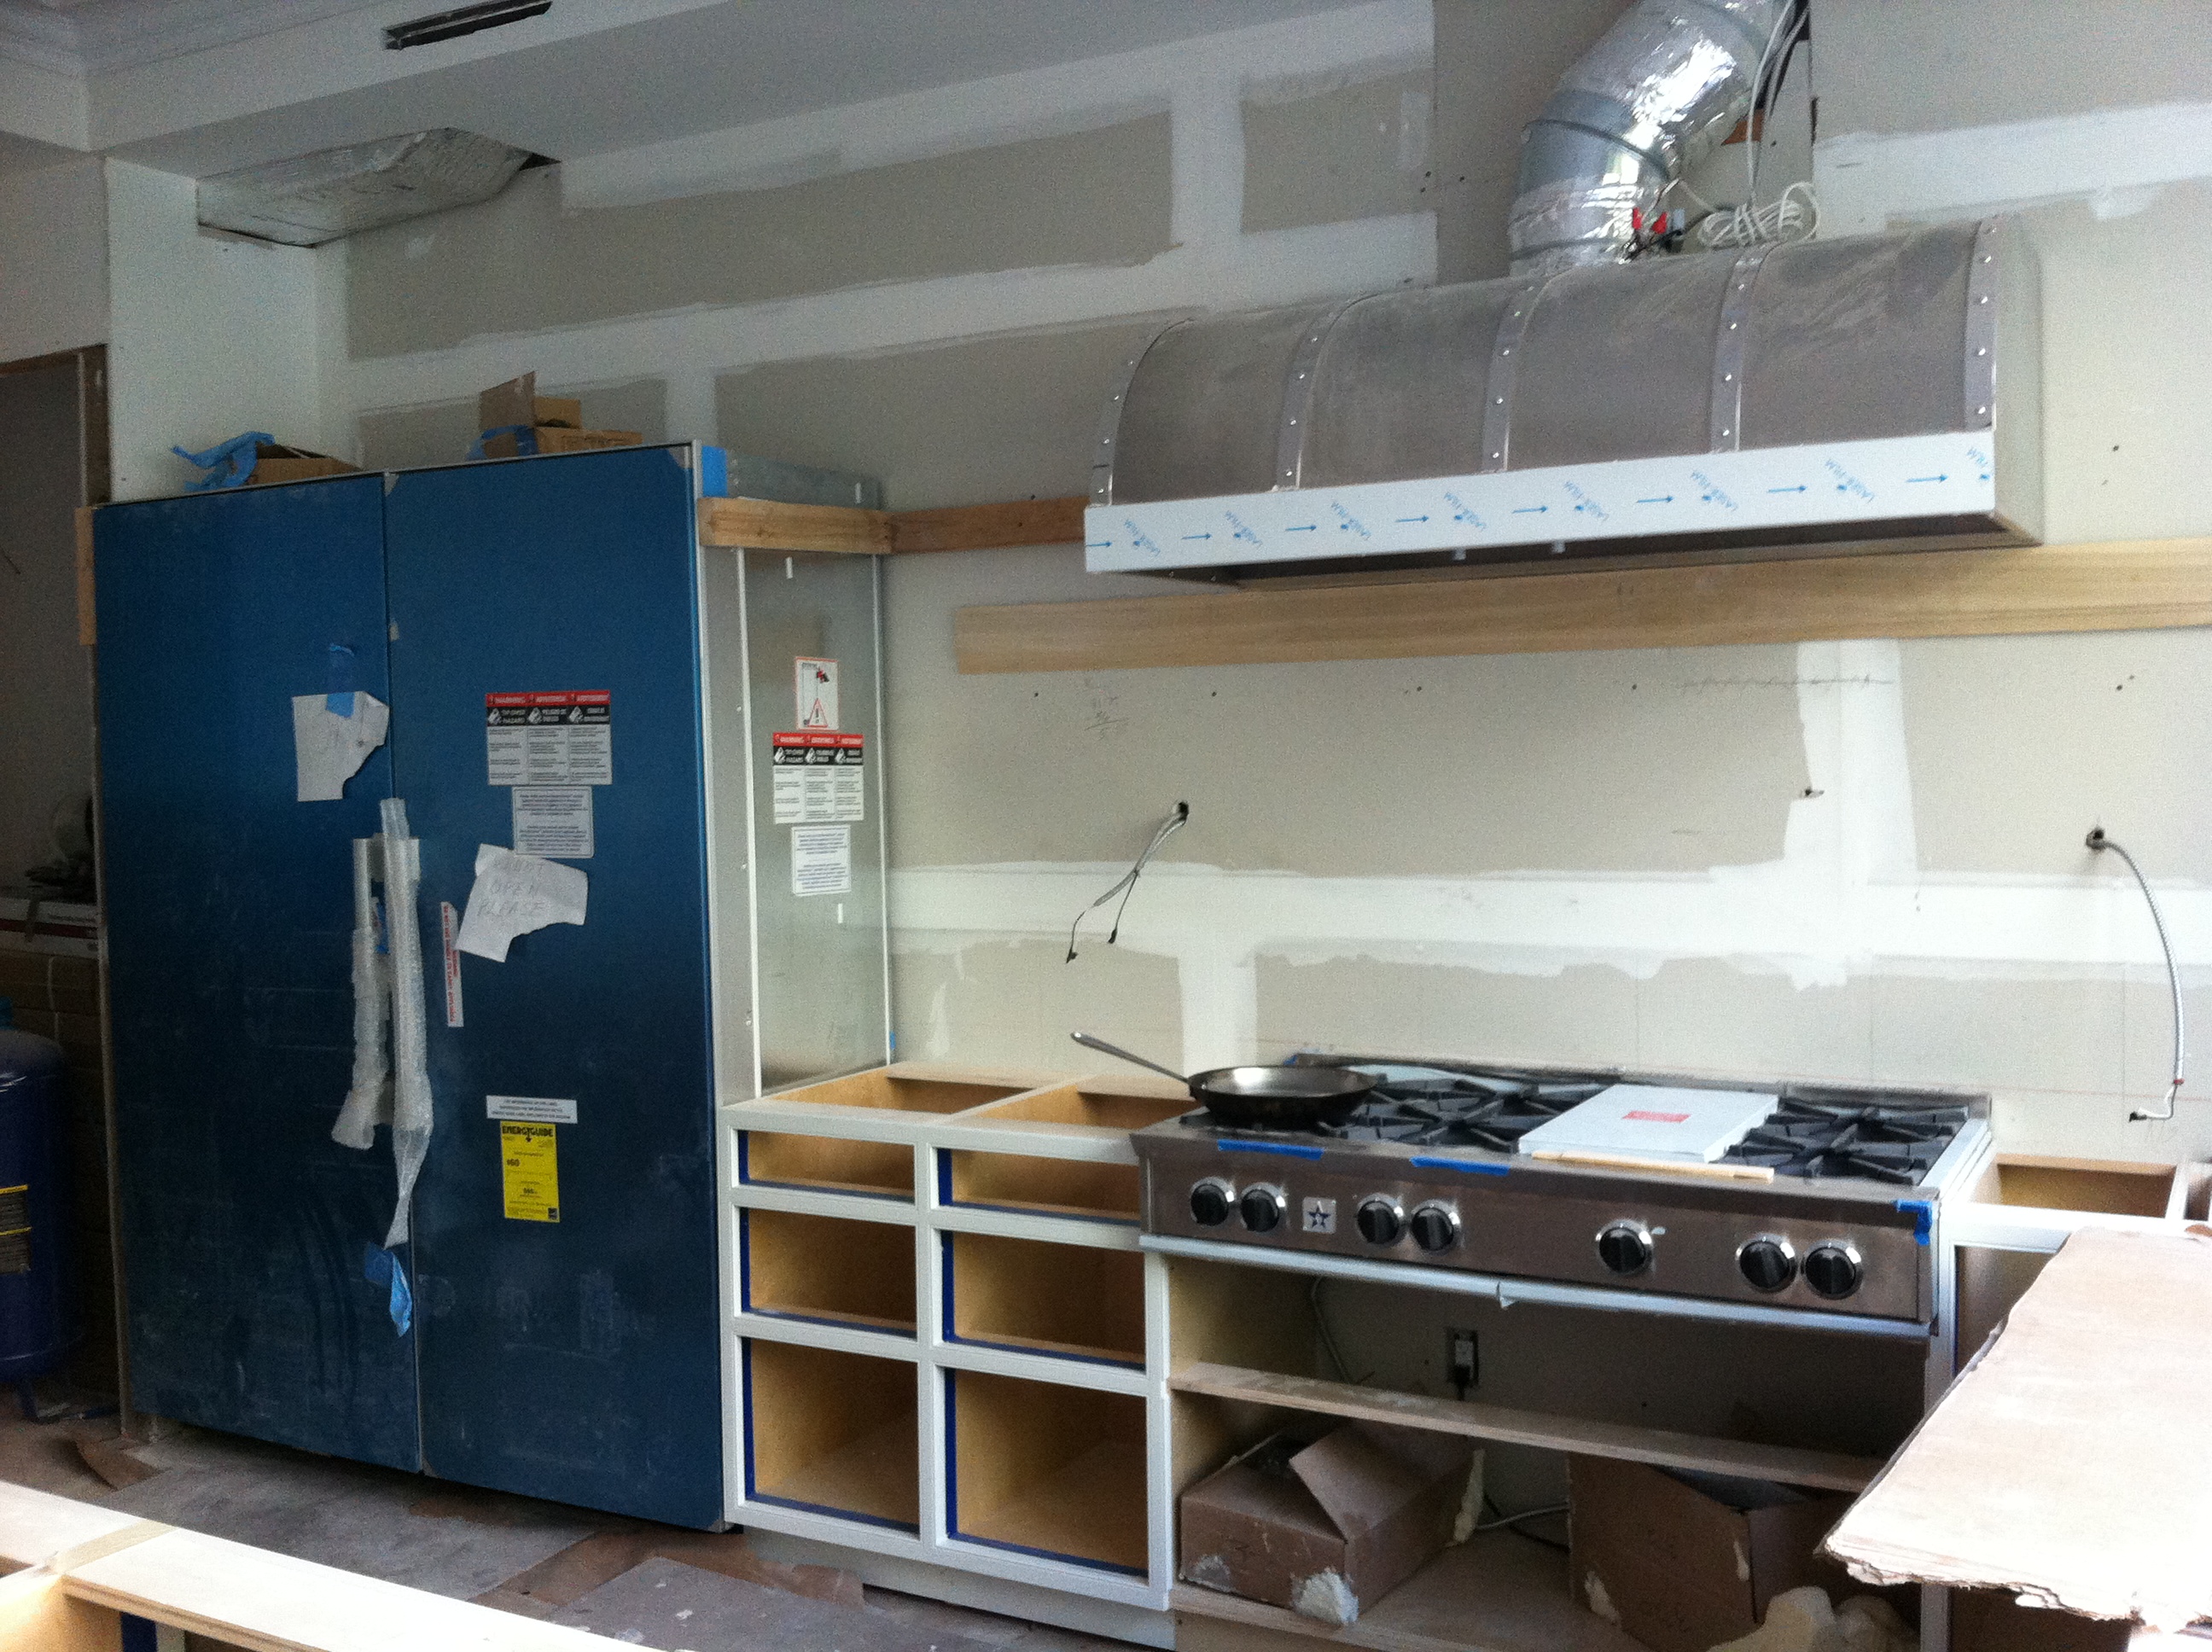
Big Bertha (aka, our fridge and freezer). Looked enormous when the fridge was there alone, but definitely scaled down as the remaining items have been installed.
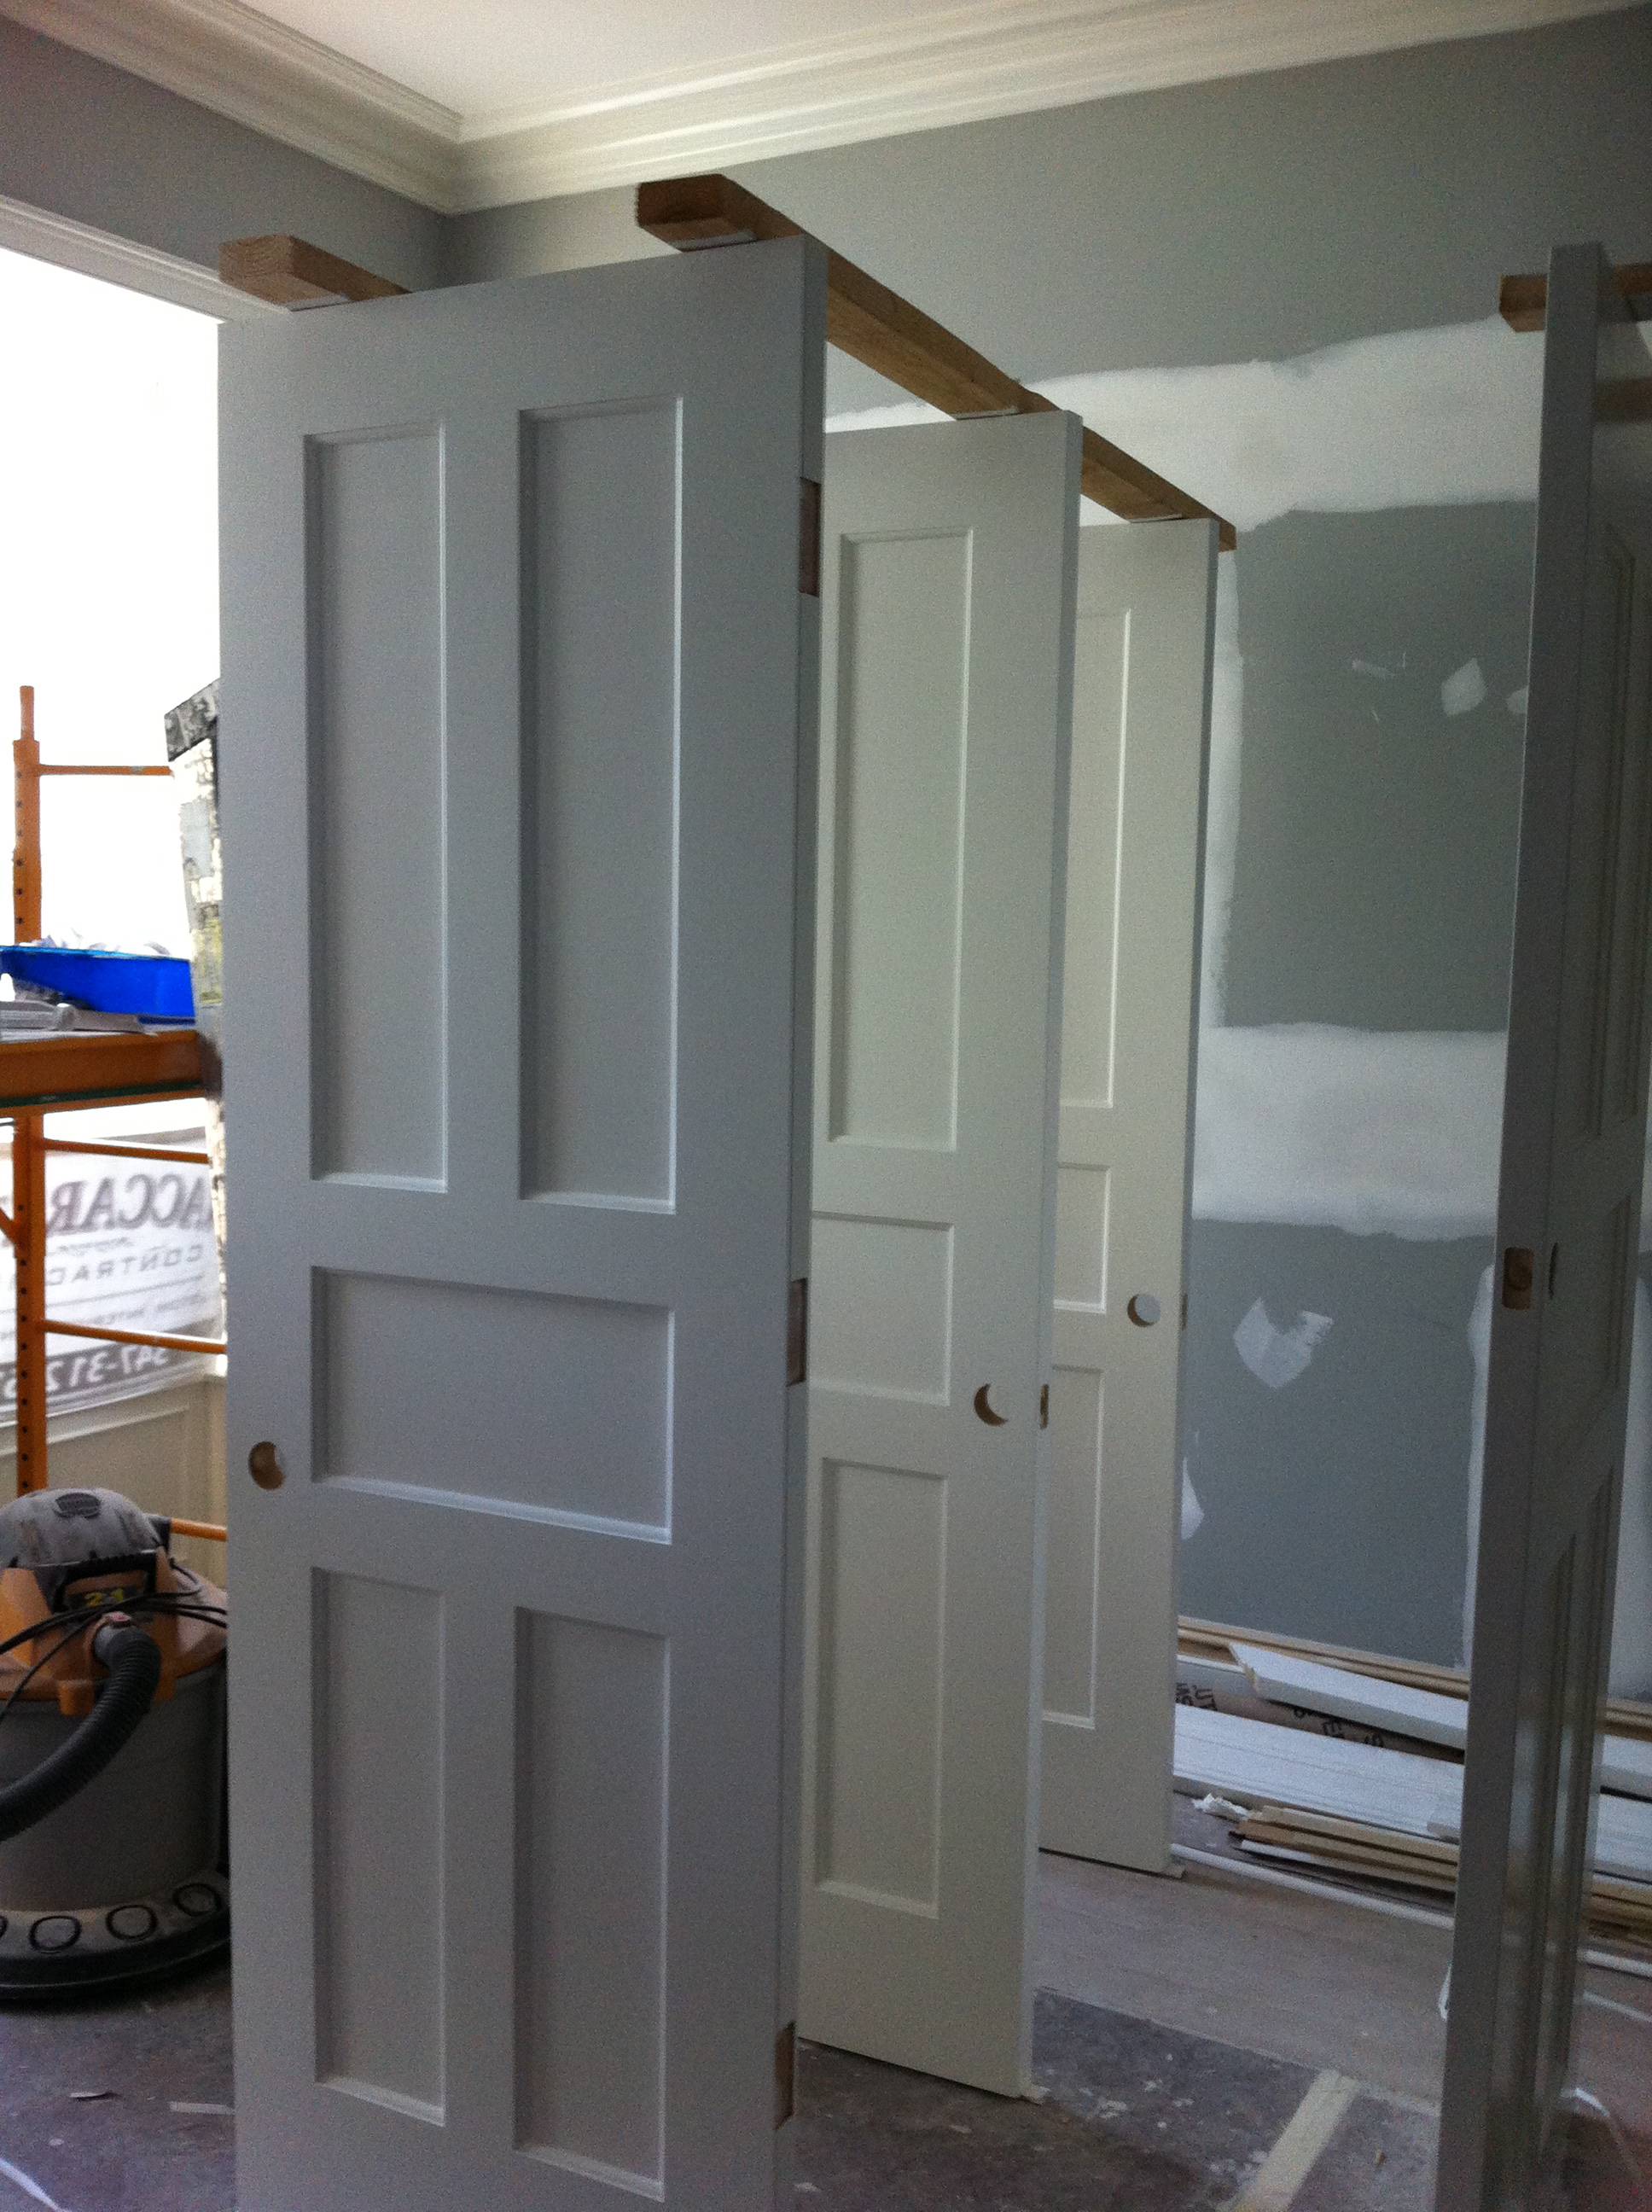
Doors have finally arrived (though ended up not being exactly what we wanted…) and are being painted and hung.
Doors – a day late and a dollar short, as they say. They took FOREVER to arrive, and they aren’t what we ordered. We wanted detail that matched the original doors, but the door company couldn’t get it right. They also made the middle horizontal panel too big, but we’re over it. They are super-thick, heavy MDF doors with a quarter round detail that will look alot like our shutters and kitchen cabinet doors; they are painted in Benjamin Moore White Dove, and they’ll work just fine.
Bathrooms are all nearly complete.
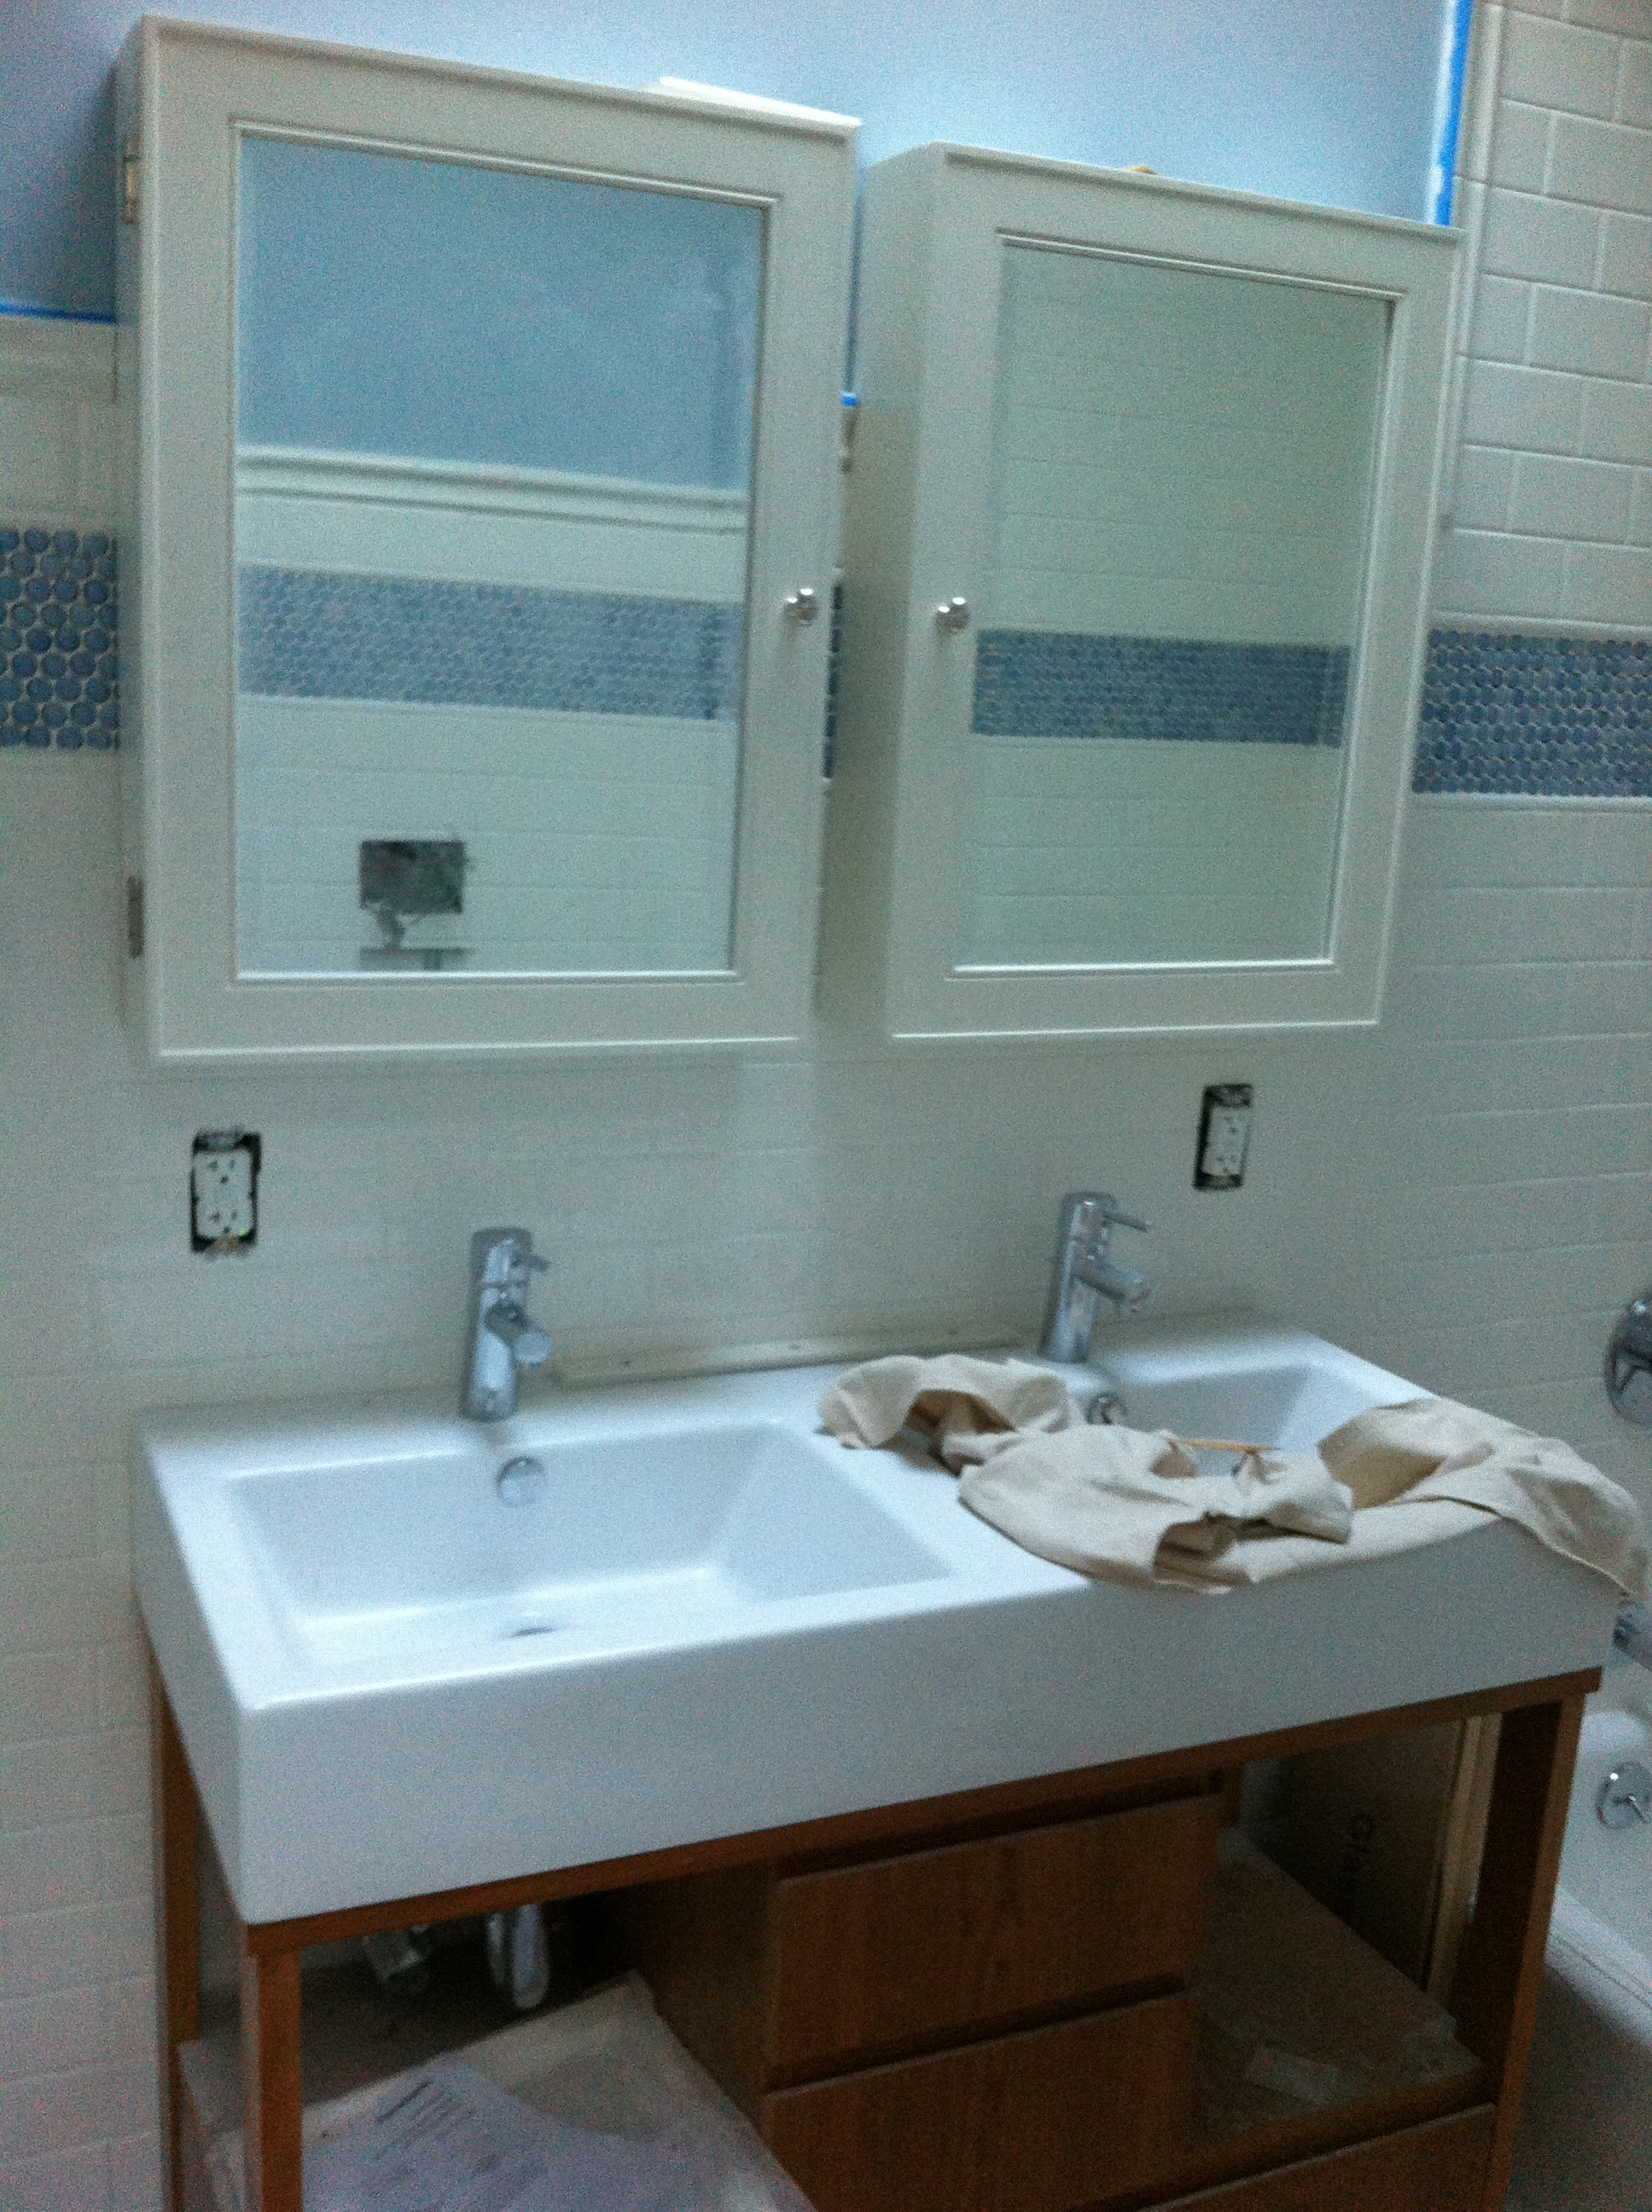
Lacava Aquamedia vanity in Cherry with Pottery Barn medicine cabinets. We wanted recessed, but there are just too many pipes behind the wall to make that happen. Oh well – just one of the hundreds of compromises you make when you do a large-scale renovation.
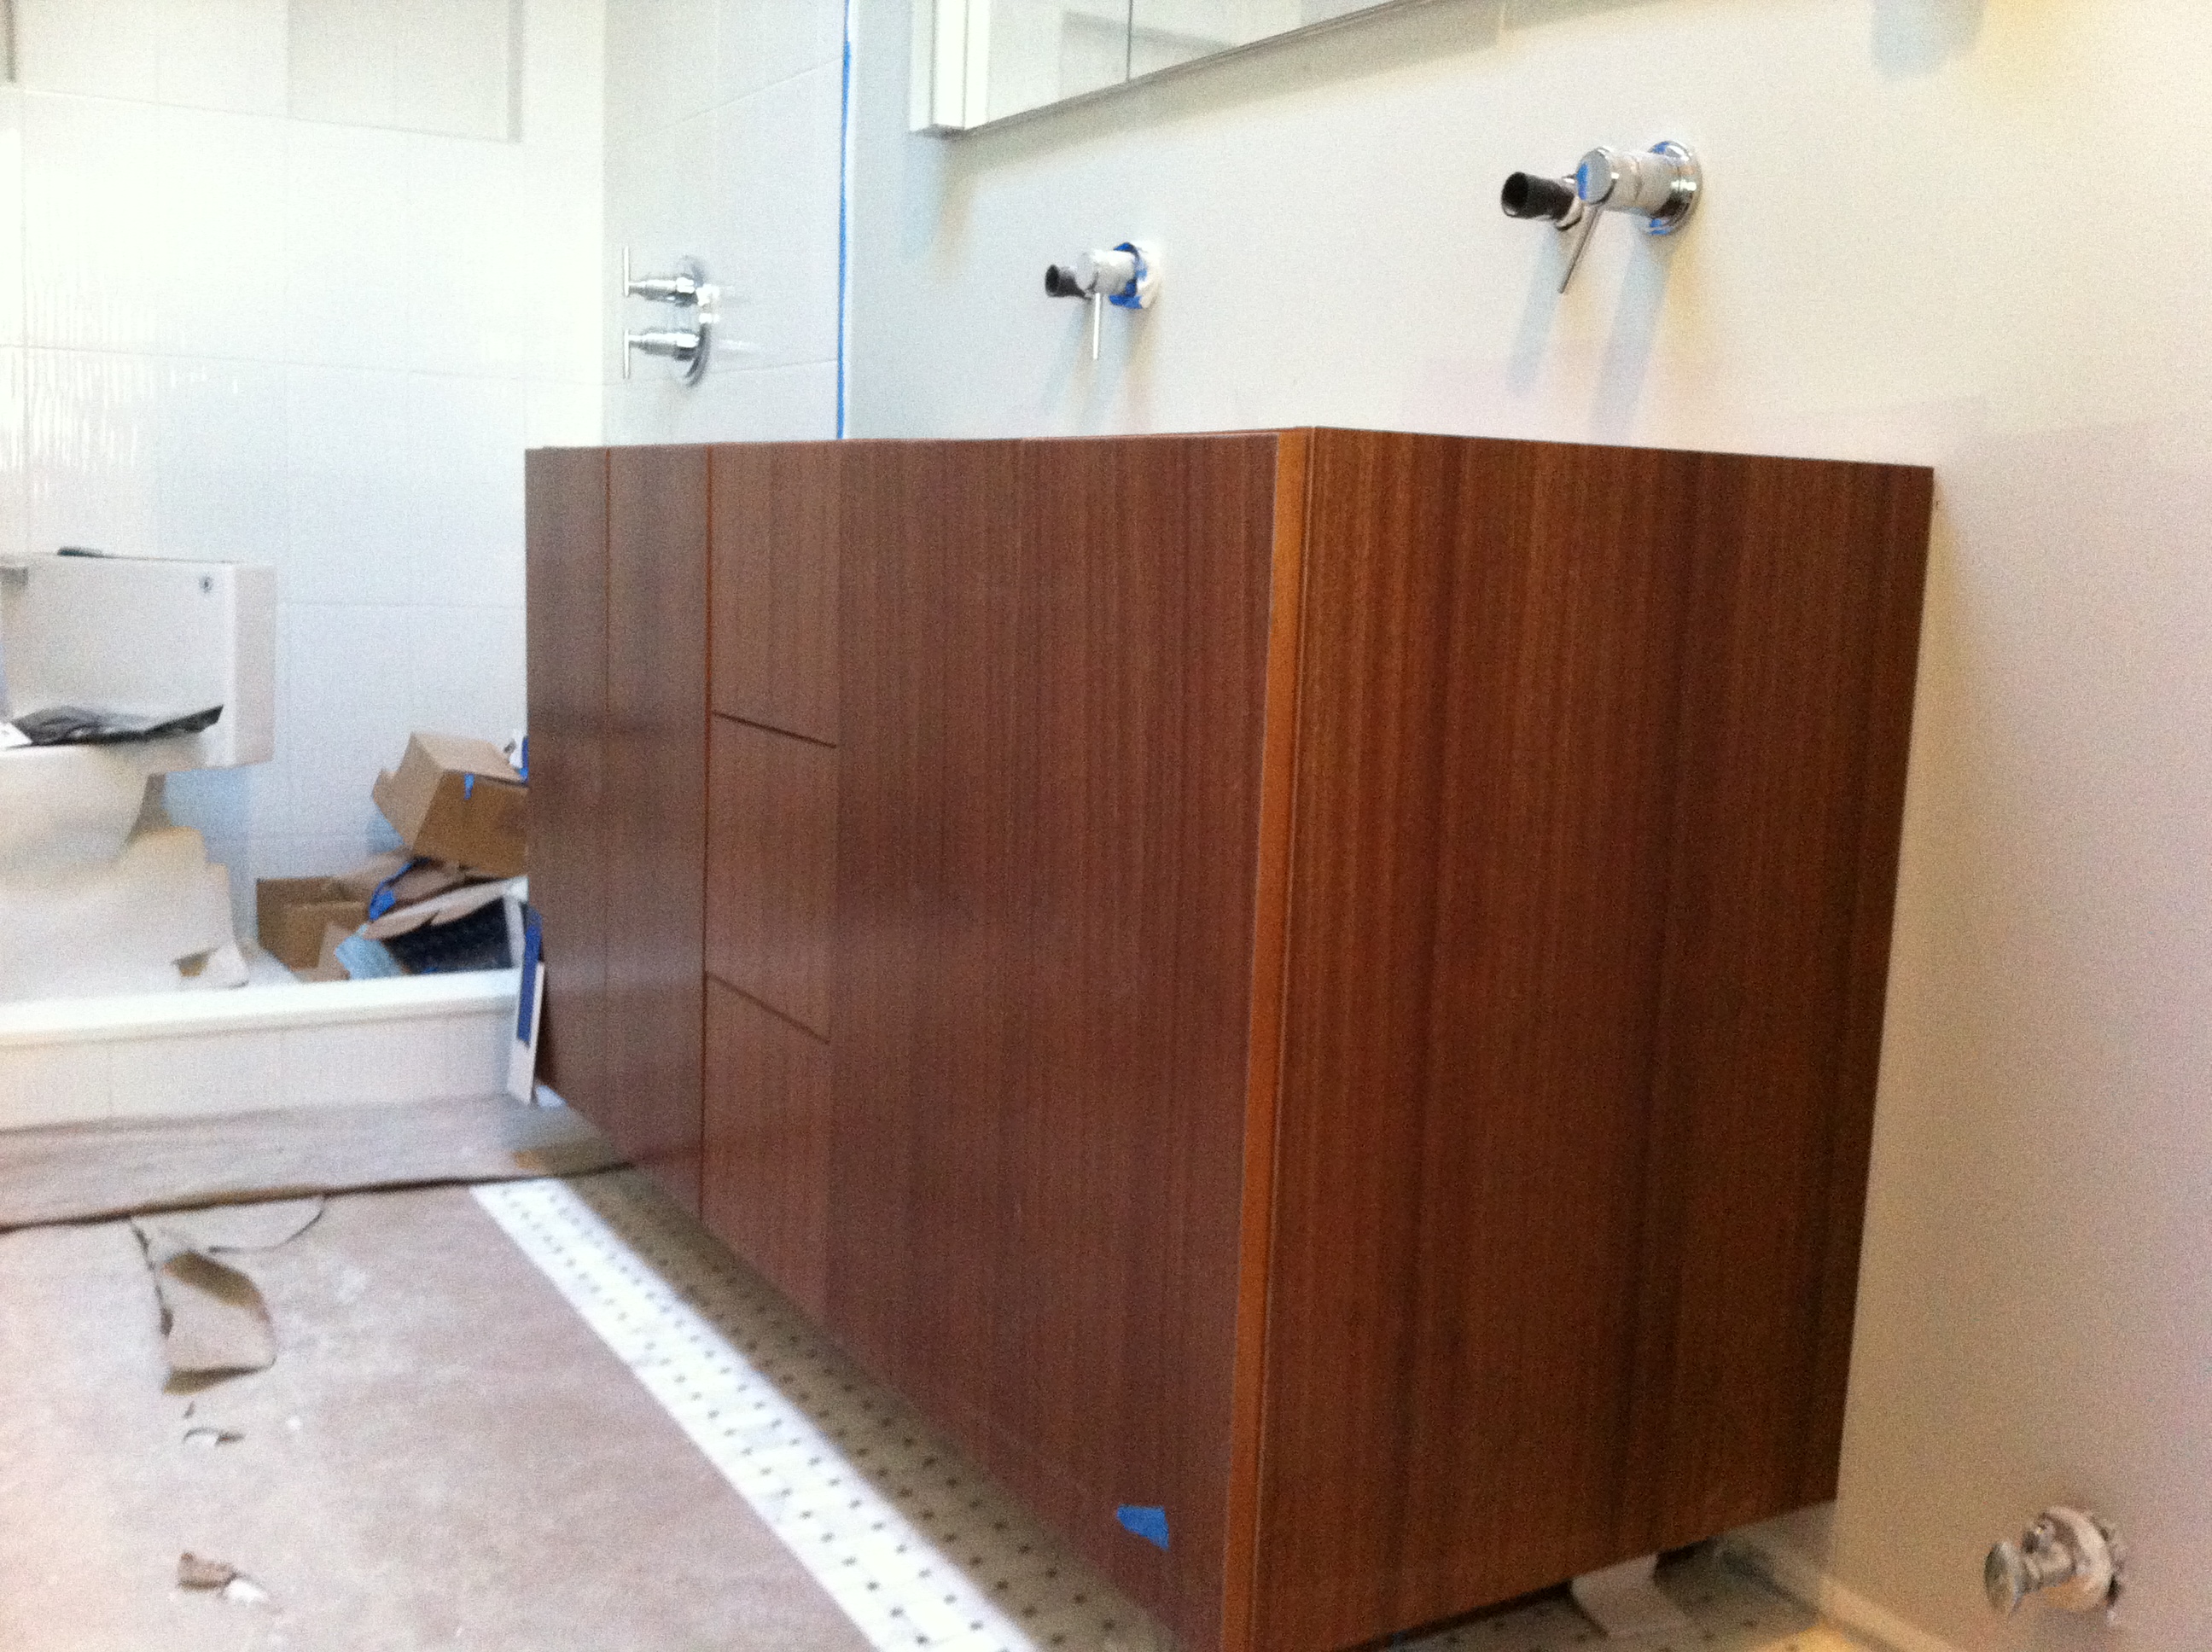
Master vanity base is built and installed.
Our master vanity in Mahogany veneer with a maple box. Veneered plywood apparently wears better over time in a wet space, so we’ve trusted our contractor on this one and let him build it to a custom fit. He did a great job!
Lots of finishing work is being done.
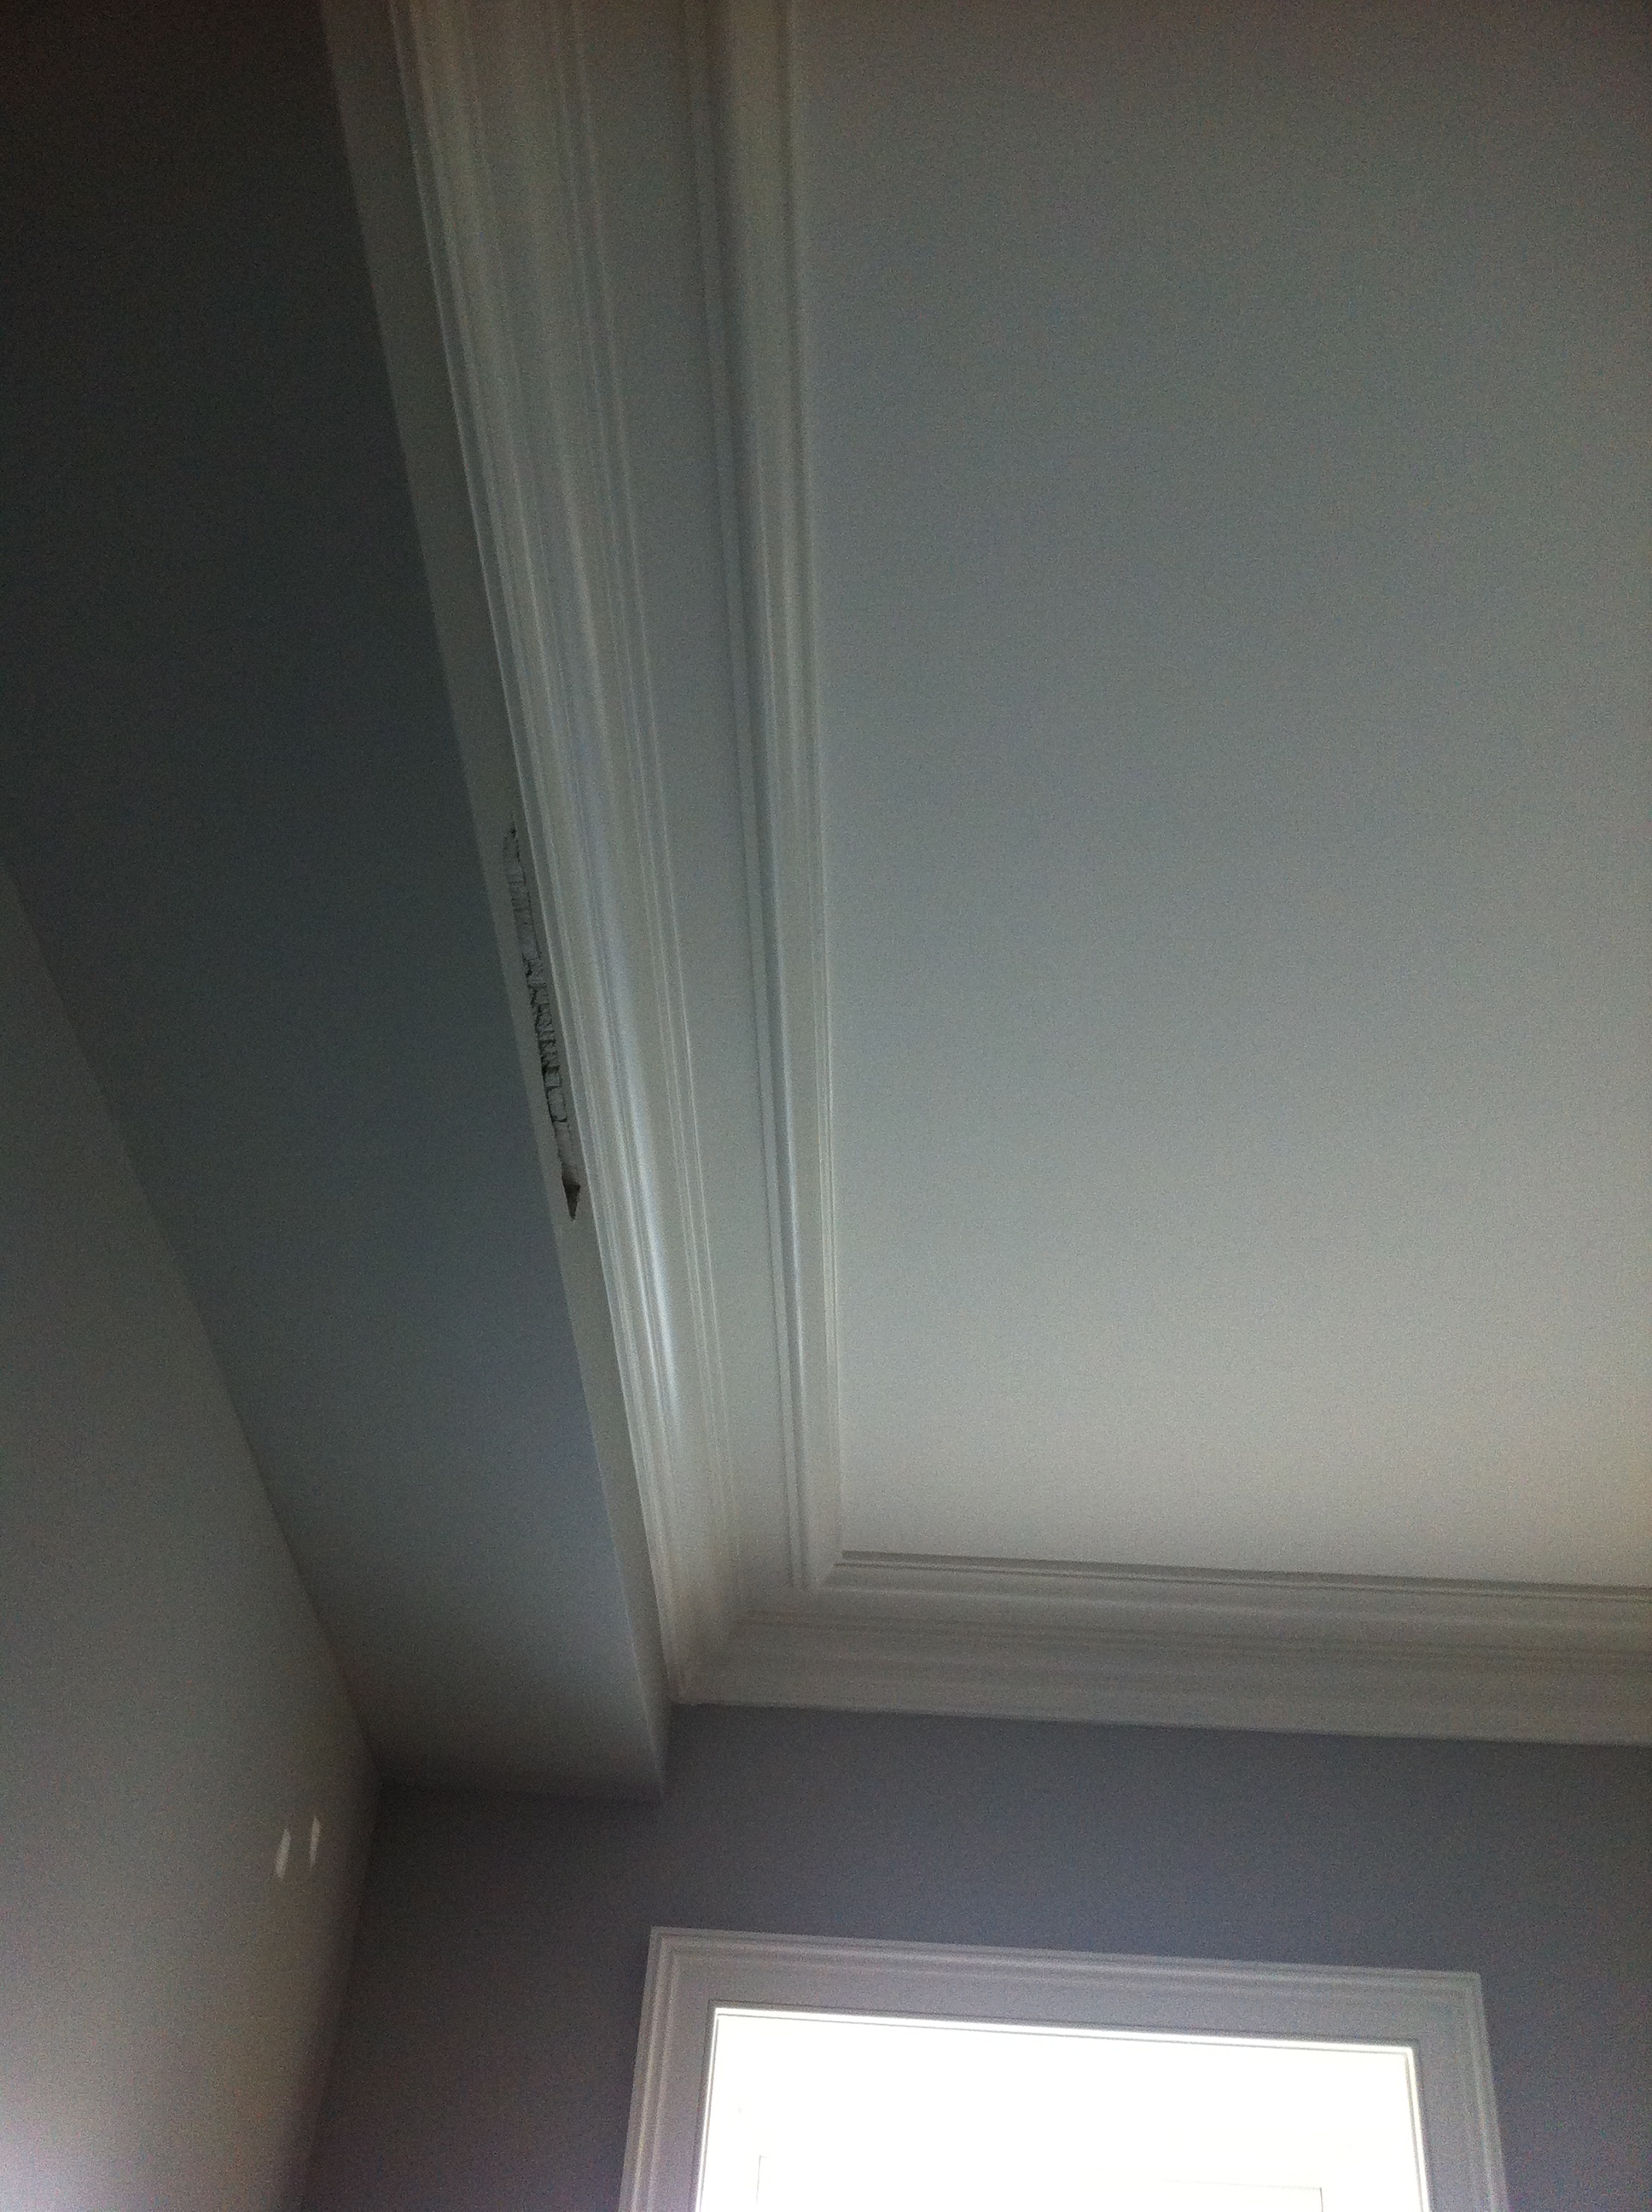
Stair base moulding detail. We were worried about the transitions in the house from floor to floor, but our contractor and architect have worked well together to define each element. We’re very pleased with how this has worked out.
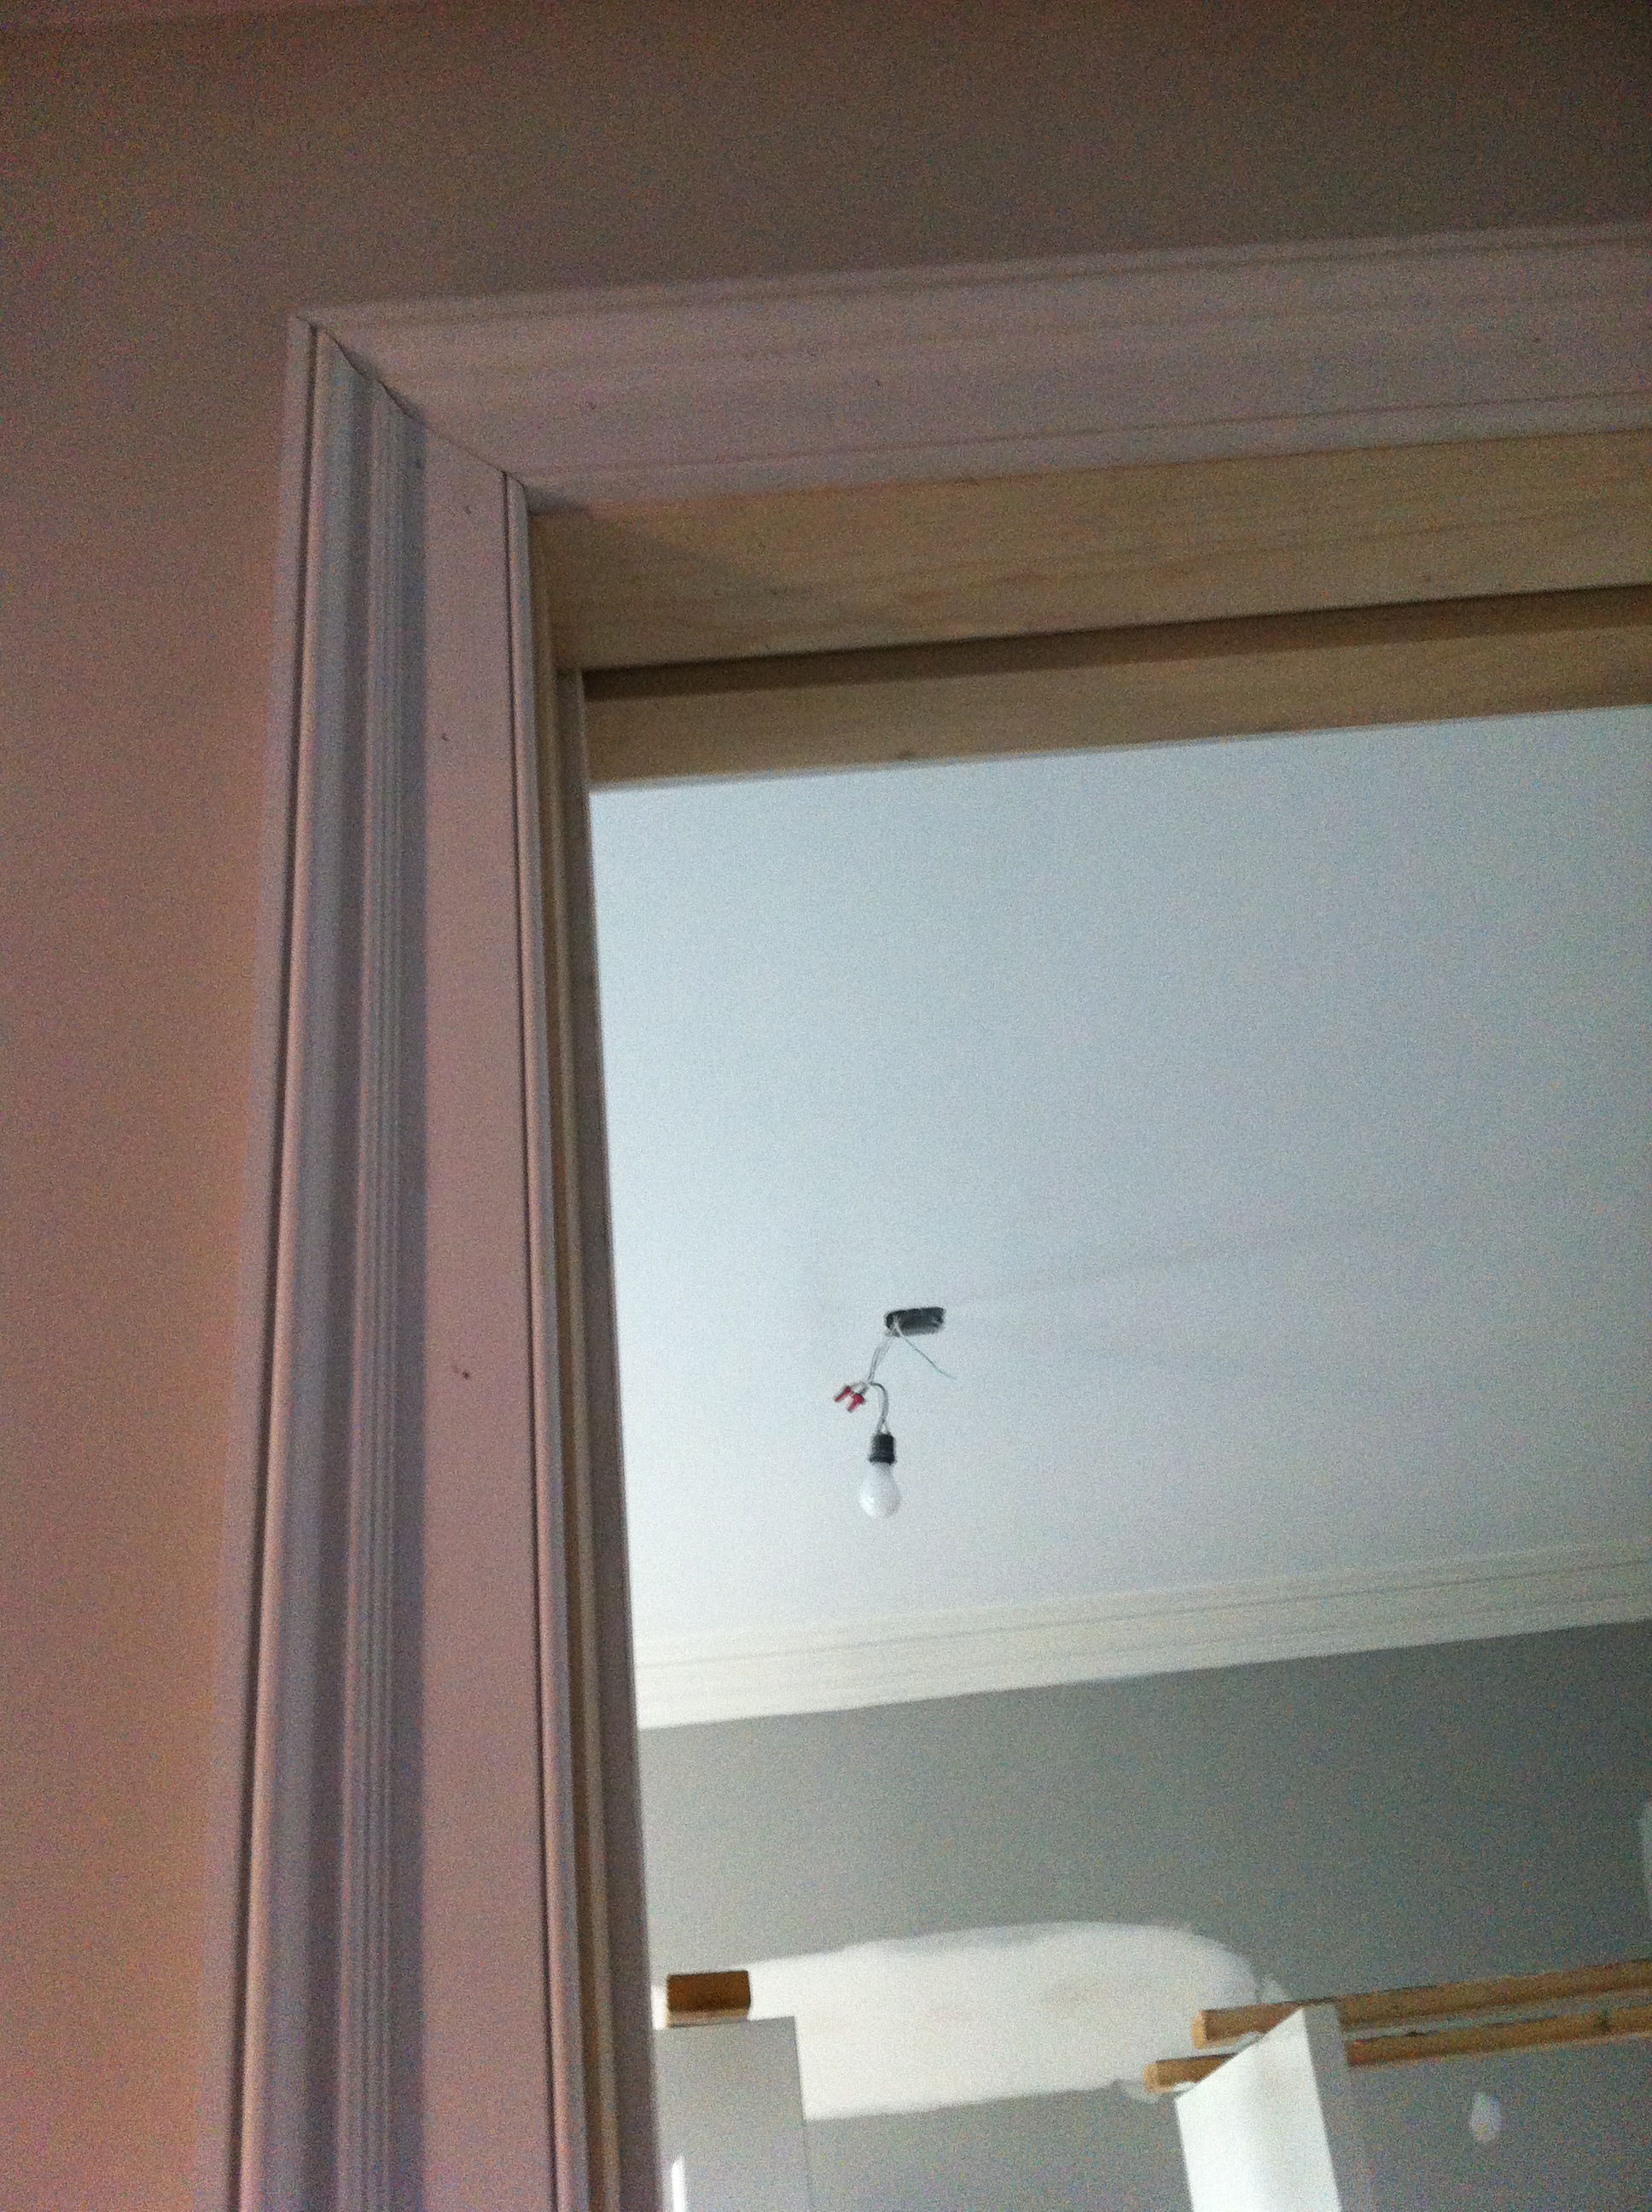
Moulding surrounding our parlor pocket doors, courtesy of Kuiken Brothers. Their mouldings really are quite superior to others.
Crown from Architectural Depot. Pricey but pretty.
The deck is fully constructed, cement slab in the back has been laid and already nearly ruined by brownstonetoddlerboy’s chalkwork.
Deck and concrete work. Deck is red primed, but it will ultimately be painted black.
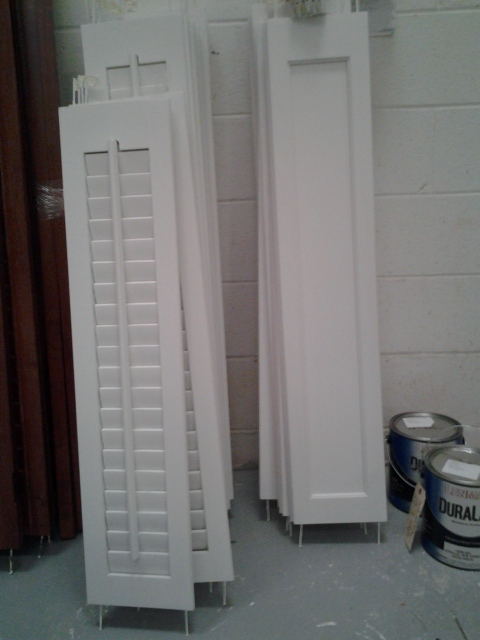
In other news: shutters have arrived and should be hung this week or next. Entry tile is circling the neighborhood trying to find us (delivery was attempted at our former rental – hopefully we’ll get it this morning). Templating for the countertops in the kitchen and master bath vanity will happen on Thursday. Bedrooms are nearly finished, save custom closets which have been configured and are being built. The newel posts are ready for delivery and the railing and spindles will be confirmed this evening. Always lots to do, but lots done these past two weeks!
We’re at t-5 days until we move back in the house, so it’s a hive of activity all around. We’ll just be able to move into the garden floor at first, but our contractor and his team are working hard to do as much as possible on the entire house before we get there. Most of the moulding, taping and painting should be completed; the lights will be hung; the deck is going in; the cement in the backyard will be set; some of the kitchen cabinets and appliances will be in; the bathrooms will be mostly completed (save the master vanity, which is being custom built).
After our return: Shutters will be installed; refinished entry doors will be rehung; stair rails and spindles will be installed, staining of upper floors will be completed, kitchen will be finished; steel work on the roof will be completed; shower doors will be ordered and installed; kitchen backsplash and vestibule tile will be installed. Lots of finish work to do, which will keep the house noisy and dusty for a few weeks. We’ll do what we can to seal off our level and hope the kids (and we) won’t go mad!
Exciting but definitely a nail biter!
A few photos just to show the current progress:
Deck going up! Will be the perfect place to sit for two minutes before we remember how mosquito-infested Brooklyn is in the summer.
New shutters in production. Purchased from Americana Shutters. You’d be surprised how difficult (and expensive) it is to replicate brownstone pocket shutters.
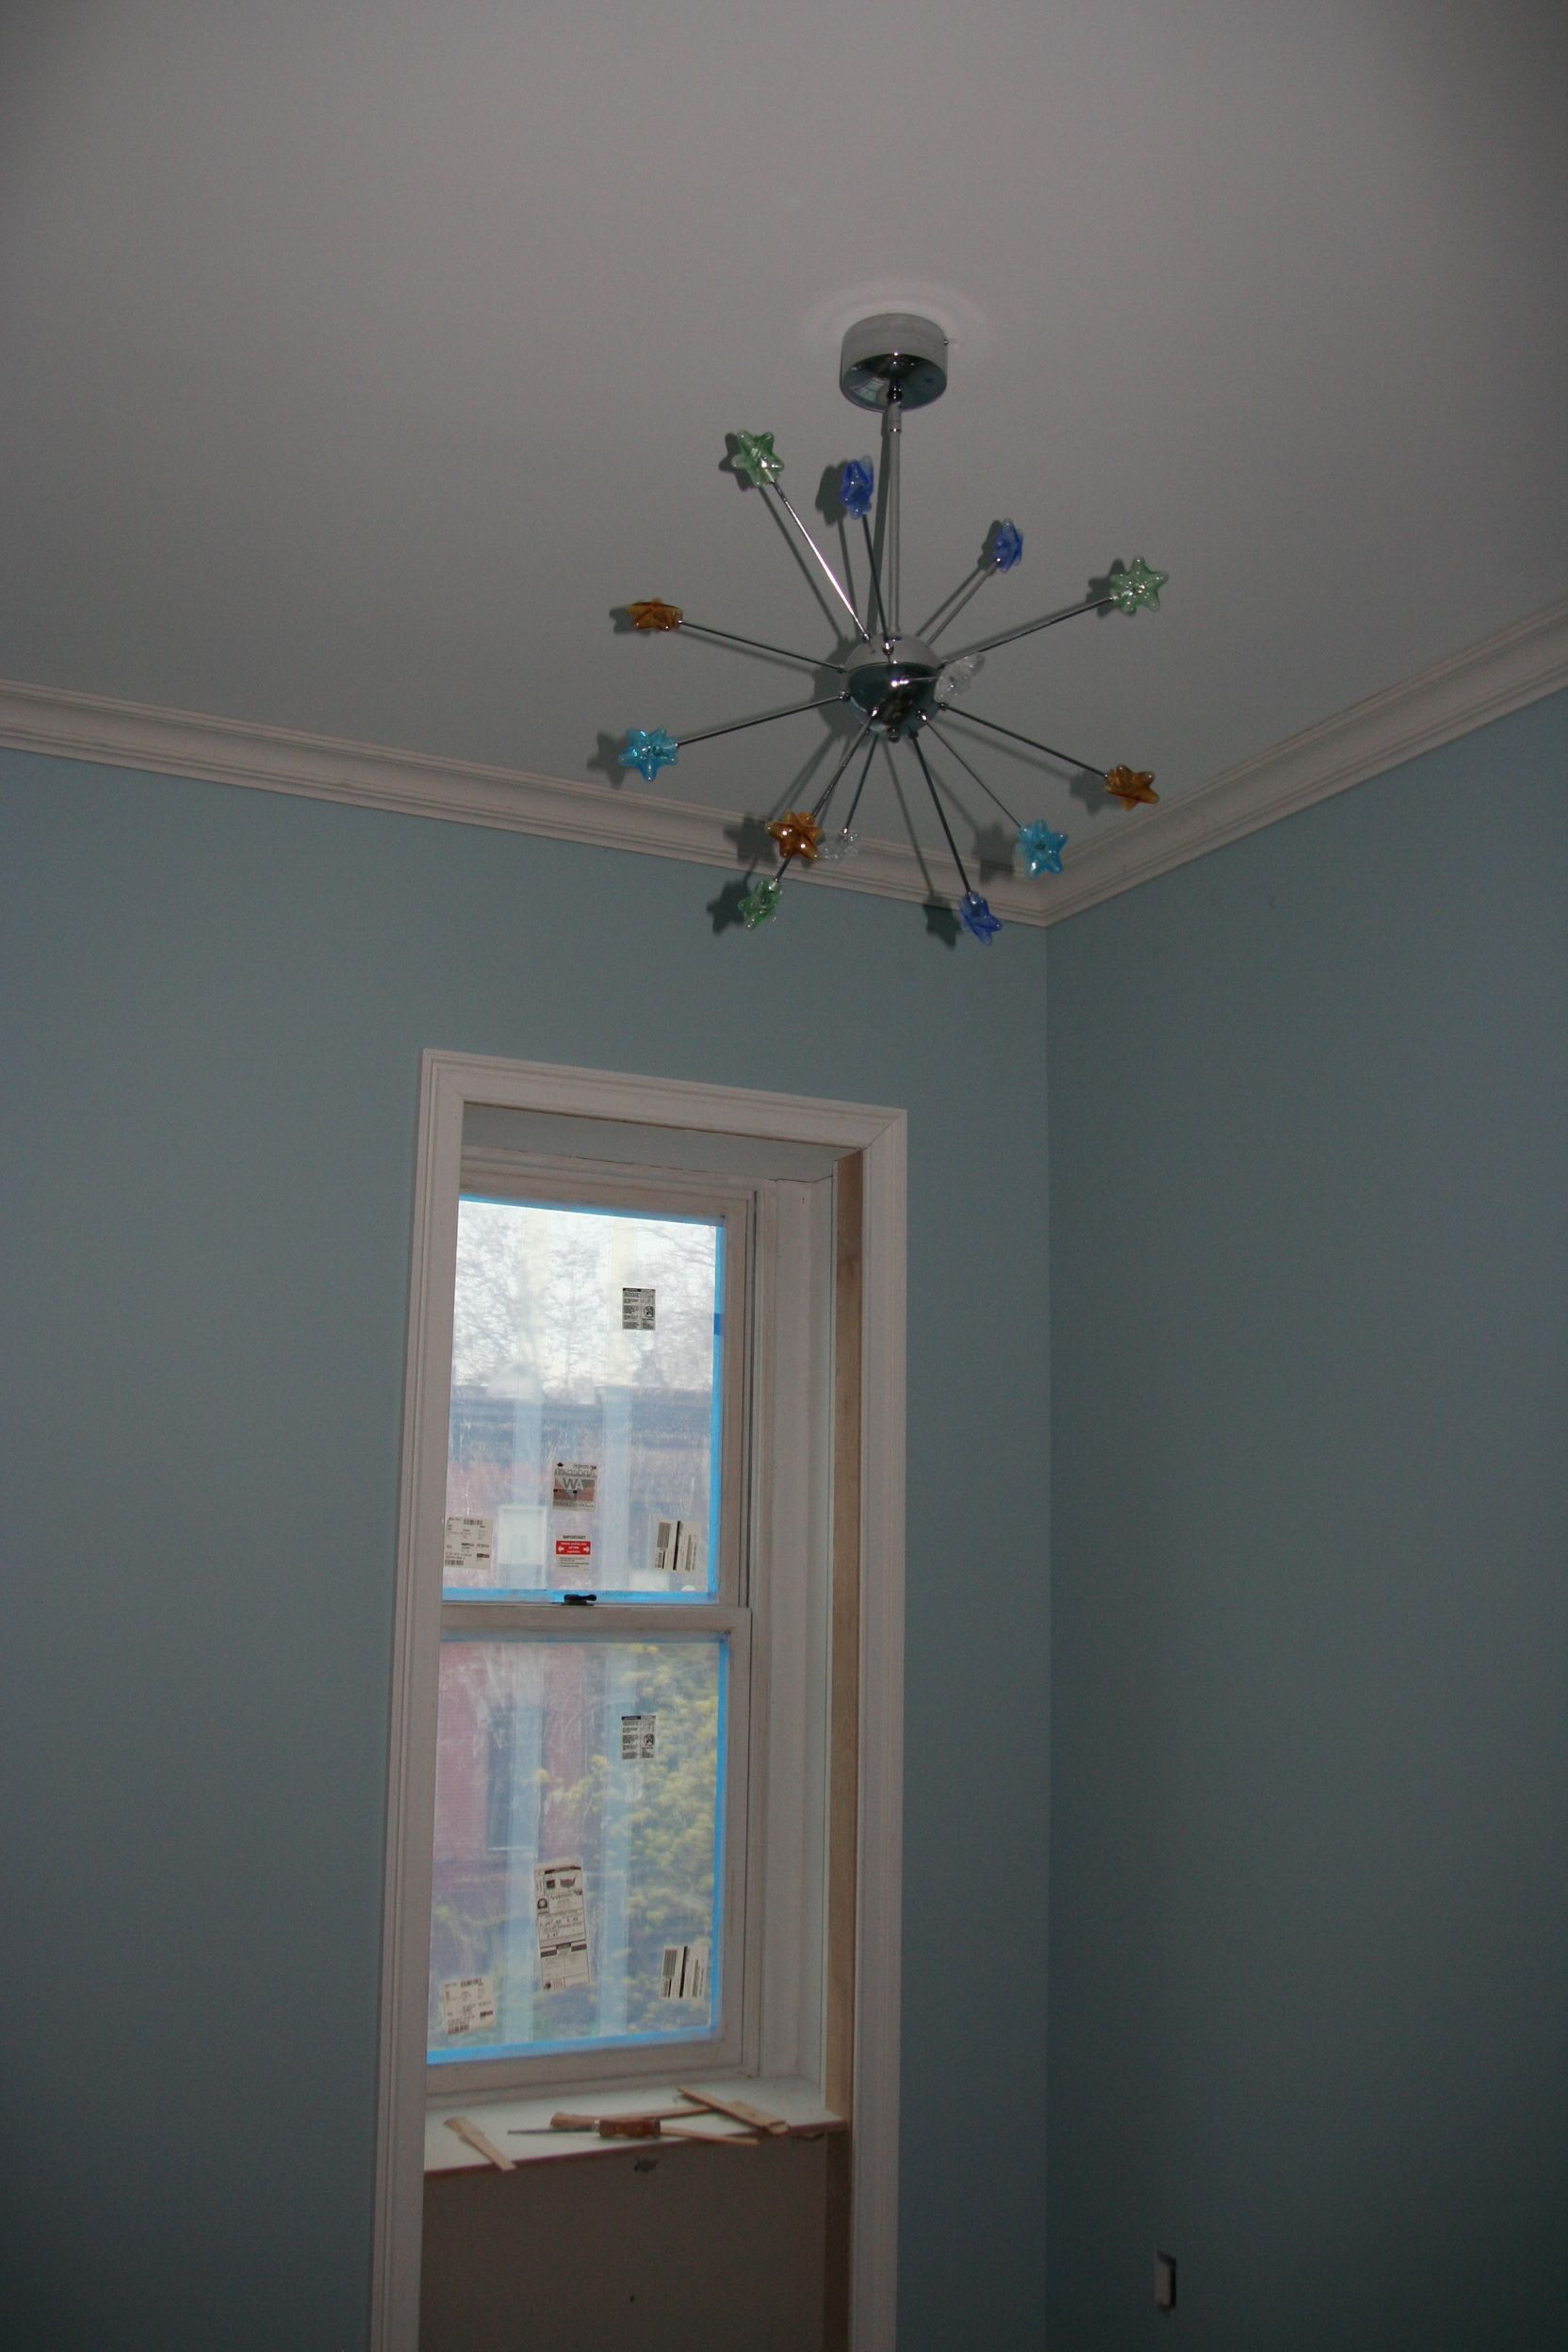
Brownstonetoddlerboy’s bedroom light. The paint is Benjamin Moore silvery blue.
Kids bathroom components going in!
Brownstonebabygirl’s light fixture. The paint is Benjamin Moore mannequin cream. The color is more vibrant in person.
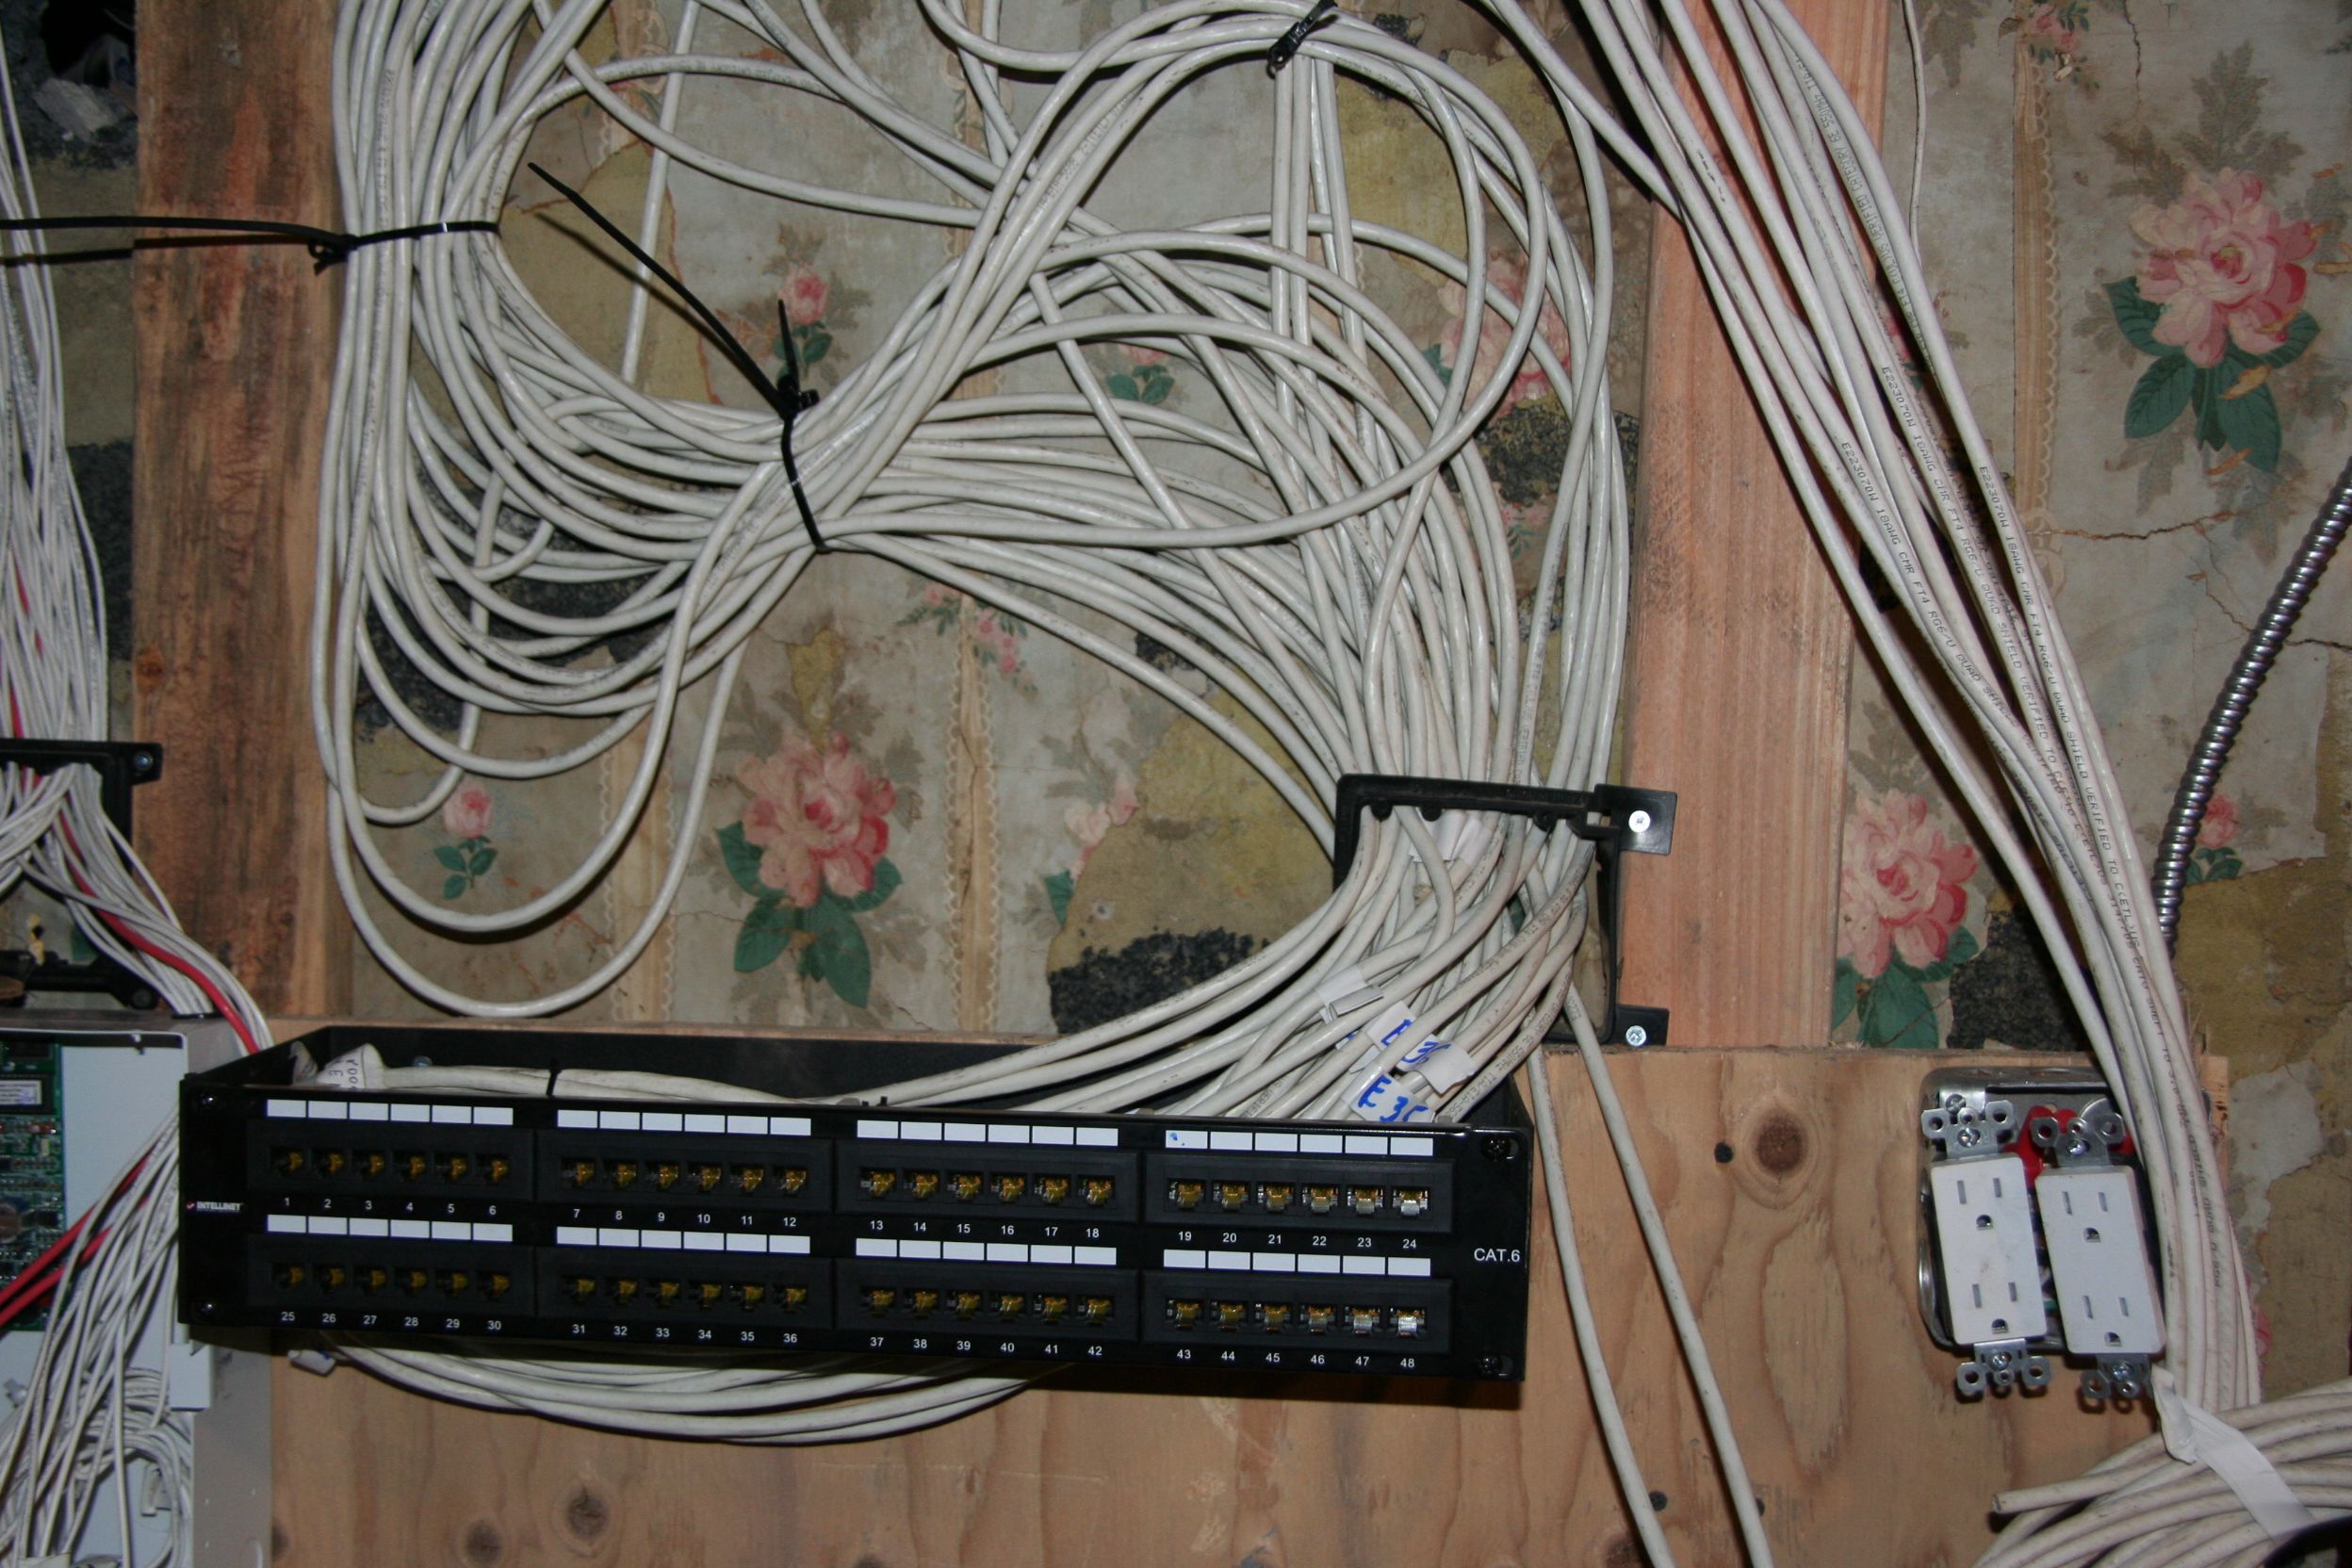
Lots and lots of wiring. Yes, we’re technology junkies.
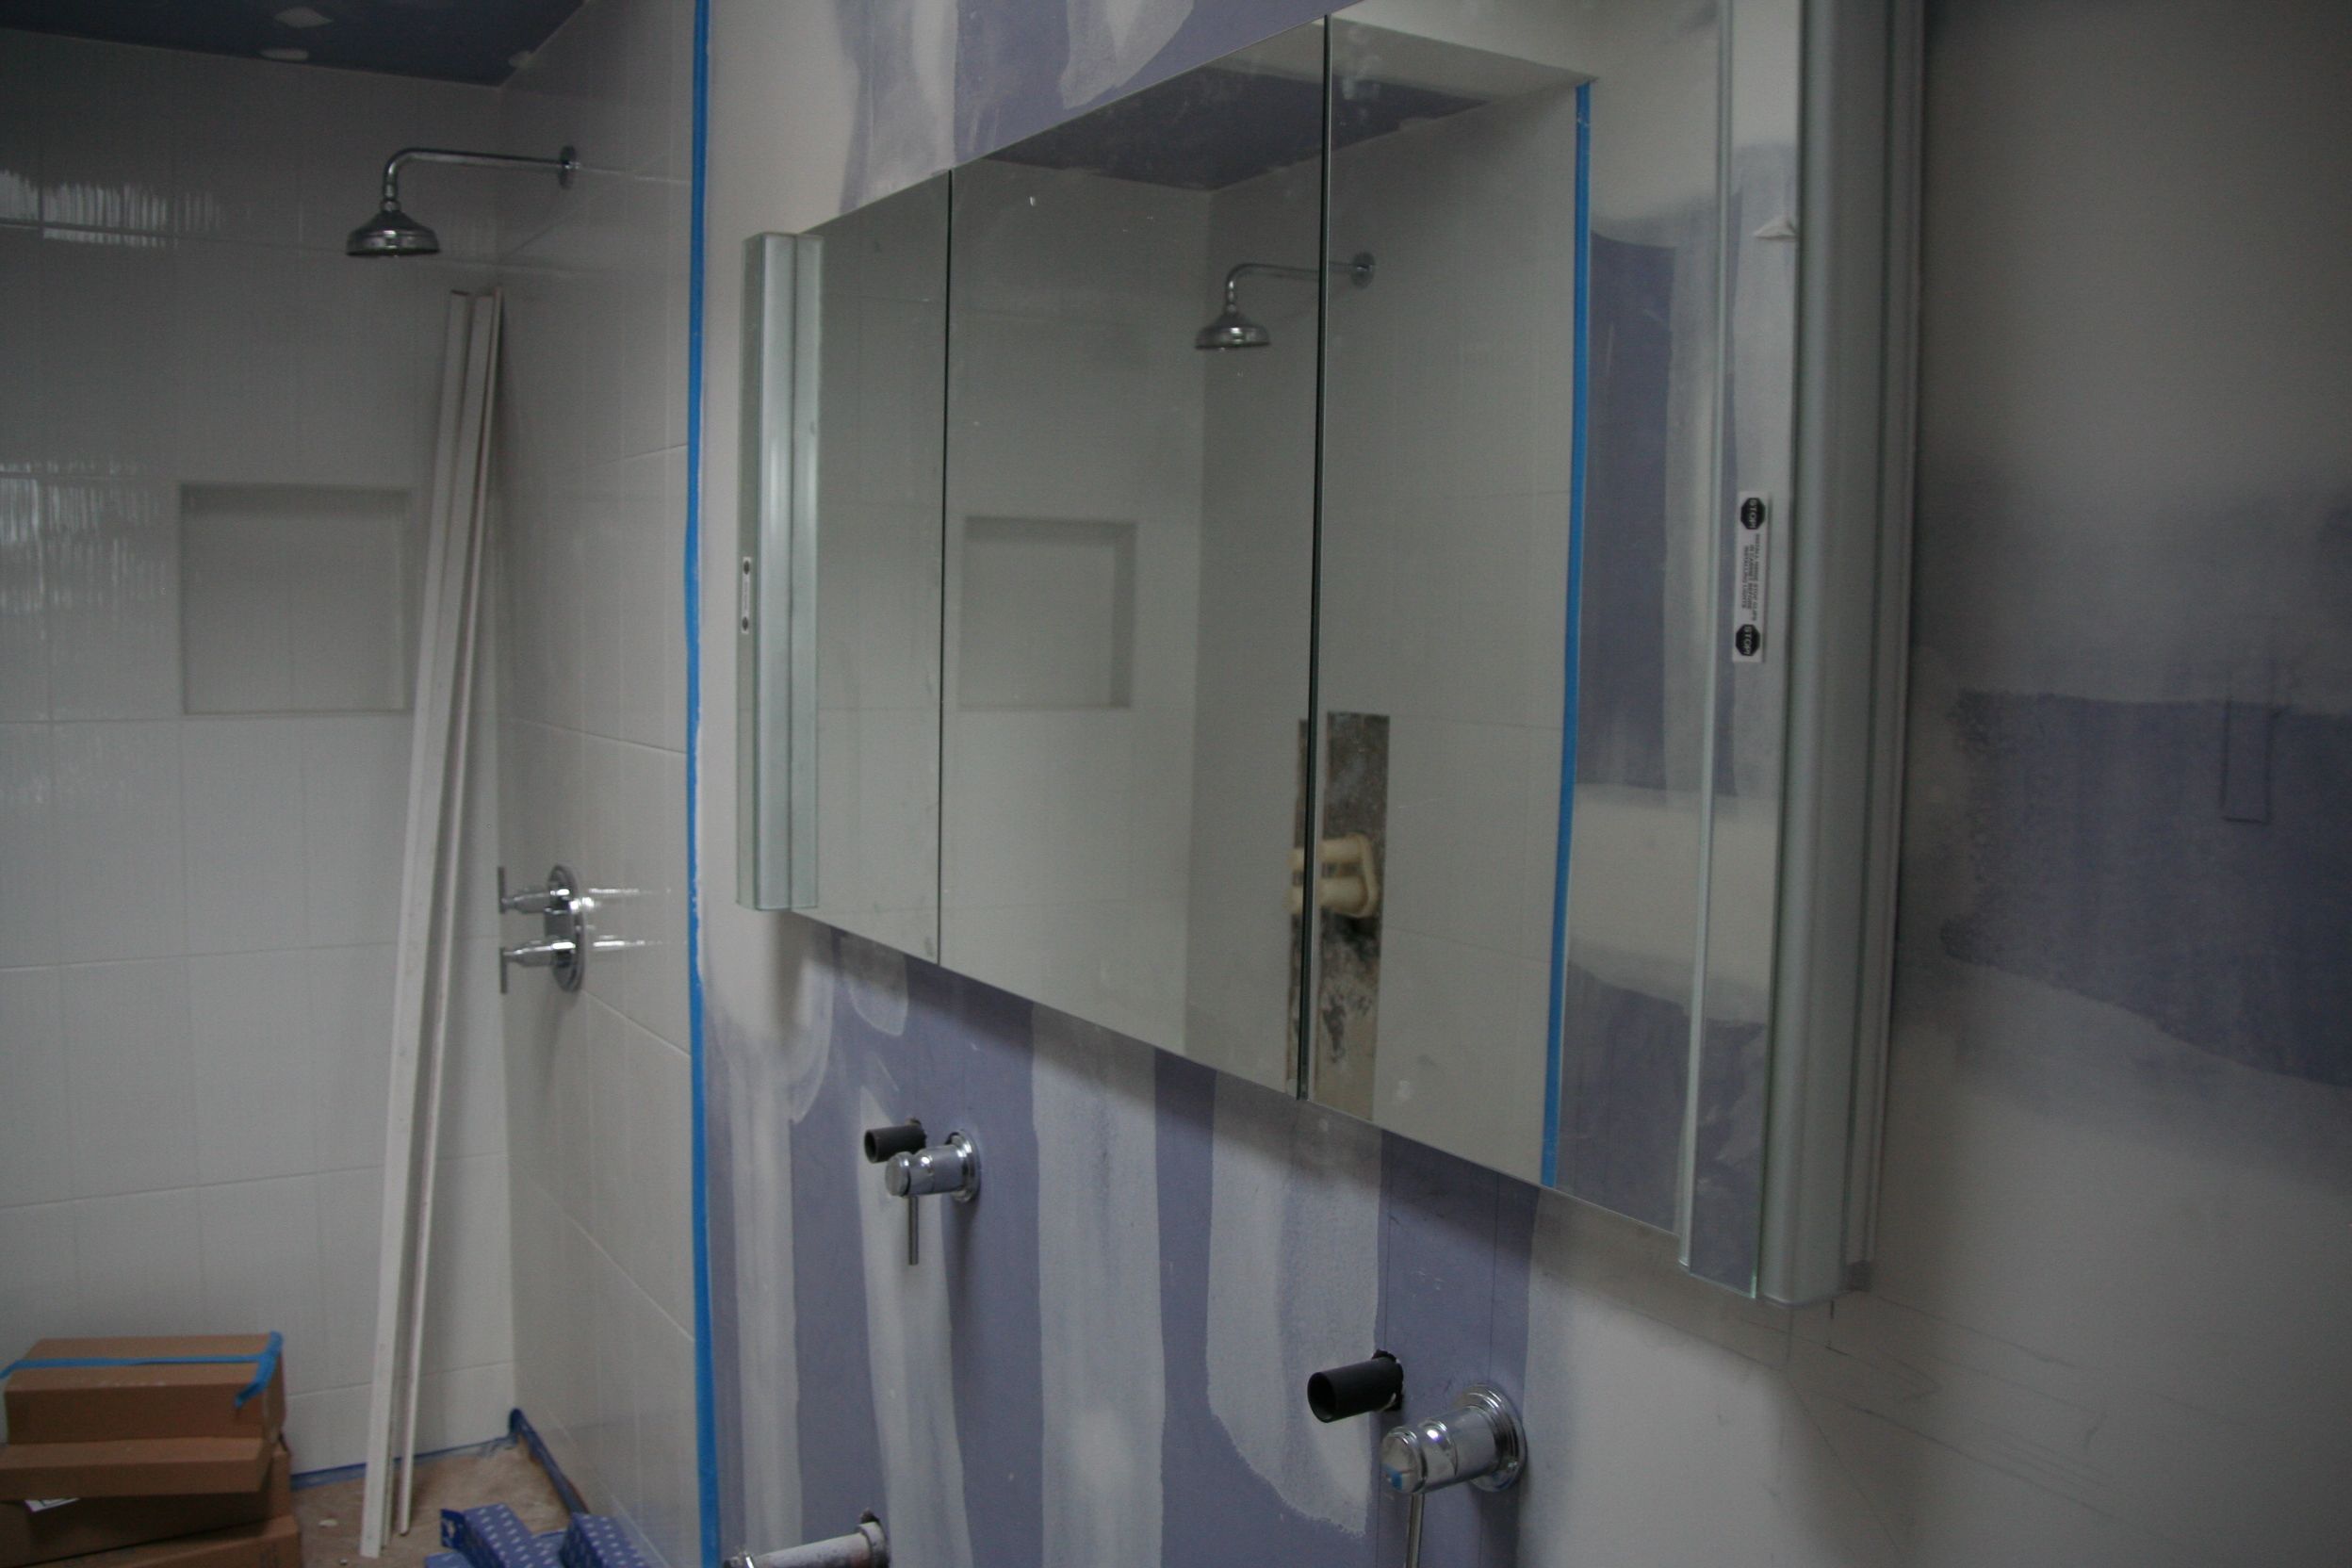
Master bath medicine cabinet. Note the half-completed wall mounted faucets. They continue to be our nemesis, as they now require extension kits in order to be used. More expense on top of what was already an unnecessarily expensive item. Boo to wall mounted faucets!
Our garden bath getting the finishing touches. Note the wood base moulding. We had ordered 3 x 6 slate tile in the same color palette as the floor. Once it was installed, it looked really awful. Thanks to our wonderful contractor and tile guy for replacing it!!
When you go from rental to rental for what seems like years (and in our case, actually was years), you end up compromising on lots of things. In just about every sublet we stayed in, we were lucky to have a space large enough to hold all the standard toddler trappings (potties, bath toys, etc.) but not much more than that. It was therefore imperative for us to make sure we had a master bath separate from the kids’ bathroom, not a small feat on a floor already tight with 3 bedrooms and a laundry room!
Our master bath won’t be enormous and won’t have a tub, and our bedroom itself will not have a walk-in closet, but we feel this is a worthy trade off for a pretty, clean bathroom space of our own. Here are some of the highlights of our bathroom choices:
Tile and Wall Paneling
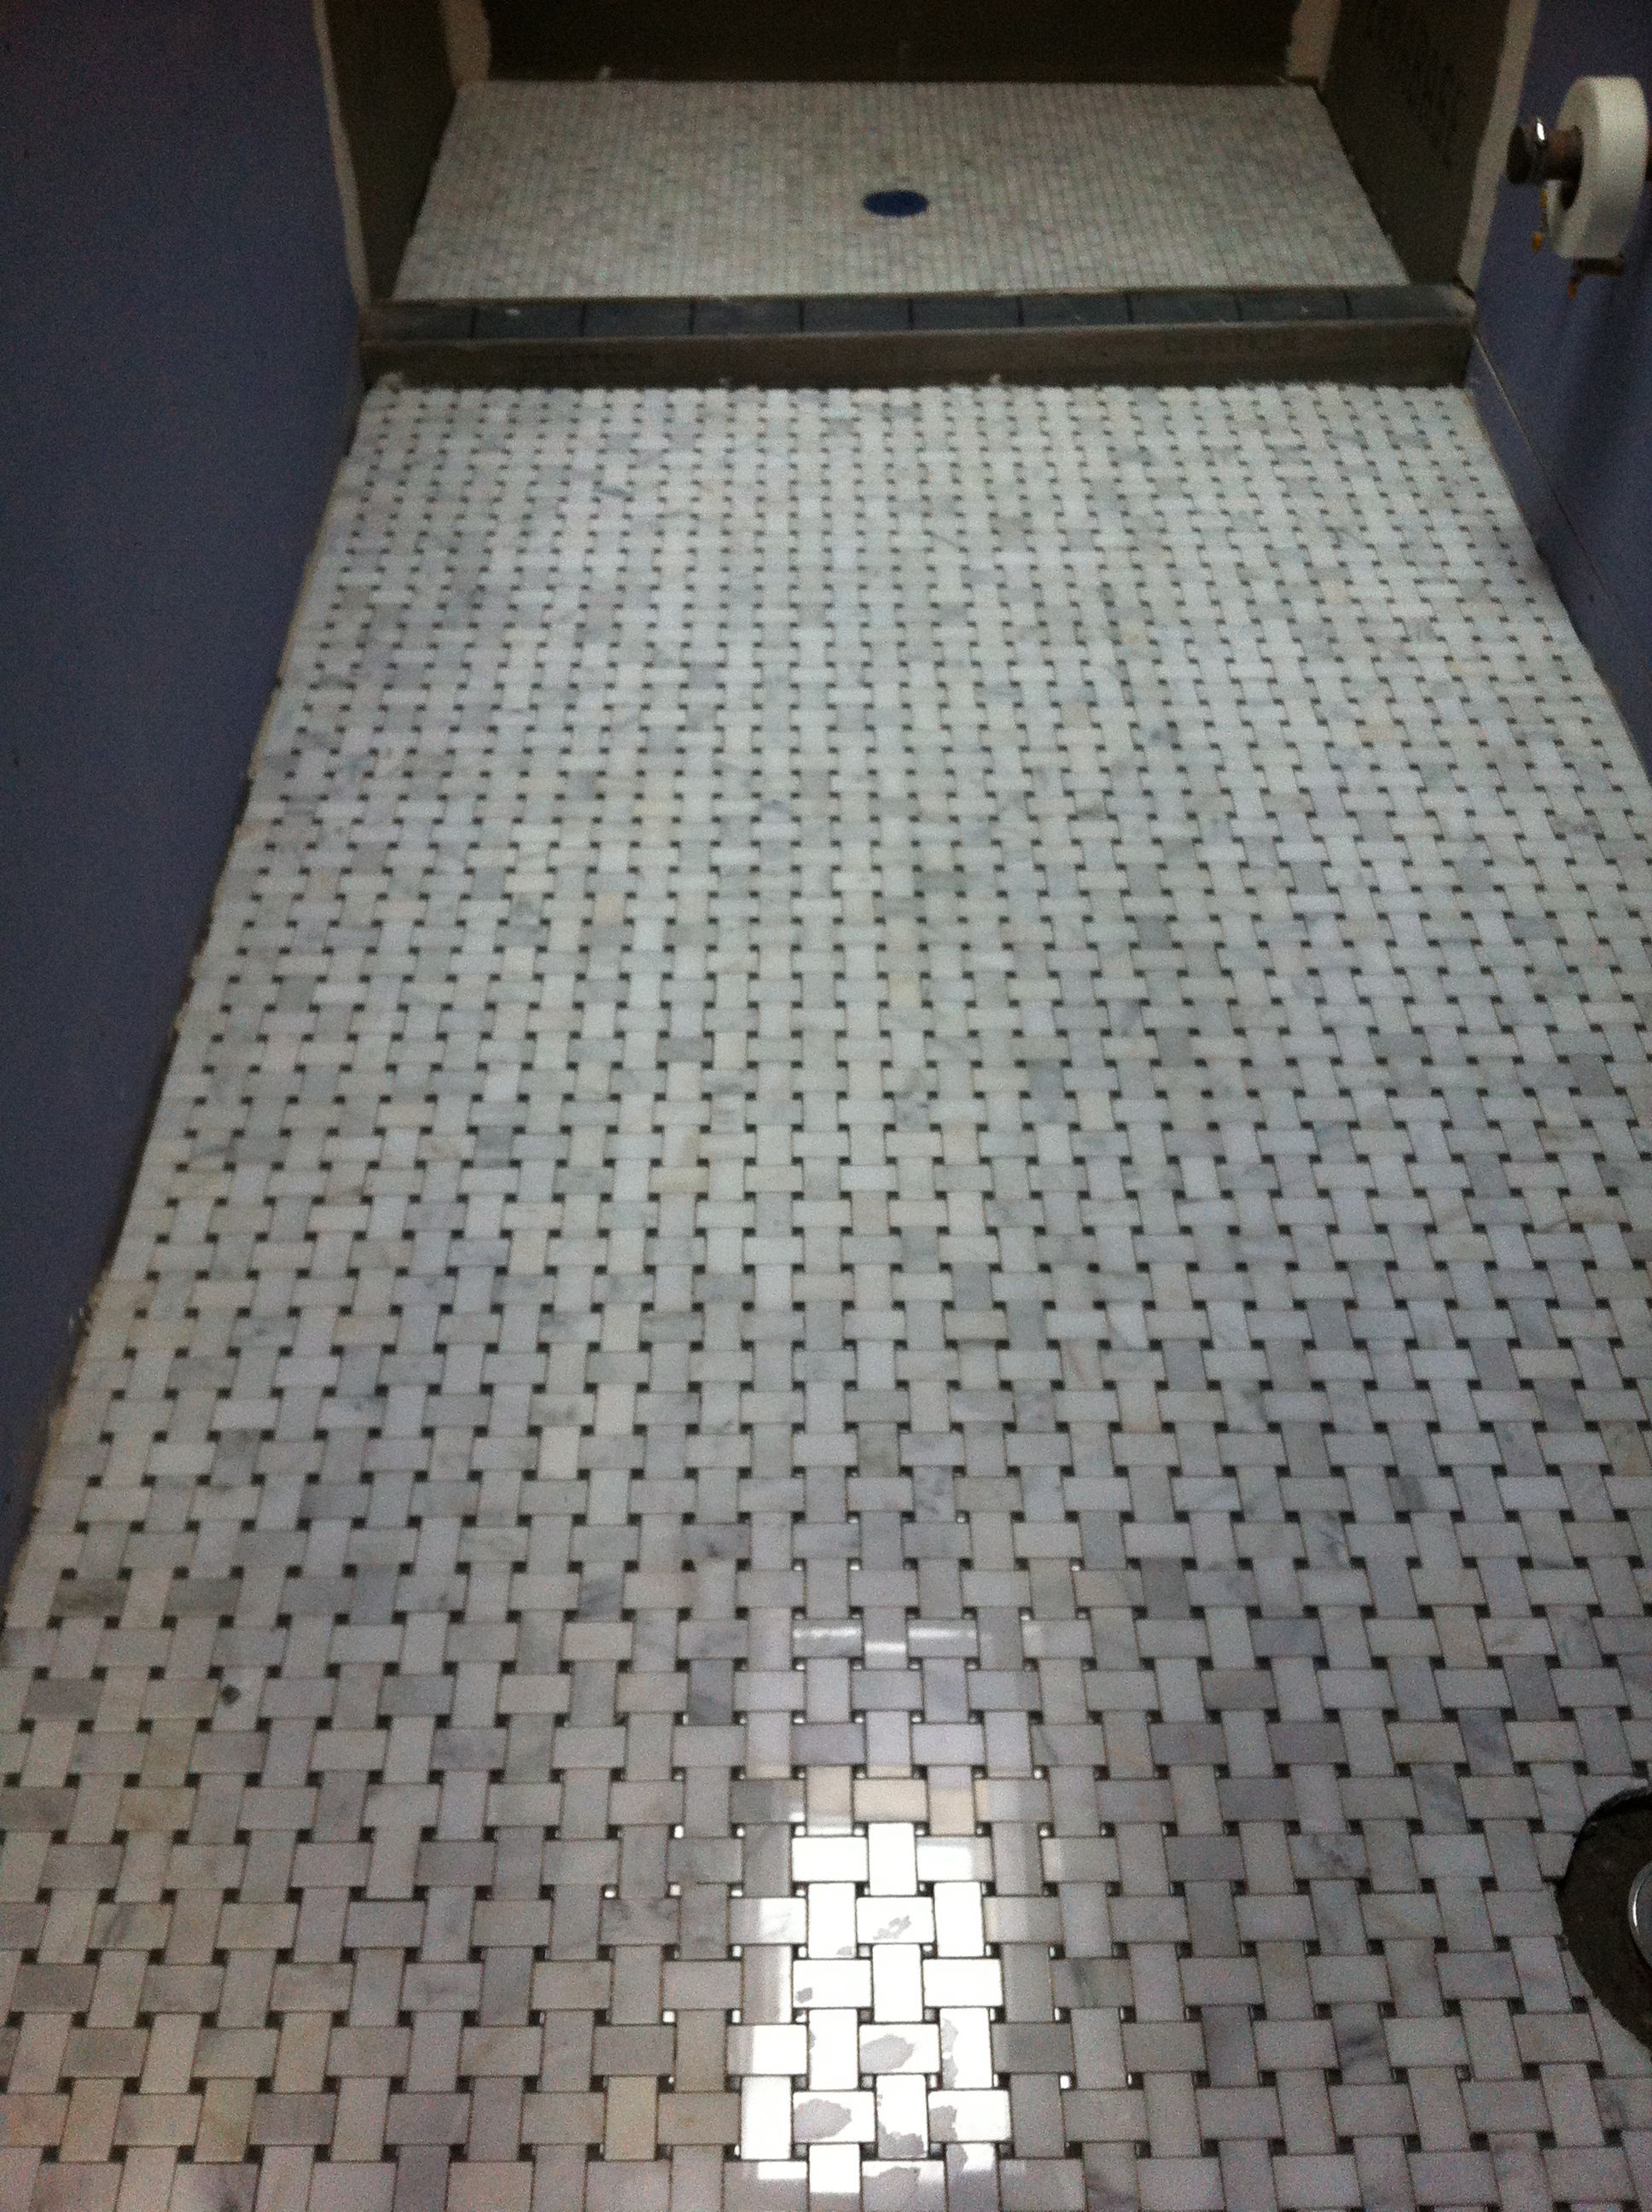
Floor tile: this was one of the first items we selected in the house. Having seen this beautiful basketweave carrara bella tile with gray glass dots by Akdo, we were instantly smitten. Another version had blue glass dots, which was even more to our liking, but the thassos main portion of the tile would have been far too much effort to maintain, so gray dots it is.
Shower floor tile: we are carrying the carrara bella into the shower with a 3/4 by 3/4 mosaic floor, also by Akdo.
Basketweave tile for main floor and 3/4 by 3/4 tile shower floor. This photo is of the installation, pre-grouting. We’ll use a light grey grout to highlight the lines of the tile.
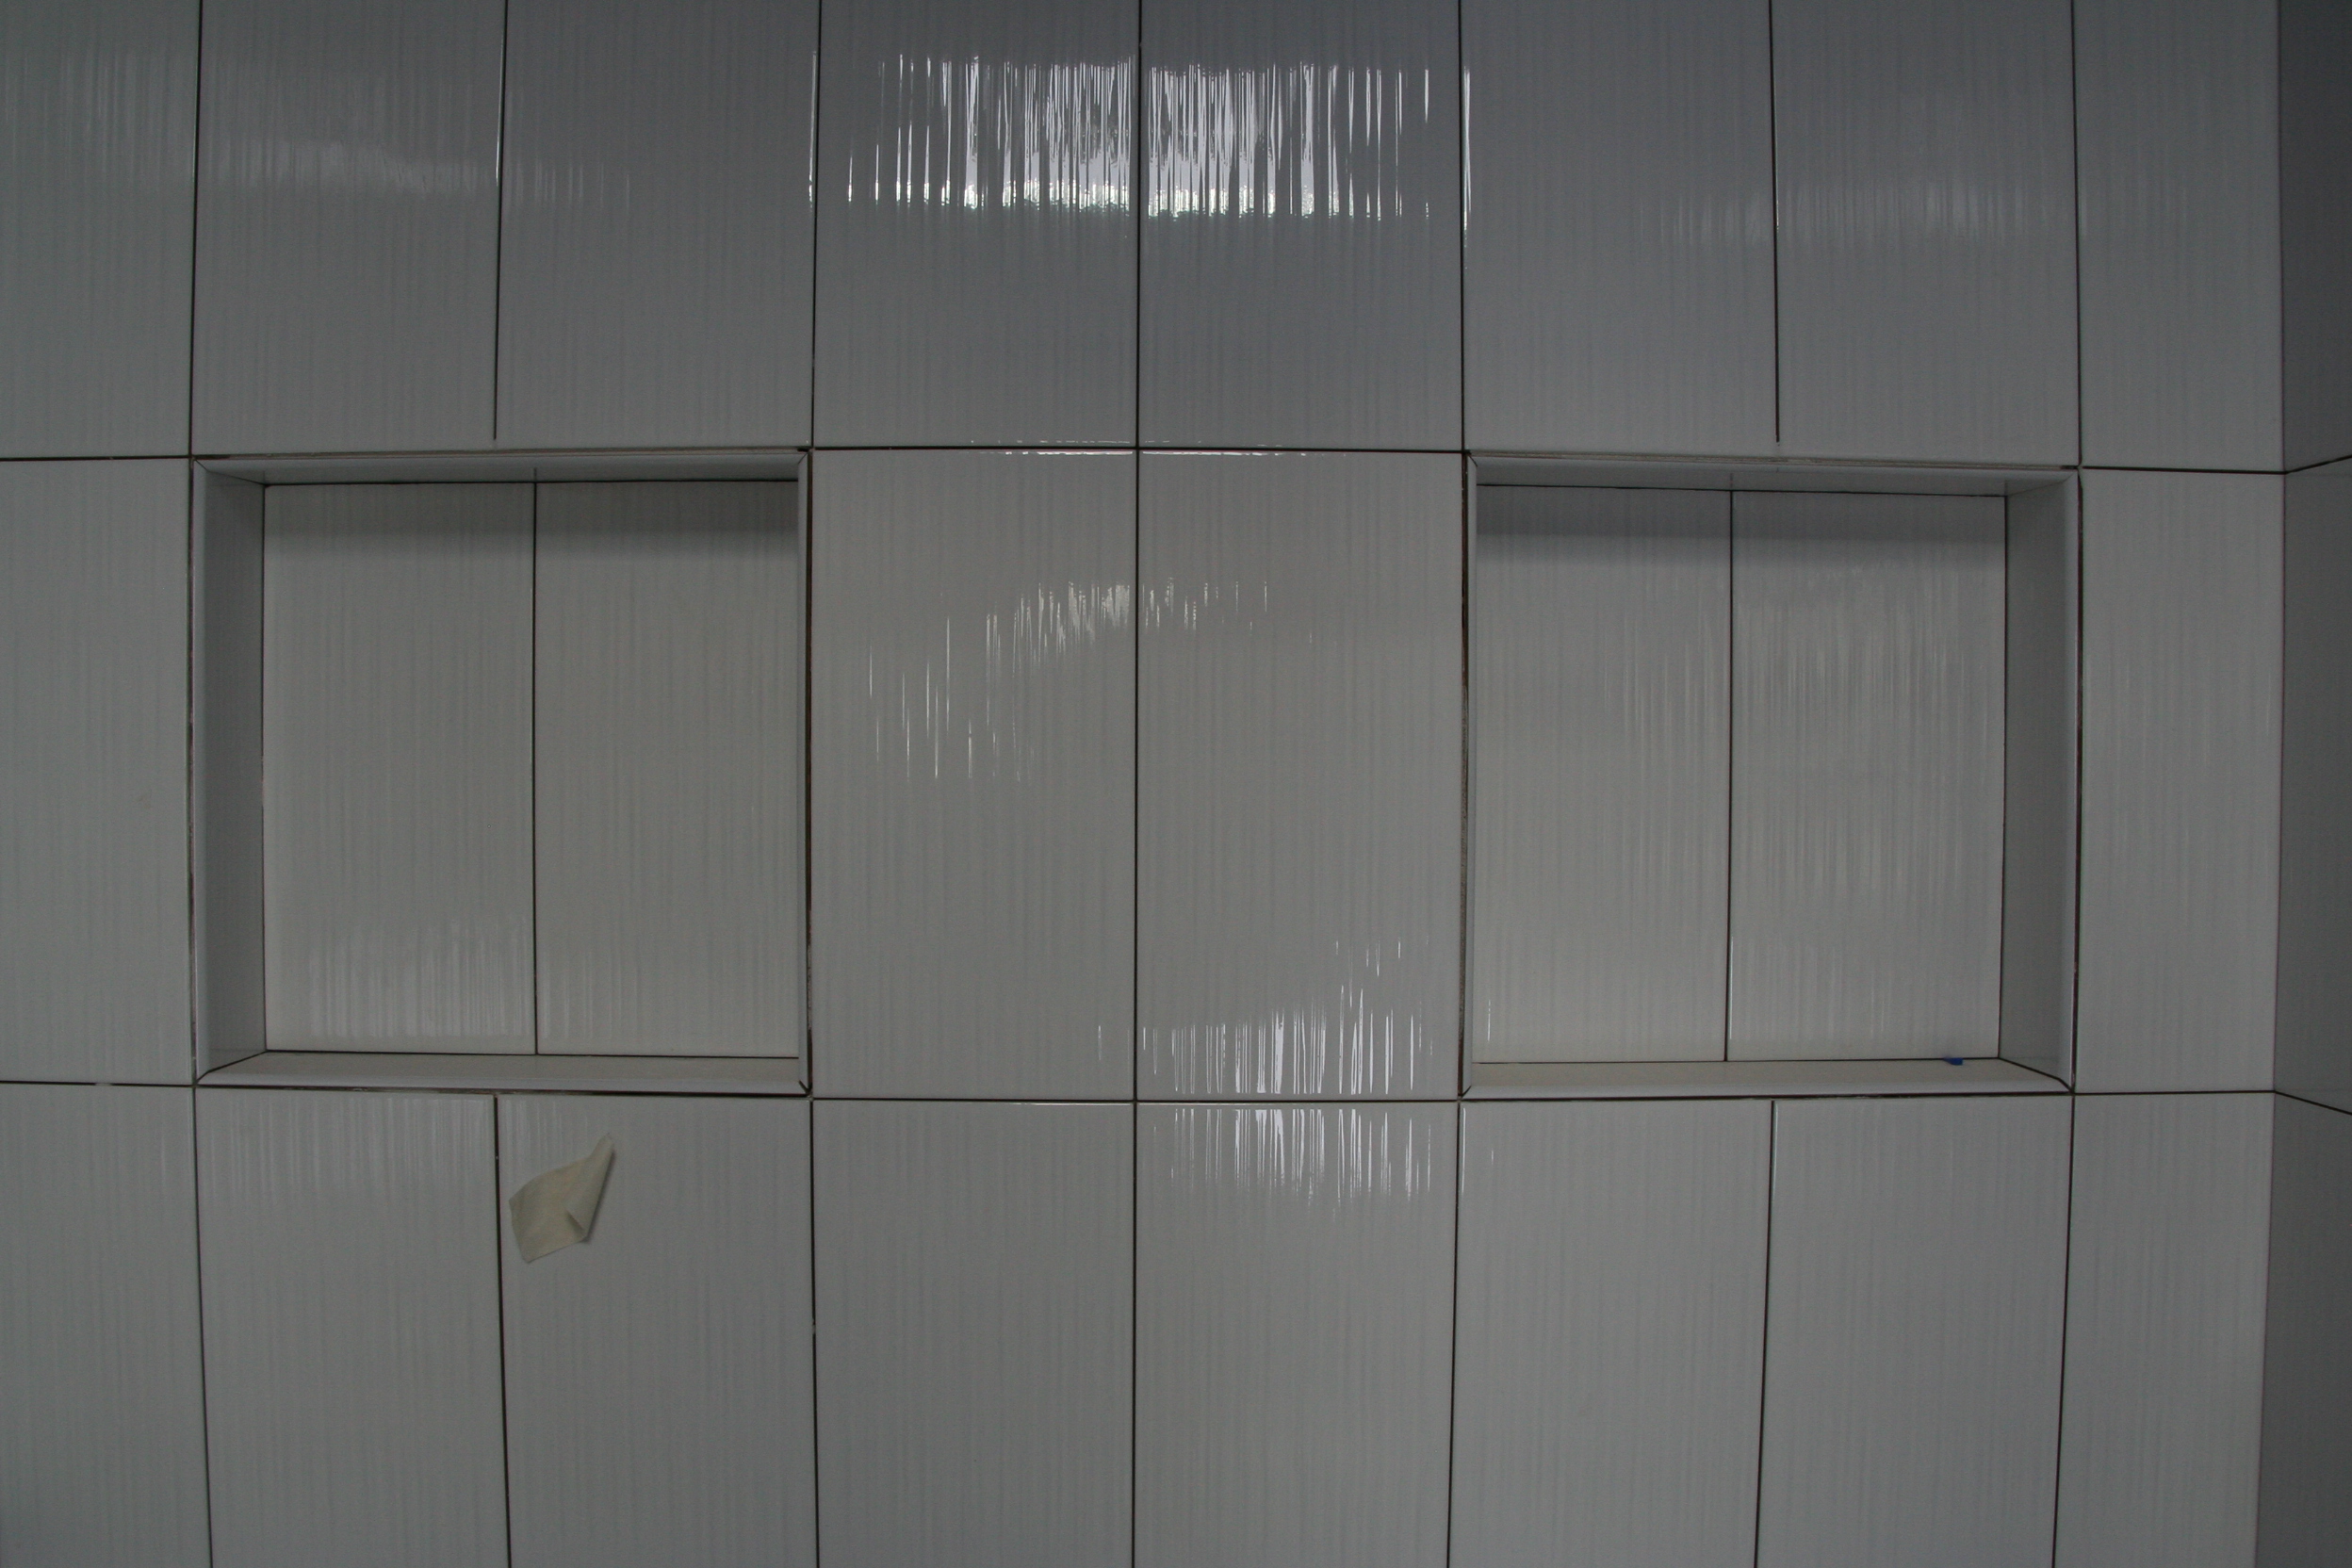
Shower wall tile: We really wanted a larger tile for our shower laid in a vertical pattern, and this textured tile from Cancos really caught our eye. It is also extremely affordable, so it was overall a great find.
Cancos wall tile. Brownstoneboy spent a great deal of time with our architect and contractor getting our tile in beautiful alignment, and it really looks great. We’ll use white grout for a seamless look.
Picture frame molding wainscoting: We love the classic look of picture frame molding wainscoting in a simple, elegant bathroom space, so we’ve opted for this instead of standard wall tile finishes.
Picture frame molding.
Fixtures
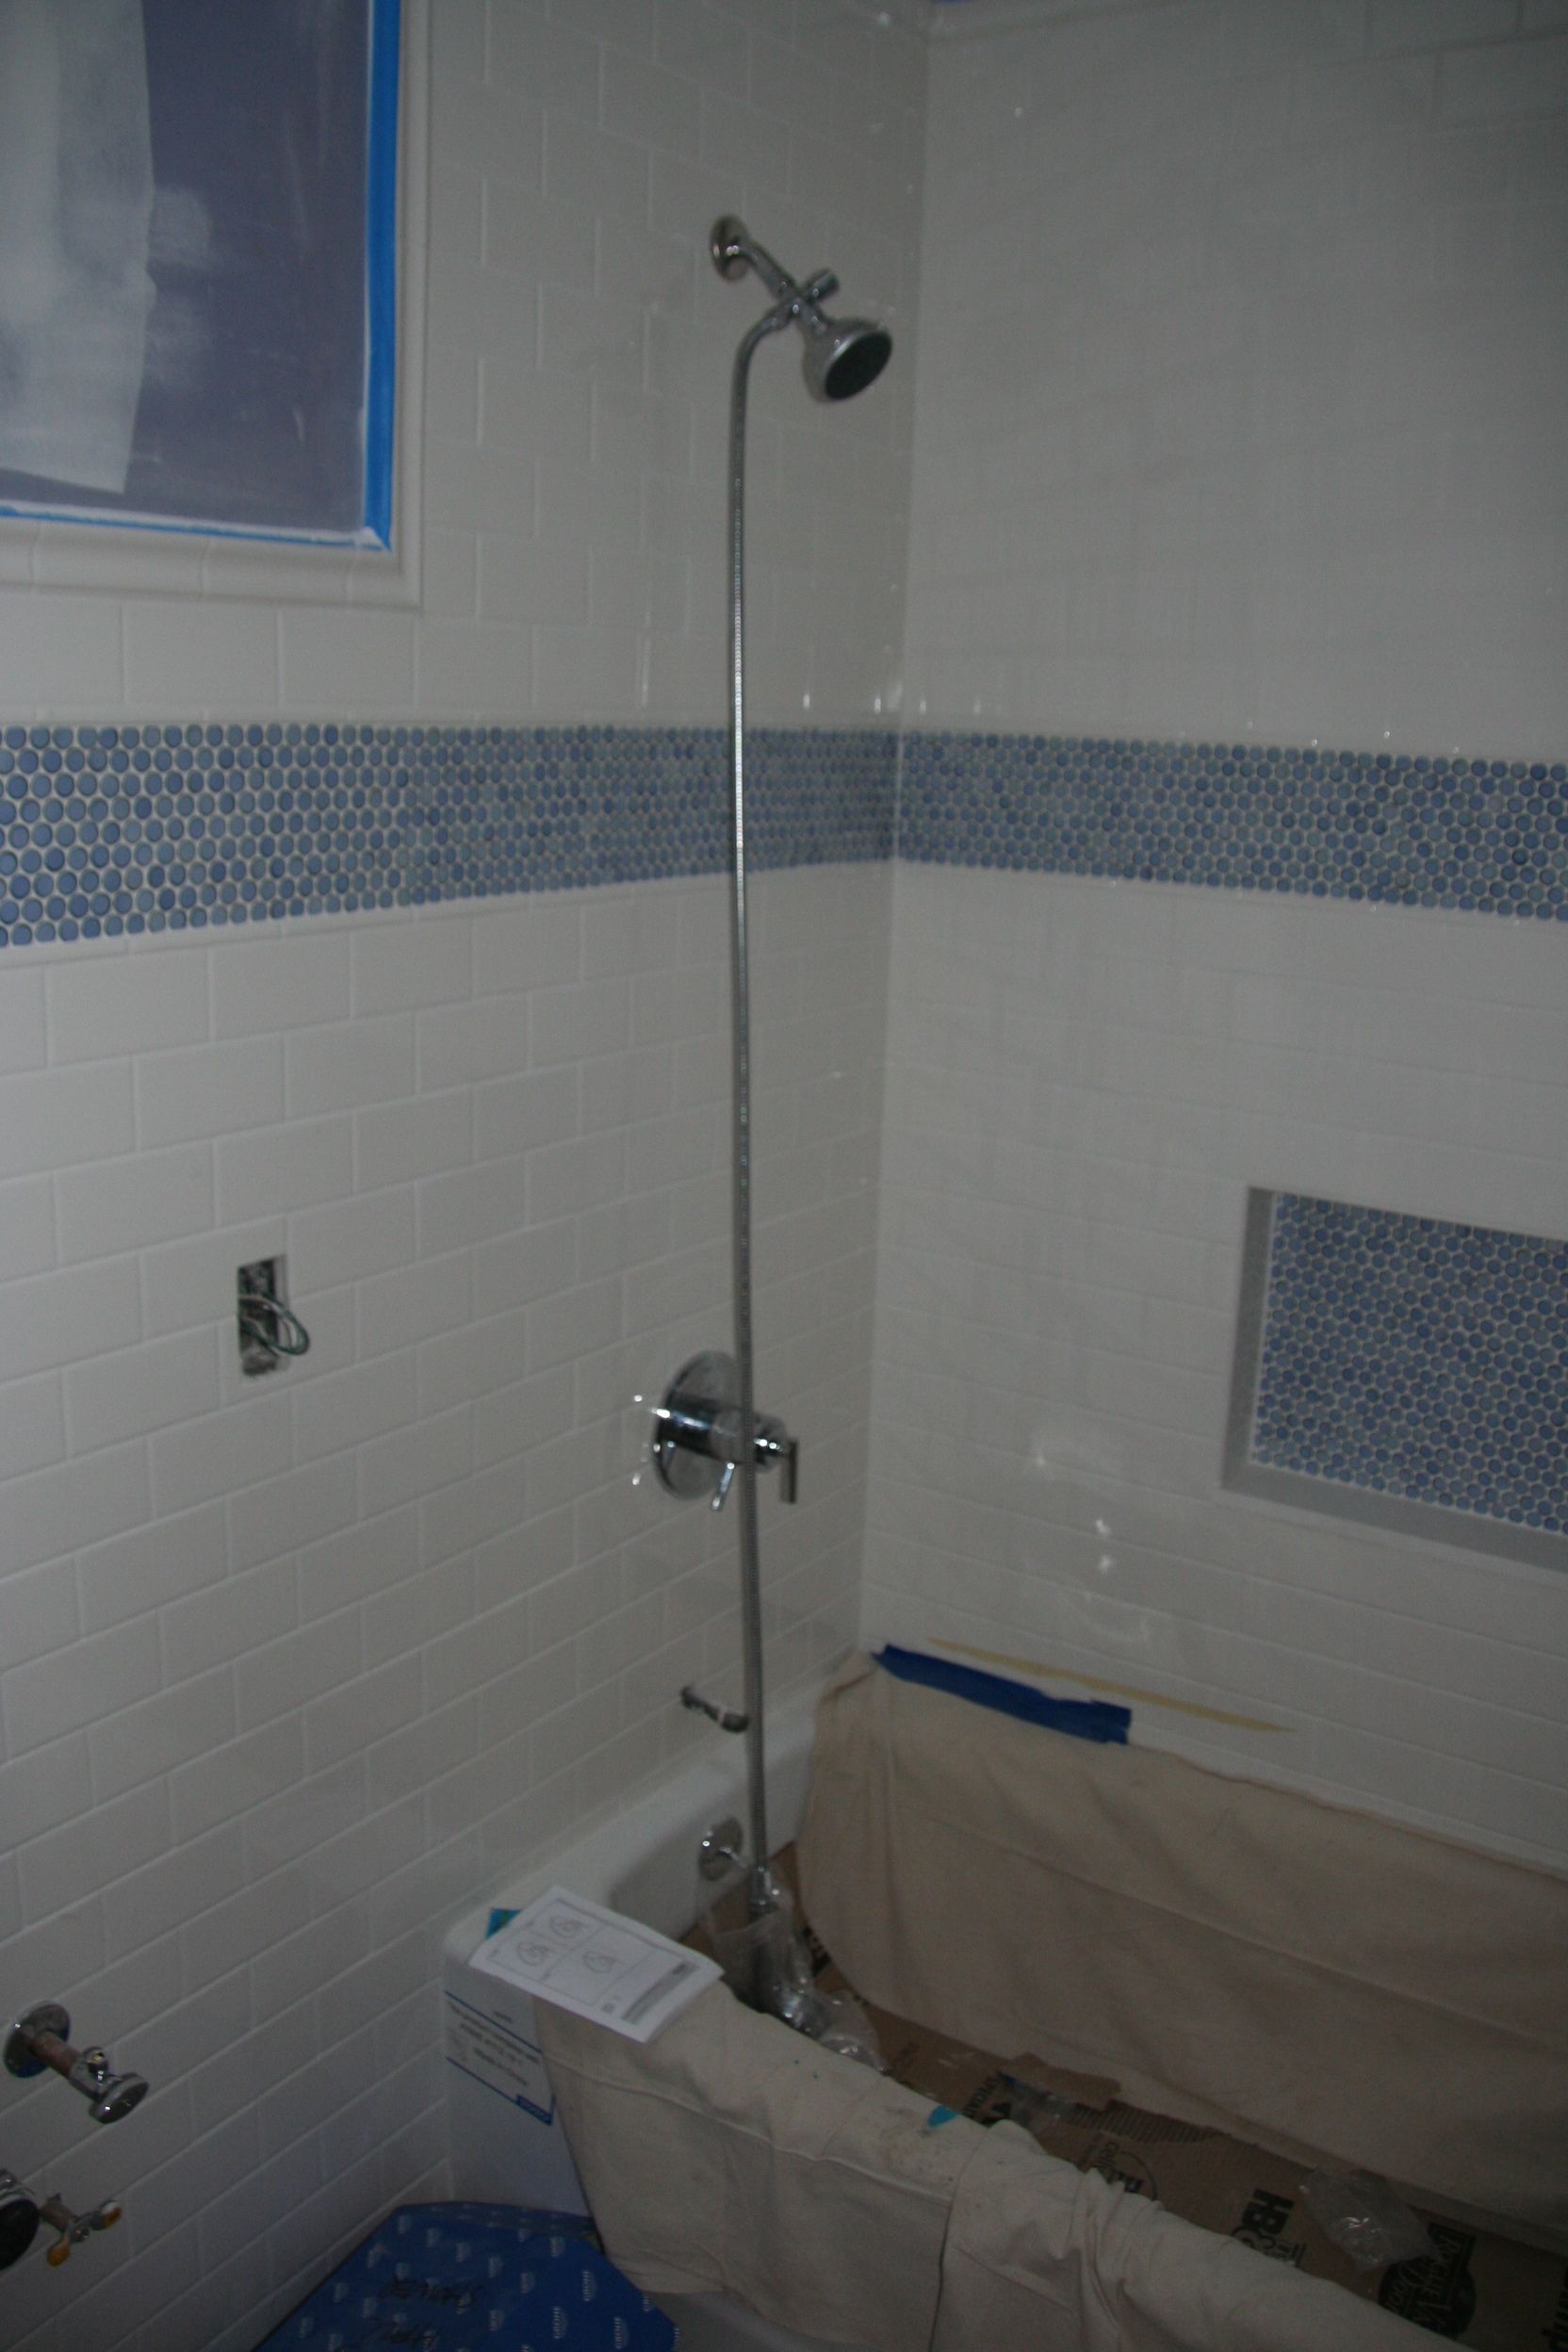
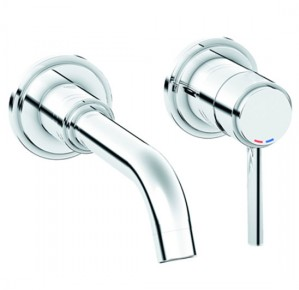
Faucets: We liked the look of wall mounted faucets, so that’s what we ultimately chose. However, I would caution anyone else against this decision. It actually made the plumbing far more complicated and limited a number of other choices. It will prove far more costly in the end as well, as there were a number of other financial factors it elevated (the faucets themselves, the rough in valves, the plumbing work and the requirement to have a backsplash). They will be very pretty, but I’m not sure we would do it again if we had realized the added expenses.
Grohe atrio single handled wall mounted faucets. Pretty, modern, but pricey installation.
Double vanity: We have just enough space for a 60 inch double vanity, which our contractor will be building. It’ll be a fairly simple European door construction, mahogany veneer over plywood (veneer will be supplied by Everwood in Gowanus on 7th street – if you are looking for veneer products, their stuff is really beautiful). A white quartzite vanity top will be purchased from Marble.com when we template our kitchen countertops, and the hardware will be similar to what is featured below. Nice clean lines.
Vanity inspiration. Ours will be built by our contractor with Mahogany veneer supplied by Everwood in Gowanus. Similar hardware will be used.
Double shower heads: Something we really liked in our last renovation and always planned to do again was a nice walk in shower with double shower heads. Last time, we opted for a three way diverter that allowed us to have either shower head on or both, but they were on the same temperature and pressure valve. Brownstoneboy isn’t as fond of the heavy fire hose level of pressure I prefer, and I definitely like my showers a bit hotter than him as well. Since we were doing a gut renovation, it was a no brainer to run separate plumbing lines with individual thermostatic valves. The trim will be Grohe Atrio, and the heads will be our favorite find from our last renovation, the super cheap and super awesome rain shower head from highpressureshowerheads.com. A real bargain at about $35.
Rain shower from highpressureshowerheads.com http://www.highpressureshowerheads.com/high-pressure-shower-head-rain.html
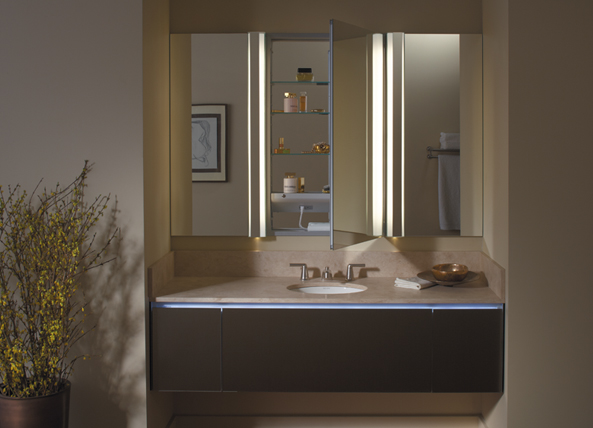
Medicine cabinets: After weeks of harassing our contact at Home and Stone, we were able to negotiate a very good deal on a beautiful Robern three part medicine cabinet. It will extend 60.75 inches and have two long lights, plus hidden outlets within. This was still a pricey splurge, but in the smaller space, we’ll definitely need the extra storage. She’s going to be very pretty!
Robern medicine cabinet. 3 cabinets ganged together with interior outlets and vertical lighting. Sweet.
The master bath has come a long way this week! Here’s hoping (knocking on wood) that it’ll be ready to use when we move in at the end of the month!
Is there a blog about renovating that doesn’t have at least one “the DOB is ruining my life” post? Our “adventure” began January 30 when we failed our gas inspection and took a long, meandering, drunken path to today. The good news is that we finally passed our gas and remaining plumbing inspection and can at long last start closing up and finishing the house. The bad news is, I’ve easily got 10% more gray hair and an ulcer as part of the bargain.
A super-costly and interminable PAA (post approval amendment), a delayed plumbing inspection, our current landlord wanting us to show the rental while we still have dozens of boxes of lighting yet to be installed, a constantly overflowing toilet in our rental, a toddler with a never-ending cough AND the birth of our second child in the mix and well, our outlook was not good (except for said child #2, who is healthy and completely awesome). Somehow that madness has all seemed to wash away, now that we’re actually able to see the finish line in sight.
So, we’ll resume glamor shots of the house in our next blog post…back to the fun!
So despite going into our renovation 100% certain on the direction we planned to go for our kitchen countertops, when the moment to officially commit, we stalled. To make a long story short, we’ve had sourcing issues on our preferred countertop and thus decided to look for an alternative. That sourcing issue has ultimately turned out to be a miscommunication, but we’ve now got two vastly different ideas and we’d love your opinion!
Our kitchen taste is what I would call classic but my mother apparently calls “milk toast,” so we feel that adding one element of real visual interest will make that item shine. The question is: should that shine come from the countertops themselves or a snazzy backsplash?
Choice 1: Super white quartzite with a snazzy backsplash
Super white is more classic and also less expensive than our other selection. The difference in cost means we would still have room in the budget for a fancy backsplash, and probably a design need for it anyway to spice up the room.
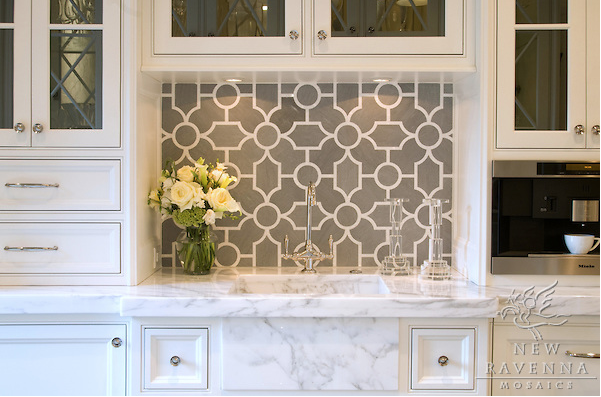
With our snazzy backsplash from New Ravenna (still not entirely sure of the color scheme, but this would be the pattern:
And the wildcard: Chatham New Ravenna in stone. The pattern sort of mirrors the lighting we’ll have in the kitchen in a nice way.
Choice 2: Fusion granite with white subway backsplash
The fusion granite is pretty wild and thus would need a really neutral surround to let it shine on its own (it’s also considerably more expensive, so not much room left for other options anyway). We therefore would opt for a subdued white subway surround. I’m posting the actual slab we saw plus a photo of a similar usage of fusion granite found on Houzz.
Fusion granite: yellow barrier not included. This photo makes the grays appear rather blue, but the underlying color definitely leaned to the gray side.
Fusion granite in a white kitchen. Our backsplash would just be plain white subway.
So, we’re happy to report that we passed our plumbing inspection (hooray!), but we need to file an amendment for review of our gas lines. This was more or less expected, as the system submitted in our plans to the DOB for heating and cooling was ultimately not what we chose for the house. Here’s hoping our architects and expediter continue to have the magic touch and get it all through quickly.
Second structural opening began today, and so far, so good. Sheet rocking should begin tomorrow, heating will continue, and hopefully tiling will begin next week!
Big week for us at the house – we have new windows and the start of the new heating system! The structural work has also begun, and we’re set for our first plumbing inspection on Wednesday. 75% of the tile will be delivered this week as well. Lots going on – fingers crossed for the week to come.
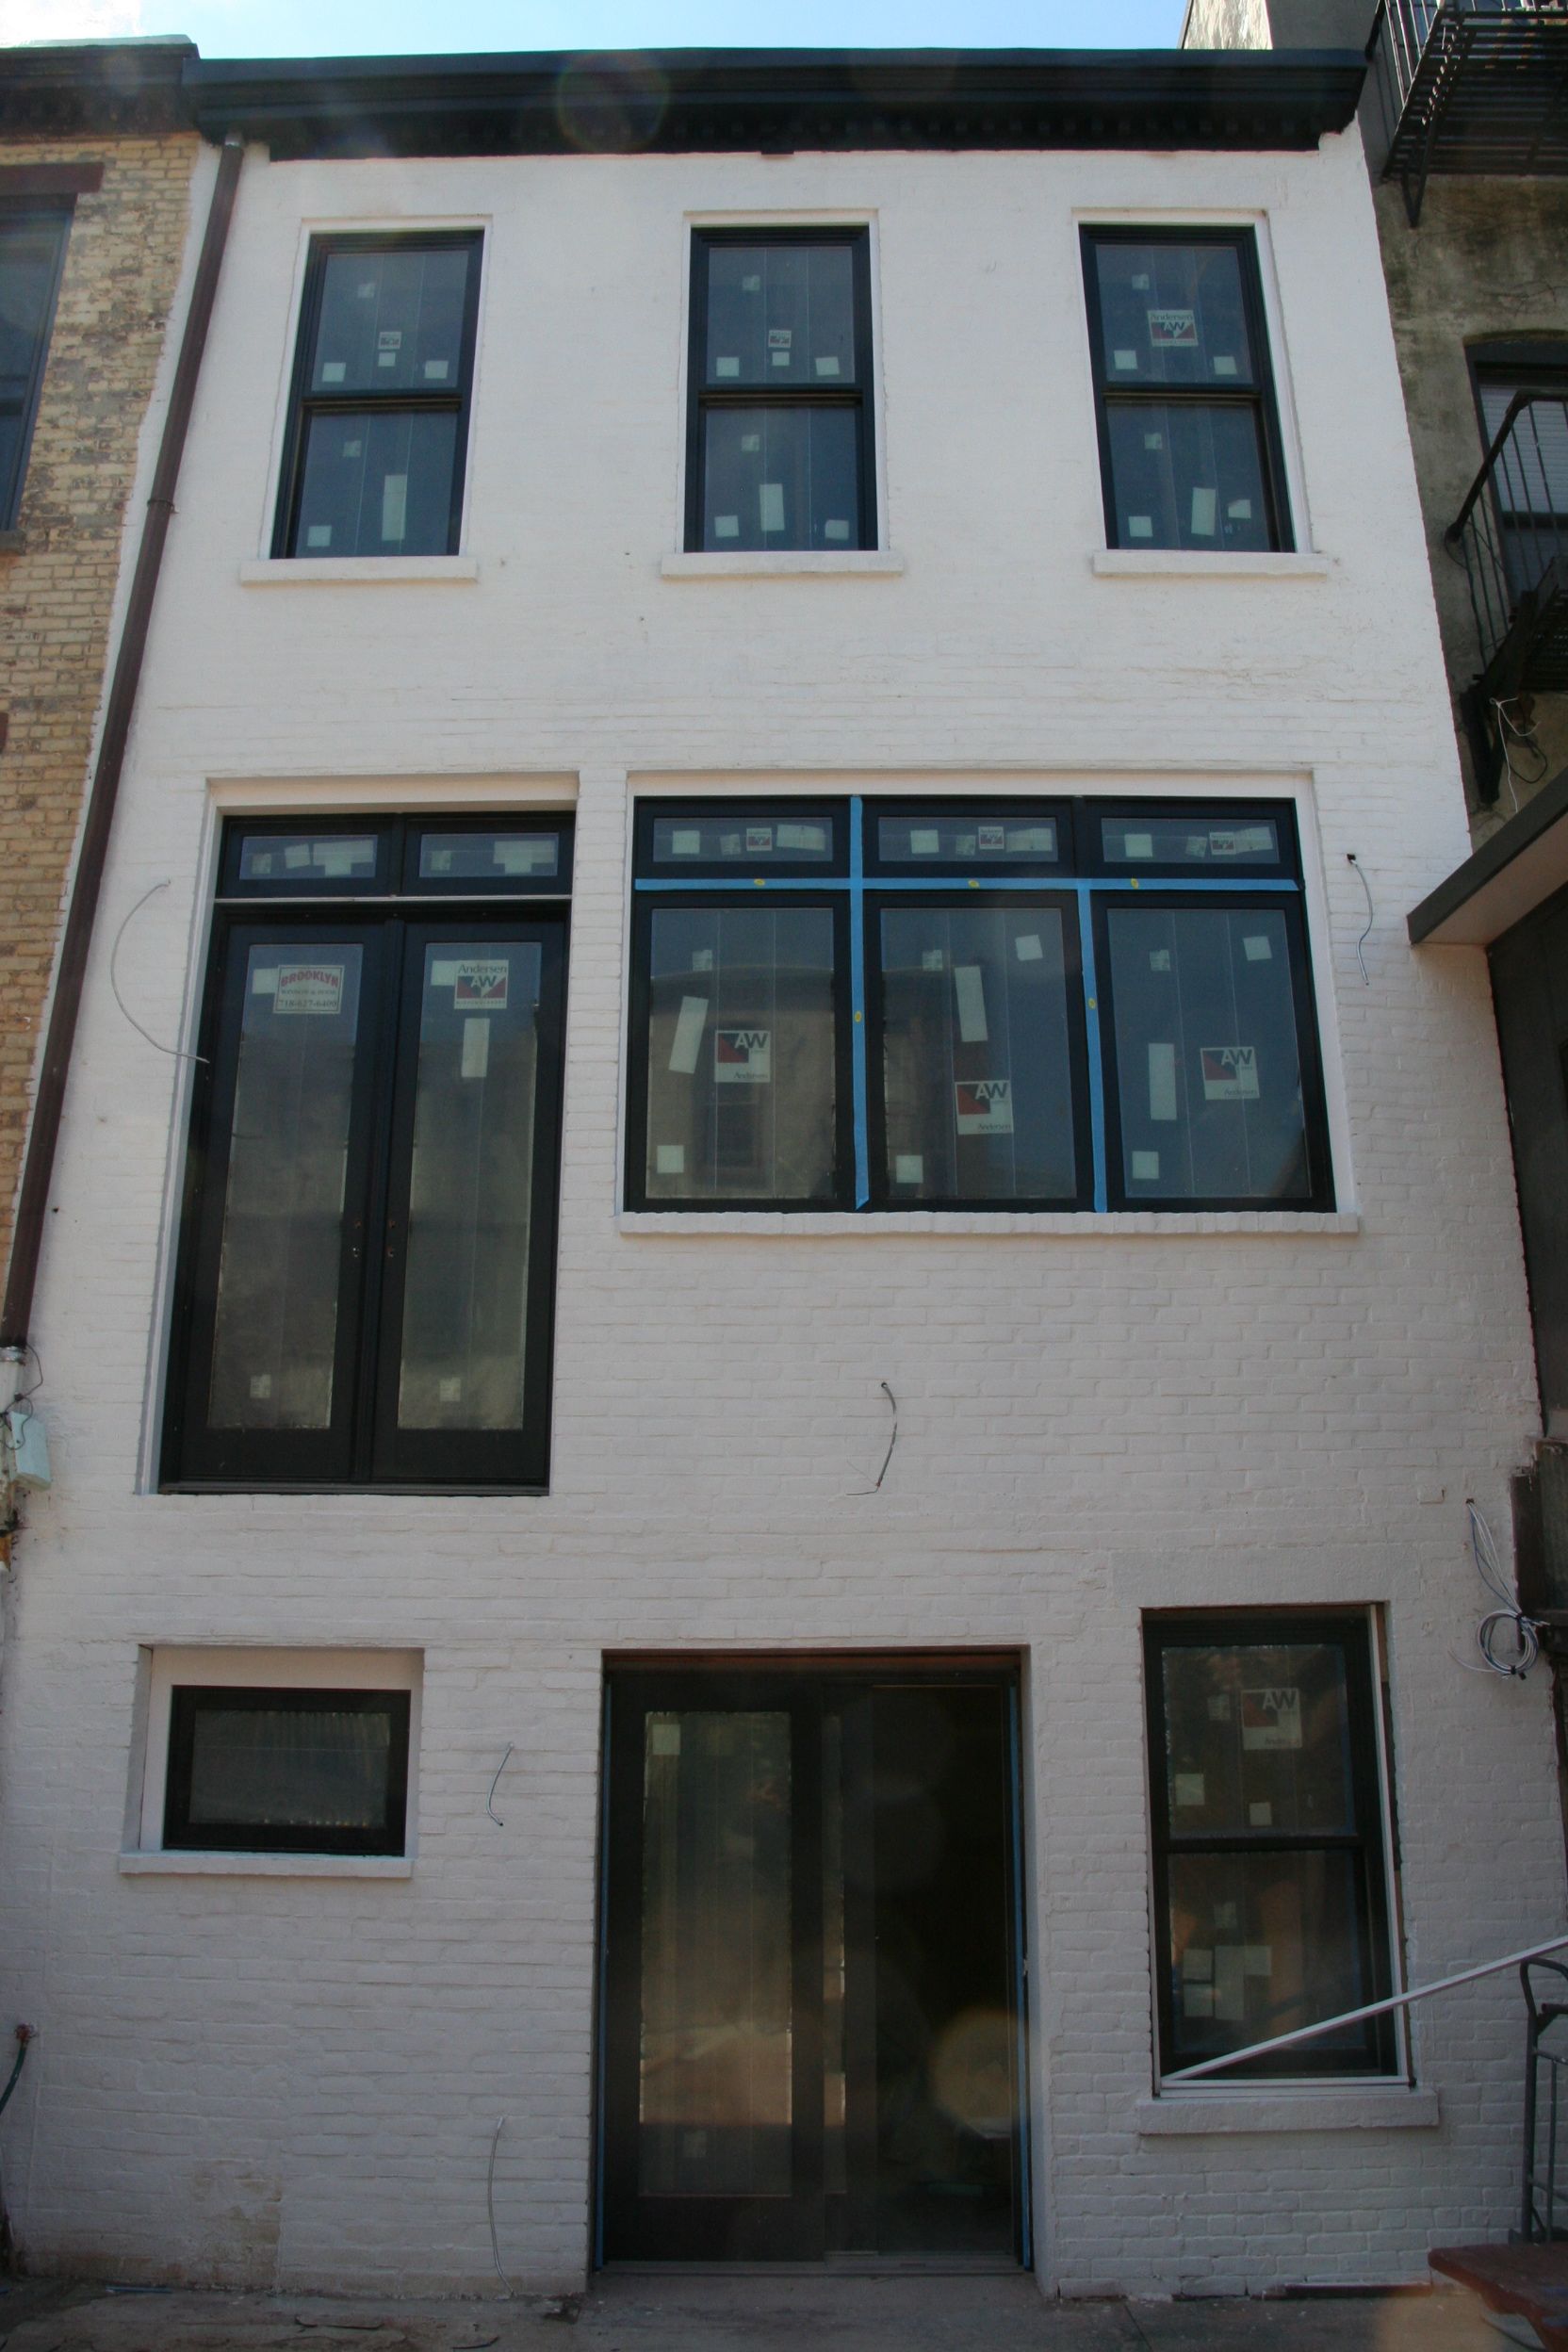
First up, our new windows. After considering various brands and models, we ended up going with the Andersen A Series windows. About half the price of Marvins, these windows are Andersen’s top of the line double pane windows. They are beautifully crafted inside and out, and we couldn’t be happier with the results. There’s still insulation and other finishing details to complete, but the initial impact really exceeded our expectations.
We’ve opted for black on the exterior (our architect approves), unfinished pine on the interior so that the trim throughout will be uniform. Here are some photos:
Window – Andersen A series in black.
Window detail.
Window: inside view.
We’re sorry the work on the heating began on the coldest week of the year thus far, but we are glad it has finally begun! After a 2 week delay in our HVAC guy’s arrival, they have made up for it by having 3-4 guys in each day to complete the job. Our prior heating system was a forced air system, and although we could have, in theory, updated that system with new duct work, given our desire to have central air and heat, plus humidification internal to the system, replacing the entire system turned out to be the best solution.
One of the nice things we were able to do when not having to retrofit work into an old system is to split the system into three separate zones; we’ll actually have three individual furnaces in the house. This will allow us to cool or heat each level independently, which will of course save us a great deal on bills in the future. We’ve also been in houses where the heating on one floor would also heat another floor, and we more often than not just chose to stay cold or overheated to avoid acclimatizing an area not being used. Here’s to comfort without guilt!
Trane furnace in the top floor.
Heating and cooling outlet in one of the bedrooms.
Ductwork in our master bath.
It’s really kind of an amazing thing to really see absolutely everything going into our walls and all that it takes to make it happen (and happen right!).
The other big event of the week was the start of the structural openings in the back of the house. The garden level will have double doors to the garden, and the parlor level will have a wall with three ganged windows, french doors and transoms over both like this inspiration photo:
Inspiration photo for our kitchen windows and doors. Ours will not have the grill work, but the overall finished look will be very similar. This photo is of a prior project from our wonderful architect, Ben Herzog. Isn’t all that light dreamy?
so steel beams were a must have, as was a structural engineer to define the plans. The larger structural opening on the parlor will be done later this week, which will then allow for the remaining windows and exterior doors to be finalized. Here are the photos of the basement structural work completed:
Opening for the sliding doors on the garden level.
A peek at the steel beam support that runs the length of the back wall.
Next up this week: plumbing inspection tomorrow (fingers crossed!), more structural work and the start of sheetrocking.
Anyone who knows us knew that the place where we’d really be focusing our attention is in the kitchen. The kitchen is the heart of any home, as they say, but this goes double for us. To give you an idea, the best Valentine’s Day gift I have ever received was this bad boy, the Sumeet Multi Grind:
Sumeet Multi-Grind. Best countertop appliance ever.
The Multi Grind takes anything you put into it and makes it into a fine powder or paste. Ground spices, nuts, grains, curry pastes, you name it. It was love at first site for me and the Multi Grind (discovered at an Institute for Culinary Education glass in Thai Curries), and she’s had a place of pride on our countertop ever since. No flowers and chocolates for this girl (well, ok, no flowers, but I’m more than happy to receive seriously good chocolate)!
So, where do we begin? For a refresher on the floorplan, cabinet style, island stone and backsplash, take a look at our backsplash conundrum post (and feel free to continue to weigh in on that one…we’re opting to wait on that decision until after the cabinets are in). For the lighting, take a look at our kitchen lighting, blue or grey post (we’re going with grey – thanks again everyone!). For our rocking faucet, head to the bottom of this post.
Here are a few highlight photos for those just interested in the eye candy:
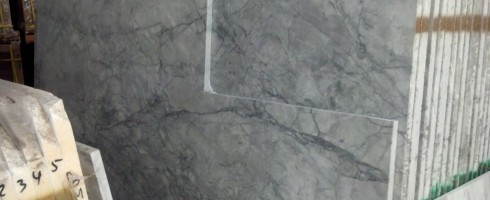
White fantasy quartzite: our likely countertop choice.
Beaded face frame cabinetry. Ours will be a whiter color overall with concealed hinges.
Modern aire PS-26 hood in brushed stainless with polished steel rivets and bands. Ours will be about 18 inches wider to accommodate the larger rangetop plus some overhang for more power.
Floorplan of our new kitchen.
Character Grade Natural Finish American Walnut. This will be used throughout the house, including the kitchen.
Waterstone Gantry faucet. We’ll have a matching faucet in our prep sink in the island.
The grey dining room light from Niche Modern. Ours will be the one with 4 bulbs. At 13 inches in diameter, it turned out to be larger in person than it looks online, which is perfect.
The clear Bella pendant light. We’ll have two over our island. The light is the narrower bell-shaped light with the light saber bulb.
What’s left? Nothing, I guess…oh wait! The appliances and cabinet inserts. We spent a ridiculous amount of time researching appliances, as one should, as well as where to buy them. We’re ultimately going with AJ Madison as they offered great deals for bulk purchases through our contractor. We wanted to go with a smaller mom and pop place in NJ, but between the sales tax (which they couldn’t waive), delivery fees and overall pricing, plus a tremendously antiquated paper-based system, AJ Madison turned out to be the winner.
So without further a-do, here are our appliance selections:
Rangetop: While we were momentarily lured by the fire power of the Capital Culinarian, the Bluestar range was our first and final choice. Fans of the product on blogs like Gardenweb (which, if you are looking at anything kitchen related without reviewing this blog, it is something akin to trying to hone a wheel out of stone with a butter knife), as well as various videos demonstrating the Bluestar’s general awesomeness sealed the deal:
In the end, we’ve opted for a 48 inch rangetop, which includes 6 burners and a 12 inch indoor grill (there was some hesitation about whether the grill, which receives mixed reviews, is worth the trouble, until we spent a mosquito-infested summer in Brooklyn an decided we were less enthusiastic about grilling outdoors). Here’s a visual:
Burner configuration.
Bluestar rangetop. Ours will not have the griddle.
Ovens: Why double wall ovens instead of going with a full range (including the ovens)? Unless you are getting a 60 inch rangetop, you’ll end up with one large, one small oven. The discomfort of bending over and attempting to view the contents of said ovens with an island directly behind you is also less appealing. With small children, we can also run the top oven without as much of a safety concern. Most of all, though, is that electric ovens are generally considered to be better for baking than gas, and we do a great deal of baking. We have opted for the DCS Fisher-Paykel electric wall ovens:
DCS Electric Wall Ovens
The hardware in the oven itself was far superior to many of the other options, and it includes great features like a built in probe thermometer, proofing functionality and the best broiler available on an electric oven at half the price of Wolf ovens (generally considered tops for electric ovens). We briefly toyed with the idea having one regular oven and on Gaggenau steam oven or combi oven (both of which offer great options for bread baking), but in the end, the great price and excellent features of the DCS ovens made them the winner.
Dishwasher: Having spent some time living overseas, we can attest to the vast superiority of European dishwashers. They simply do a better job and are quieter to boot. The general consensus was that Miele are the best but are about double the price of Bosch and require Miele trained staff for install and repair, so we scratched those off the list. However, you can’t just buy a Bosch dishwasher and assume you are good to go. After careful research, we discovered that there are two lines of Bosch: those made here, and those still made in Germany (the Bosch plus line). We opted for the German model for the quieter function volume, hidden controls (great with kids), cool rack configuration and great reviews:
Bosch 800 Plus Series SHX7ER55UC.
Refrigerator and Freezer: Years of living with other peoples’ tiny fridges with variously awful configurations made us a little nutty on this particular set of appliances. We’re going with a 36 inch fridge and a 30 inch freezer for an outrageously silly 5 1/2 feet of cooling capacity. We actually would have preferred a smaller freezer at 24 inches, but the brand we decided upon doesn’t offer a 24 inch model, so 30 inches it will be. The brand will be Miele:
Miele refrigerator.
Sinks: Having had a stainless sink in our last apartment that looked scratched and beat up from the jump, we wanted to go for a porcelain sink this time around. However, we also have seen the typical apron-front, farmhouse sink stained and mottled when the standard white model is used. We found a great option with the Blanco Silgranit line, made from 80% granite, which promises to be stain free. We’ll be using them for both the main and the prep sink. We were able to score an unbelievable price on both sinks at Hayneedle through regular searching and dogged persistence (a week later and the price has increased there by 40%)!
Microwave: We toyed with various options and locations for the microwave, and after reading the pros and cons of every possible option, we’re going with a cheap, non built-in option that comes highly recommended. This is your average Panasonic model with none of the bells and whistles we don’t need (convection oven, oversized capacity, etc.) and the one we can’t live without (a mute function…truly, if you have kids, this is a godsend). We also considered Sharp’s line of drawer microwaves, but we were turned off by the price and user complaints about the door and the ease of putting things in and pulling things out. One final tip for microwave selection: with built-in microwaves running well over $2000 (Yes!), you can buy a trim kit for less than $200 that will work with your $200 microwave and achieve the same look.
And here are a few of our favorite cabinet insert selections:
Utensil organizer:
Utensil organizer.
Above the oven cutting board storage:
Spice racks for the pantry:
Spice racks.
Under sink organizer:
Under sink drawer.
Under sink pullouts:
Under sink pullouts.
Pantry design:
Pantry design (ours will have french doors). Yes.
And my personal favorite, the baking station:
Baking station.
Designed to accommodate both bread and pastry baking, this will be brownstonegirl’s personal corner of heaven in this kitchen. The perfect height for kneading bread by hand, the wooden board need not be dragged up to counter height; it’ll easily be stored away underneath when not in use. Awesome.
The stuff dreams are made of, indeed. What are we looking forward to the most? Just having counterspace again – such a luxury after several consecutive rentals with limited space!
So, we have a moratorium in place in our house on discussing our kitchen backsplash, as we’ve gone over it a thousand times already with no answer in sight. We were thinking of waiting until the kitchen is complete and making a decision at a later point, but our contractor has indicated it might be best to begin setting whatever we choose before the cabinets and countertops are installed, giving a more seamless look.
So, first, here’s the floorplan of our new kitchen (a broader post on the kitchen itself will happen soon):
Floorplan of our new kitchen. Big. Dreamy.
The only area that will actually have a backsplash is the wall with the rangetop. The remainder will be finished with millwork and a dreamy wall of windows. Here’s a view of the part of the kitchen that contains the backsplash:
Range wall with backsplash area.
As you can see, we’ll have some heavy hitters on this wall: a 36 inch column refrigerator, 30 inch freezer, 48 inch commercial rangetop and a 54 inch stainless hood. All great stuff, but lots and lots of metal going on. The backsplash, however, is quite small (The cross-hatched area is the only area where we will have the backsplash). Depending on the trim we use for the range, it might be 10-20 sq ft at the most.
The layout will look fairly similar to this inspiration photo (including the limited amount of visible backsplash, plus our cabinetry will be similar, and we’re using the same lights in clear glass over the island):
So, here are a few elemental photos to get you in the spirit of the design (again, more will be a general kitchen post very soon!).
Color scheme:
Cabinets will be white, countertops will be grey and white granite or quartzite (white fantasy or super white granite), floors will be walnut. Here’s a photo of a white fantasy quartzite:
White fantasy quartzite.
Stronger than marble but with the look of marble, we used this beautiful stone in our old master bath and loved the look. We hope to find a slab with more of the swirling bits when it is time to purchase.
The overall color scheme will therefore be something like this:
Hood and hardware:
What will go directly above the backsplash? I imagine this is an important factor to consider. Here’s our new baby:
Modern aire PS-26 hood in brushed stainless with polished steel rivets and bands.
With some jockeying back and forth, we were able to eek out a great deal. Isn’t she pretty? We’ll also likely be using similar polished chrome cup style pulls, albeit with different knobs on the upper cabinets.
Cabinet style:
We’re going for an updated traditional/transitional look throughout the house, so the cabinets will be an inset, concealed-hinge beaded face frame design. Too technical? They’ll look something like this, but with hidden hinges:
Beaded face frame cabinetry.
Backsplash choices:
So, that leaves us with the ultimate question: what to do with that 10-20 sq feet of backsplash? Our beautiful lights, the wonderful light from all the glass at the back of the kitchen, the hood and of course, all those wonderful appliances will be enough to take center stage, but that wall will need some sort of protection. Do we therefore go with:
White subway: classic, but boring? If we go with white subway, do we go with white grout or dark grout for a more period look?
White subway backslash with white grout.
White subway with darker grout.
Gray subway: many options here (ceramic with some color variation, glass, opalescent, or high gloss. Too much gray?
Grey subway option #1: ceramic with some color variation.
Grey subway option #2 – glossy with no color variation.
Stainless – range panel only:
Stainless panel with shelf just behind the range. Our range and hood will be 24 inches narrower, but the finishes will be similar.
Stainless – entire backsplash:
All stainless backsplash. This has been the frontrunner, but our concern is the 66 inches of stainless fridge/freezer wall directly next to it, plus the 54 inch stainless hood and 48 inch stainless range all flanking it. Too much metal?
Pattern: The variety of patterns abound, of course, but we have narrowed it down to one that we are still considering:
And the wildcard: Chatham New Ravenna in stone. The pattern sort of mirrors the lighting we’ll have in the kitchen in a nice way.
If you aren’t familiar with New Ravenna, their stuff is stunning but pricey. However, given the small area we’ll need and the relatively more affordable pricing on this particular tile, it is still in the running. I also like how it complements the shape of the lights we’ll be using in the kitchen (see the blue or grey post for more on that).
So, dear readers. Do tell: what would make your heart sing when you walk into our fair gray and white kitchen? We’d love your input.
Although it will be the smallest room in the house, the parlor bathroom is likely to be one of the more visible rooms to our guests, so it is important that we do her up right. We’ve decided to go for a period look that we think will tie the old in with the new, and we’d love your help, dear readers, with two elements: the mirror and the lighting!
Here’s a rudimentary elevation drawing to show you what the space will look like:
Basic elevation. Sink will actually be a pedestal and the mirror and sconce are still up for debate!
Petite but functional.
So, the floors throughout the house will be 5 inch wide Character Grade American Walnut floors supplied by Premium Floors right here in Brooklyn with a natural, tung oil finish. Here’s an ooh and ah photo for natural finish walnut floors:
Character Grade Natural Finish American Walnut.
We love the look of the sleeker “select” grade walnut, but with 2 kids and the softer nature of walnut, choosing character grade means the floor will start out with some imperfections and will thus be less noticeable when dings inevitably happen.
The flooring will extend into the bathroom.
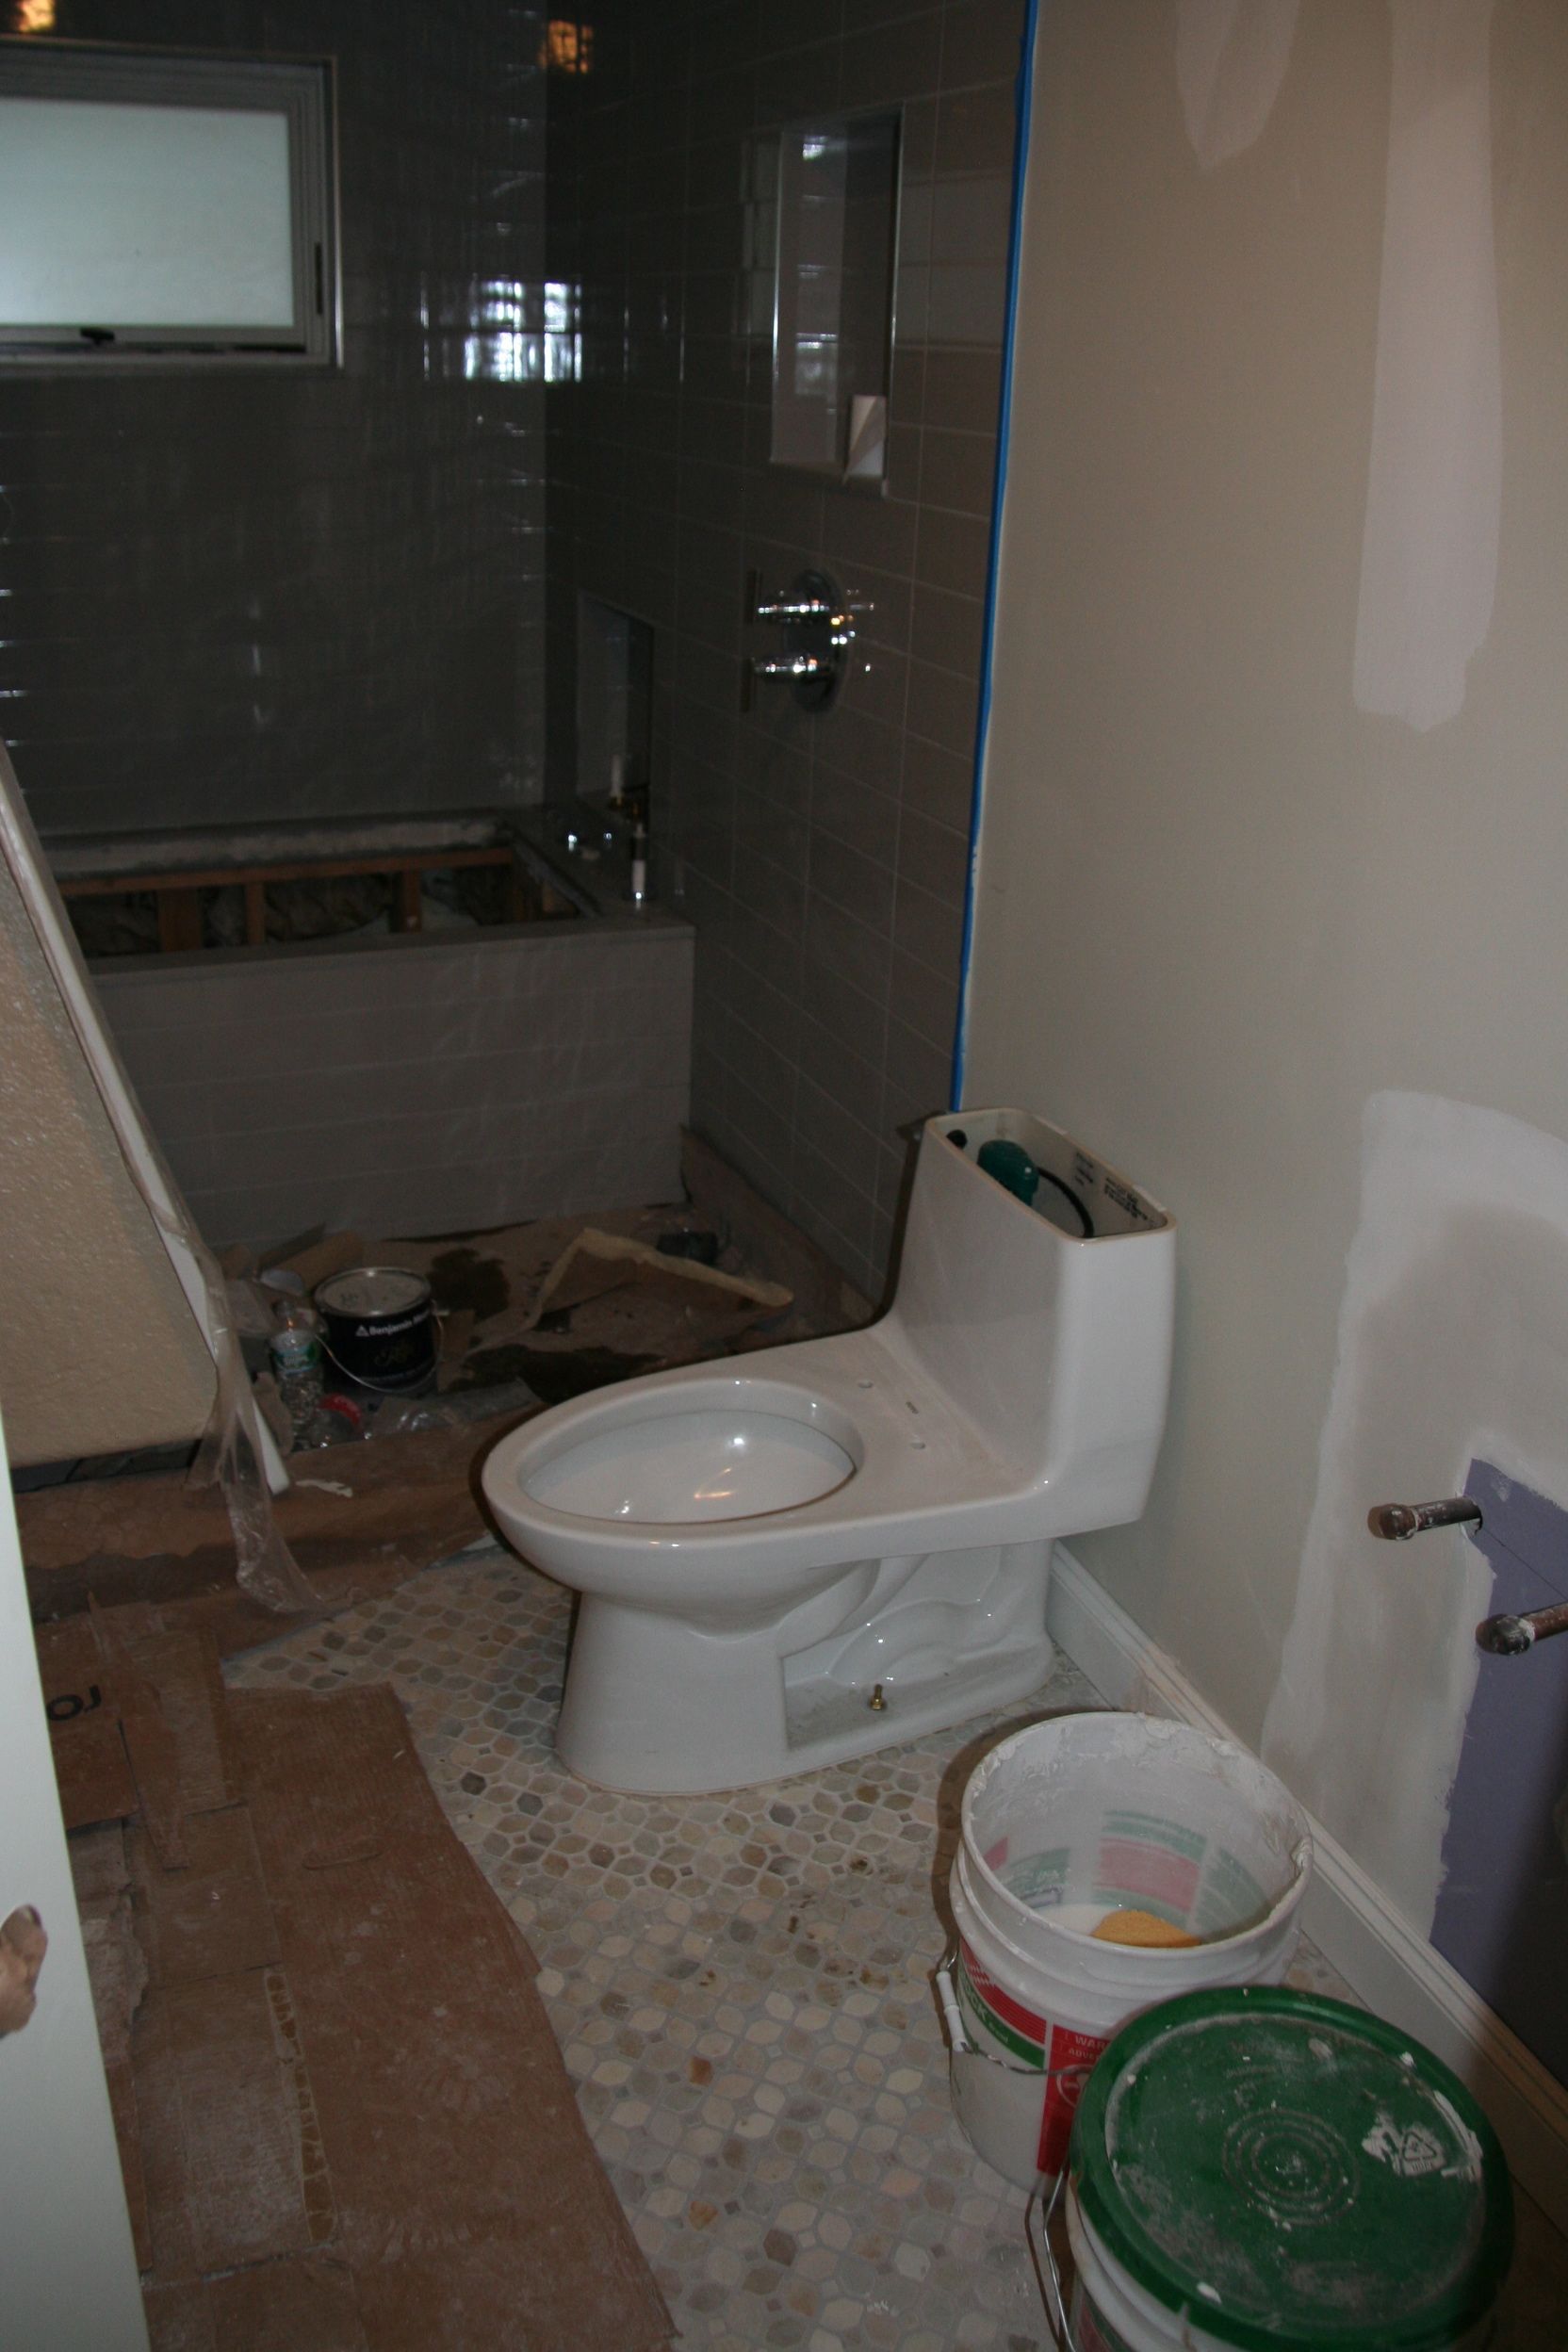
Here are the toilet and sink we’ll use in the space:
Toto Promenade Toilet.
Toto Promenade Sink.
We got a great deal over Black Friday weekend on Toto toilets and a bathtub for the kids bathroom from HomeClick.com. We ended up with the Promenade model because of the 24 inch width. Most of the other Toto pedestals were 27 inches wide and 24 inches was our comfortable limit in this tighter space.
Faucets and accessories will come from Jaclo, the Roaring 20′s series:
Emtek Old Town Clear Crystal Door Knob. Ours will be in Polished Chrome to match the fixtures.
We were thinking of doing either a chair rail or wainscotting in this bathroom to complete the period look, but the “petite” size of the space will mean we need every inch. Therefore, I think a chair rail and nicely painted walls will finish the look nicely. Something like this:
Chair rail for powder room.
HELP US CHOOSE!
The final decisions in the bathroom are about lighting and mirrors: what kind? how big? The mirror choice will define the lighting, so here are the contenders:
1. Full wall mirror: The room will be quite small (only about 5 feet by 4 feet) and will not have a window, so we thought it might open up the space to have a large mirror. The ceilings on this level are high though (even with the ceiling dropped to accommodate heating and other duct work, it will still be about 8 1/2 feet), so is too much mirror just too much?
Full wall mirror with some sort of embedded lighting. Too much mirror?
If we did that sort of mirror, lighting would probably be a recessed light plus an embedded sconce like this one:
Embedded sconces: sconces are mounted on the mirror itself.
Our sink is not that wide at only 24 inches, so one sconce may be all that we could fit. The recessed light would help with additional wattage.
2. Tilting beveled wall mirror:I’m really drawn to the old-fashioned tilting wall mirror look. I feel that it would work well in our bathroom in either a rectangular or oval shape. Our fear is constant fingerprints from guests compelled to moving it about. Should we worry?
Tilting mirror and small shade sconces.
The sconces would likely be similar, but again, we might only have room for one, given the dimensions of the bathroom. Recessed light would also be an option.
3. Standard wall mirror: So with a standard mirror, options abound. We could do something simple like a beveled oval or rectangular mirror:
Beveled oval mirror.
Rectangular mirror.
Or we could go with something with a little more graphic appeal like this one (chosen because it matches a backsplash we were and may still be considering):
Trelliage mirror.
For the simpler, non-tilting, non-blingy wall mirror options, we might still go with a simple sconce but an alternative would be a schoolhouse style light like this one:
Schoolhouse pendant.
So, dear readers, that just about covers it. Full mirror, tilting mirror, standard mirror, or something with a little graphic interest? Sconces or pendant? And, one final question: tin ceiling or no tin ceiling?
Thanks in advance for your help! The comments about our kitchen lighting received online and off were so helpful…we’ll of course share all final photos as a big “reveal” at the end of the renovation.


Recent Comments