Archive | General RSS feed for this section

All DONE! *(Almost)

25 Jun

We are so thrilled that the stoop restoration is all done! Well, that is, except for the final acid wash, which we didn’t realize would be happening. Apparently it takes a few weeks for the pigment to come to the surface on the brownstone steps, which they then acid wash away as the final step.  Beyond that slight color variation, the work is absolutely exceptional. The added detail is stunning and the overall feel is just wonderful.  Thank you sincerely to Brownstone Authority for their beautiful efforts.

The ironwork is equally transformative. Originally covered in layers of peeling thick brown paint, all that paint was removed and the ironwork underneath completely restored.  A number of balusters and both newel posts were replaced, railings were repaired, the fence and under stoop door were straightened and strengthened. I challenge anyone to figure out which components are replaced and which are restored – the care and attention taken by Forerunner Creations is really awe inspiring. We are so grateful that we found them for this work and know our ironwork could not have been in better hands. You can see more photos of their work on their website and on their Facebook page.

So, without further ado, our after photos:

IMG_7595 (1)

Oh hello! Come on in. Gate entirely stripped and repaired. Flipped around so it is now on the steadier side of the fence and much less likely to warp going forward. Beautiful new latch.

IMG_7600 (1)

The front view. Aaaaaaaaaah! So beautiful.

IMG_7593

The gate under the stoop with the new detail in the brownstone work. The new mailbox is by America’s Finest Mailboxes. It’s much larger than our old mailbox, though we will miss the old medallion.

IMG_7598

The newly straightened fence with all finials restored. The bottom rail needed replacing to keep it looking in great shape for years to come.

IMG_7601

One of the newly cast newel posts. Cast from the original, the cap is still the original piece but the remainder is from new materials. Amazing work.

IMG_7603

A view from our neighbor’s yard of their side of the stoop. Big thanks to them for allowing us access and for allowing our crew to remove the plants to make the job possible. We are really lucky to have such great neighbors.

IMG_7592

One more view of the complete staircase.

Like the tender buds of May…the balusters are blooming

2 Jun

Installation is here! A few shots from yesterday’s work by the wonderful folks at Forerunner Creations. We had the pleasure of seeing all the pieces unveiled in the morning yesterday, and they are a beauty to behold.  It is clearly a puzzle to put the components back so they perfectly align with the new stoop configuration, and rail 1 is shaping up very nicely. Most of the balusters on this side are restored rather than replaced, and the handrail is about 90% original.

IMG_7328

10 little soldiers.

IMG_7327

The newly cast newel without the finial.

IMG_7337

All installed, awaiting its mate.

IMG_7335

Side view.

Ironwork update May 2016

18 May

Spring is here and our ironwork is not far behind! We are thrilled with the progress made on our ironwork and are looking forward to an installation in the coming weeks. It sounds as if several components were worse off than originally projected (namely, the newel posts), but Forerunner Creations is doing an amazing job replicating the components in materials that will withstand 100+ more years of sleet, snow, rain and ice, much less the vagaries of humid summer here in Brooklyn. We are grateful for their efforts, precision to detail and sincere desire to make this project a showpiece.

Casting for the replicated newel post.

Casting for the replicated newel post.

stoop3

Baluster molds.

stoop2

Components of the newly cast newel posts.

stoop4

A thing of beauty: the newel posts standing proud.

stoop6

All our ducks in a row.

Stage 2 complete: scratch coat!

30 Mar

Phase 2 of the stoop restoration has been completed! The old steps were actually in pretty good shape, but the need to restore the ironwork meant than now was the right time to re-brownstone the steps. The area under the stoop had started to deteriorate a bit and there were some scars from the general renovation on the steps themselves, so although it is hard to take on such a big project all at once, we hope to not have to do it again in our lifetime!

Two pieces of great news: there was actually some beautiful original detail, covered over the years, which our great brownstone contractor J. Mos Browstone Authority was able to restore. It really adds a beautiful component that we can’t wait to see when the restoration is complete.

J. Mos and his entire team have been great throughout the process. On time, hard-working, extremely nice and very detailed in their efforts. The scratch coat alone is a thing to behold. Enjoy!

Detail on the side of the steps after demo.

Detail on the side of the steps after demo.

IMG_6716

Detail on the side of the steps after scratch restoration

Under the stoop after demolition.

Under the stoop after demolition.

IMG_6739

Under the stoop after scratch restoration.

Header above the gate after scratch restoration.

Header above the gate after scratch restoration.

IMG_6709

IMG_6735

IMG_6740

IMG_6736

Ironwork and stoop repair!

1 Mar

Hi all! I can’t believe it has been just over 2 years since we’ve posted. We’ve been living in our wonderful home and everything inside is still fantastic. The ironwork out front and the stoop, however, had not been refurbished with the rest of our project due to a lack of funds at the end of our renovation. Now that we’ve had a chance to recover a bit, we are tackling this work.

We were thrilled that the house retained its original ironwork out front, but the years have left it somewhat unstable and in need of attention. We searched and searched for the right company to restore the railings and our fence to its original glory, and we finally put a team together and are getting started.

We are so excited that Forerunner Creations will be doing the ironwork restoration and Brownstone Authority Inc. will be doing the stoop re-brownstoning. I attach a few before photos. More soon!

IMG_4271 IMG_4272 IMG_4273 IMG_4275 IMG_4276 IMG_4277


I’d like to thank the Academy…

22 Jul

So what did we really learn from all of this? Shopping is hard. So very, very hard.  If we never look at another door hinge, window guard, pipe elbow, pop-up drain or water filtration system, our lives will be better for it.

There are, however, a great set of people, resources and suppliers to whom we are truly grateful for their excellent work and service.  To those we could thank in person with pastries and good coffee, we salute you most of all. To the online companies who served us well, we will continue to thank you with our shopping dollars in the future (should we ever have the stomach to shop for anything ever again).  So, without further ado, thank you, thank you to:

THE BIG GUNS: Our crew

1. Our contractor, Frank Naccarato of Naccarato Contracting. The proof is in the pudding, but we have worked with Frank twice now and could not have imagined doing this project without him.

You will not find a more honest, reliable, detail-oriented contractor and crew than Naccarato Contracting. We were introduced to Frank, the company’s General Contractor, several years ago by friends who had used his company for the most stunning duplex. We didn’t hesitate to have Frank combine our two apartments in Manhattan and complete all the necessary interior work.

When we decided to move to Brooklyn, we didn’t hesitate to look at homes requiring significant renovation and ultimately bought a brownstone that required a gut. Our renovation was completed well ahead of the estimates most contractors would have given and we couldn’t be more thrilled. Every single detail is perfect, and anything that required adjustments along the way, Frank was extremely accommodating about. His crew was here every day – we never worried whether a plumber or an electrician would be by to complete their tasks or follow up on an issue.

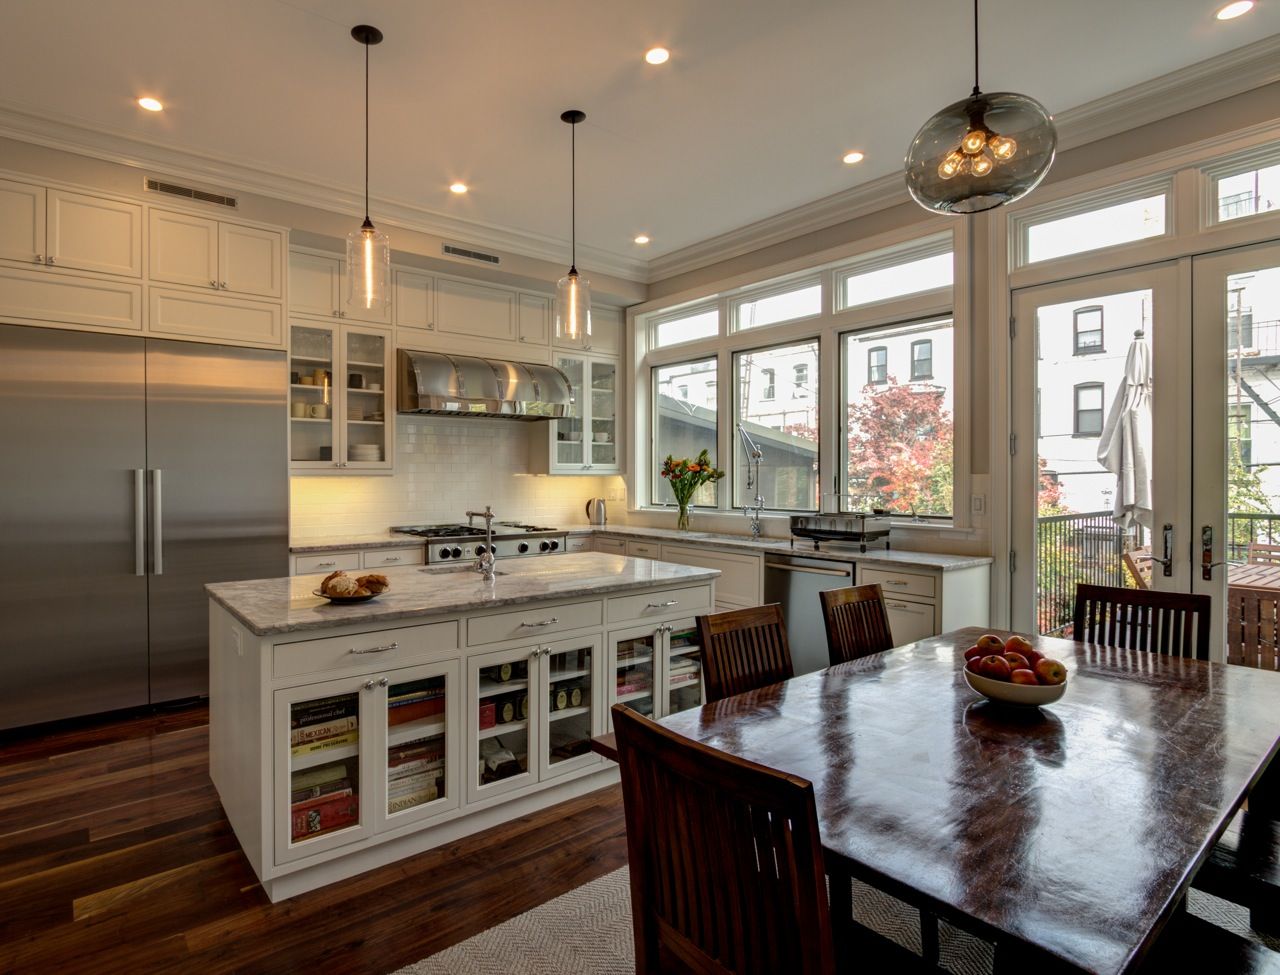
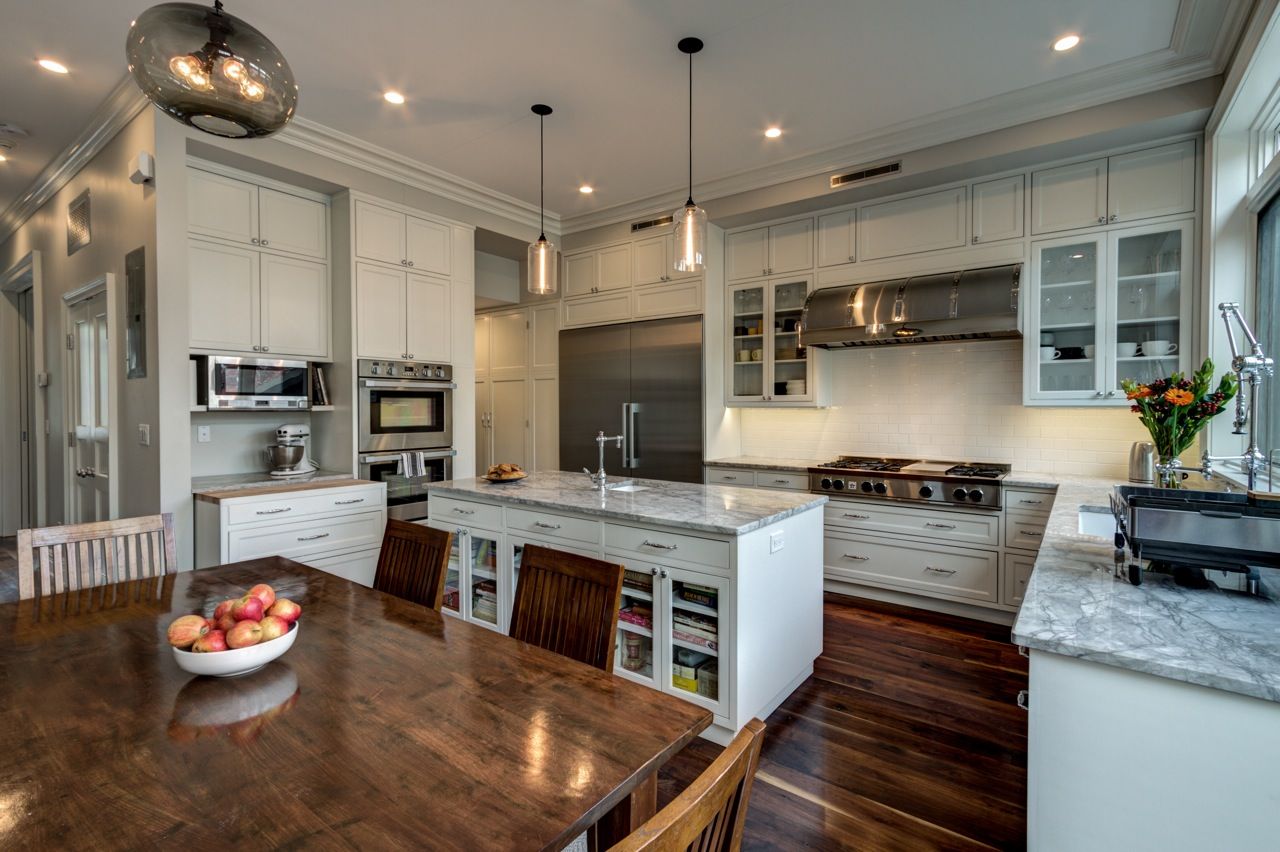
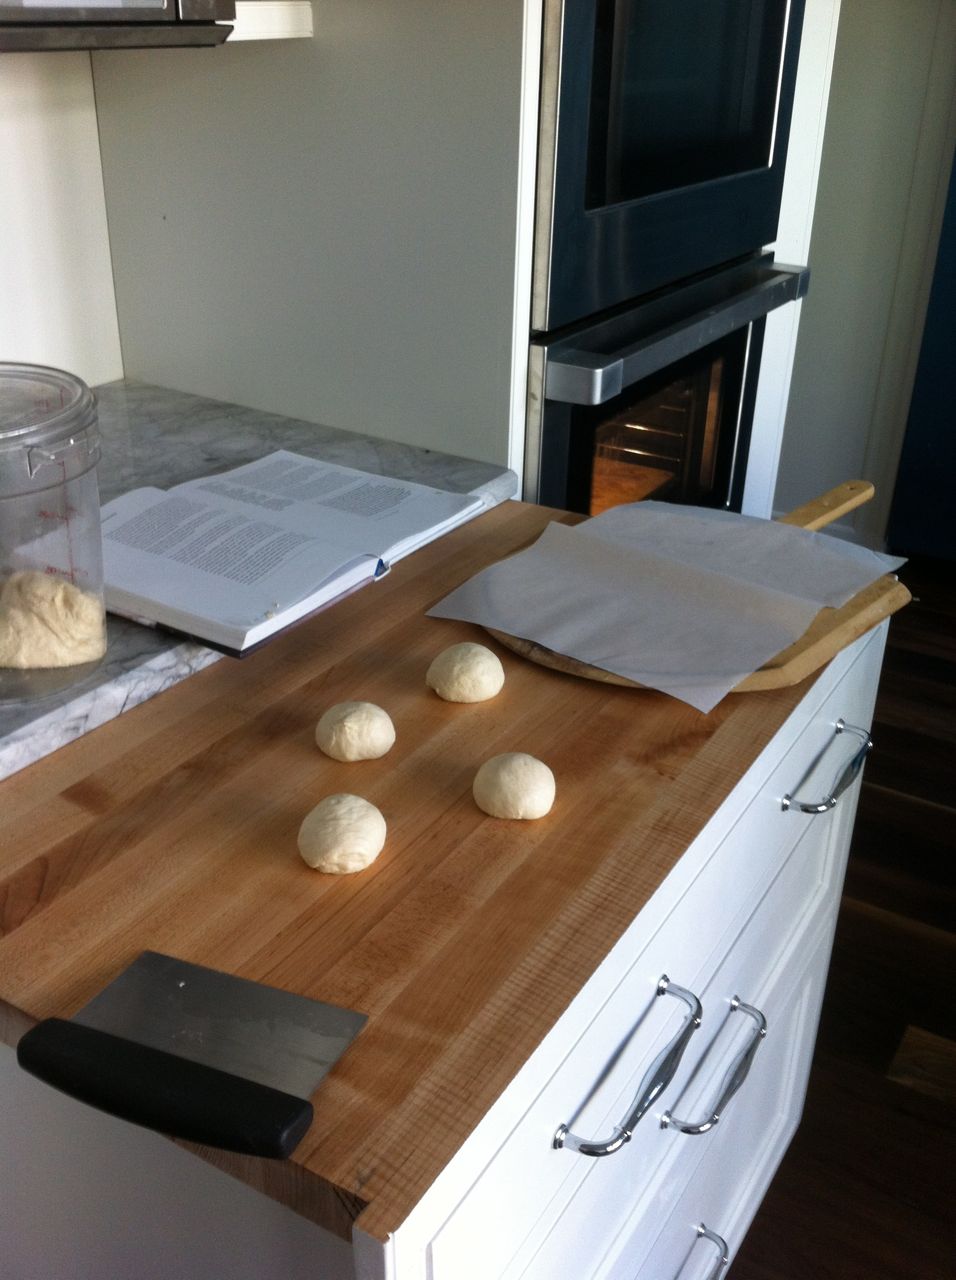
Frank has a real eye for detail that is really unusual, and he’ll always figure out a way to get even the most complicated requests done. I wanted a hide-away baking station as part of our kitchen renovation, and his final build more than exceeds my expectations. Frank also has a shop that makes it possible for him to build all of the cabinetry, including closets and vanities. We saved a bundle having him do it all.
I will NEVER do another gut as it’s just more work than anyone should have to endure and our home is already the pinnacle of our expectations. But, if I did, I wouldn’t go anywhere else.

2. Our architects, Ben Herzog Architecture We had a terrific experience working with Ben and the entire team. We actually found Ben through Houzz, having fallen in love with photos of his work on a previous project. We owe Ben and his team a great debt for their efforts and contributions throughout the process.

How do you codify the work of a great architect? They are part designer, part brainstorming partner, part devil’s advocate, part hand-holder, part task-master, part code enforcer and part freely-speaking trusted friend; Ben and his team were very deft in all areas, and we know our project sailed smoothly because of their effectiveness. Always calm, always on top of things, always willing to do whatever needed to get done when challenges arose, we had a real advocate and a partner in Ben Herzog, in Ben Herzog Architecture and in all of the corollary personnel on our journey with us (many of whom had been recommended by Ben).

3. Our expediter, Calvin Zeng of Anzalone: miracle workers, detail oriented, on top of everything. What more could you want from expediters?  They managed to get our complicated paperwork through very quickly at a difficult time (just after Hurricane Sandy) and always seemed to be able to get appointments far sooner than expected. They were diligent, thorough and followed things through to the letter to the end.

4. Our deck manufacturer Lopopolo Ironworks: Joe made the process of building our deck a breeze. He knew exactly what we wanted, quote a fair price, had an amazingly quick turnaround, and the deck is perfect.  Solid, comfortable to walk on, no issues with the DOB and exactly what we wanted. We wouldn’t hesitate to recommend him to anyone looking to complete a similar project.

5. Our plumber Scarponi and Sons: Our plumbers were great. We were on site every single day, and I have to say, the plumbing work was truly a thing a beauty.  The fact alone that Anthony Scarponi managed to turnaround the disaster that was our wall mounted faucet debacle and make it work is well-deserving of our highest recommendation.  Whenever a question has arisen since, they have been on-site or responded to questions in an extremely timely fashion.  Scarponi and Sons will be our plumbers for many years to come.

6. Our structural engineer Celin Munoz: Our structural engineer was terrific. He came in well under the rates of other engineers but in no way underworked the job. He was here regularly to check on the job (more regularly than expected), and he pushed all parties to go above and beyond the requirements to ensure our home will stand the test of time for generations to come.

THE VIRTUAL BIG GUNS: invaluable online resources

1. Houzz: this website was our muse. The incredible amount of inspiration one can glean from it is spectacular. There’s nothing like it. Truly.  We actually refer to our house at times as “the House that Houzz built,” it was that essential.  I cannot say enough about it.

2. Pinterest: An immensely useful way to save ideas, share them, hone them, etc.

3. Garden Web Forum – spent days researching on this site, particularly the incredibly useful appliance forum.  A great place to start your research on the real nitty gritty details of renovation.

4. Google Docs – Helped us keep track of everything that we could all access from anywhere.  A place to keep tabs on budget, required materials, where things were going to be purchased, when items were expected to be delivered, when items were going to be needed, etc.

BEST SUPPORTING ACTORS: our favorite suppliers

1. Home and Stone – Jerry was great as always! We purchased most of our tile through Home and Stone on Coney Island Avenue in Brooklyn.  Jerry is incredibly knowledgeable, patient and always willing to go the extra mile to make sure you get the best tile combination for the best price.

2. PC Wood Floors – great showroom in Sunset Park and the flooring couldn’t be more beautiful.  Unfortunately they weren’t able to help us with information on finishing the floors, but they did give us a stellar deal on the flooring itself, so no complaints.

3. AJ Madisonreal bargains on our appliances, which were a huge portion of our budget.  Priced everything elsewhere and brought the final list to AJ Madison. Not only did they match or beat all prices, they gave us a contractor discount on top.  We didn’t really use them to investigate our appliances so I can’t speak to whether their sales crew is particularly knowledgeable about deciphering what to buy.  If you are looking for that sort of service, we recommend Reno’s appliances in NJ.  Their staff was very helpful in the showroom, but they unfortunately weren’t as responsive when it came time to price the products.

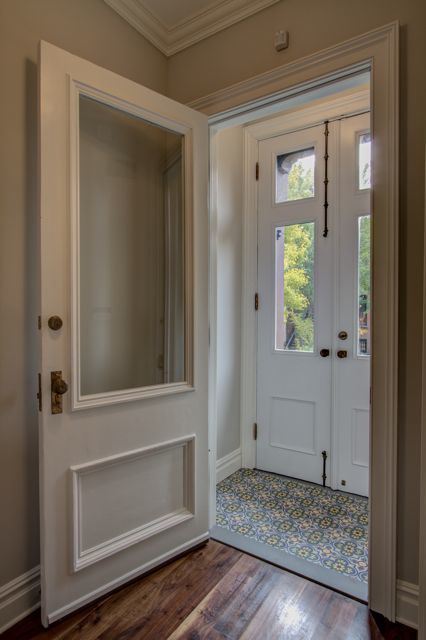
4. Cement Tile Shop: We wanted something playful in our entryway and looked and looked for the right tile.  We fell in love with encaustic cement tiles but wanted to choose our own colors, the size of the design, etc. without breaking the budget.  Jennifer at Cement Tile Shop was awesome.  She spent hours with us designing and pricing this very small but important space in our home.  We love the result and we are so pleased to highly recommend them.

5. Home Click: bathroom toilets, bathtub and parlour sink purchased from here. Great prices on Toto products.

6. Marble.com: We have now purchased all of the stone for two homes at the All Granite and Marble Corp. location in Ridgefield Park.  As (bad) luck would have it, this time around we knew exactly which stone we wanted in our kitchen, because we’d used that stone in our bathroom in our last renovation.  When we went to the showroom the first time, they were out of the stone.  We then went on a wild goose chase for 3 months looking for something comparable or even as a replacement. We went to several other stone showrooms in both Brooklyn and New Jersey, and we were amazed at how much more competitively priced marble.com’s prices were, plus how much easier the process would be. Many other places required that you purchase the stone in one place (whole slabs only) and then fabricate it elsewhere. Marble.com do it all in one place and you pay only for what you need. They offer the rest for smaller jobs, saddles, etc. and the price really reflects this. The installation is quick and incredibly well done.  We had an issue with the backsplash marble in our master bath that did cause a great deal of headache, but in the end, everything worked itself out and we continue to be happy to recommend this great showroom.

7. ABC Shower Doors : We’ve used ABC Shower Doors on 3 different projects and were very happy with all three. They do beautiful, clean work and their products and customer service are both terrific.

8. Lighting companies:

Niche Modern: Our beautiful kitchen fixtures came from Niche Modern. They regularly have 25% off sales and also have warehouse sales that promise deep discounts if you are able to schlep to Beacon, NY.
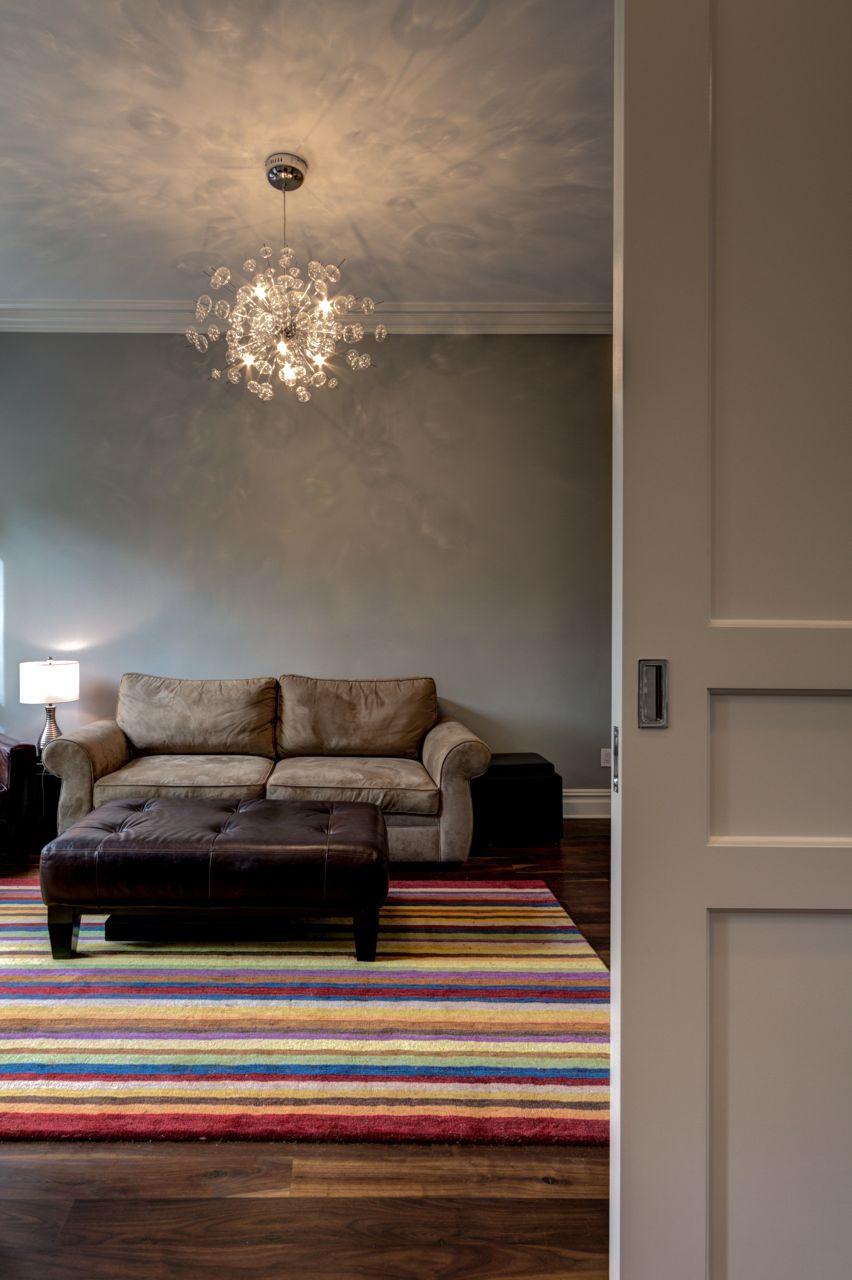
Clayton Gray Home: Our beloved living room chandelier came from here. Got a great deal with a 25% off coupon.

Lamps Plus: The old standby actually had some great deals on certain fixtures. They also have terrific customer service – when one or two items were either missing a bulb or had a broken component, they re-shipped without complaint. Not a great site for browsing, though, so we did generally look elsewhere as a starting point.

ZGallerie: Our master bedroom fixture is a great copy of a far more expensive piece and was made by ZGallerie.

Lightology: One of our favorite lights, our entry light, came from Lightology. They have great open box sales that can get you a terrific fixture at a fraction of the cost.

Ylighting: Not sure we ever actually bought anything here but it was a great place to search for lighting inspiration.

AllModern: Ditto.  Beautiful stuff, but again, not sure we ever purchased from here. Great place for browsing.

9. Mouldings, windows and doors

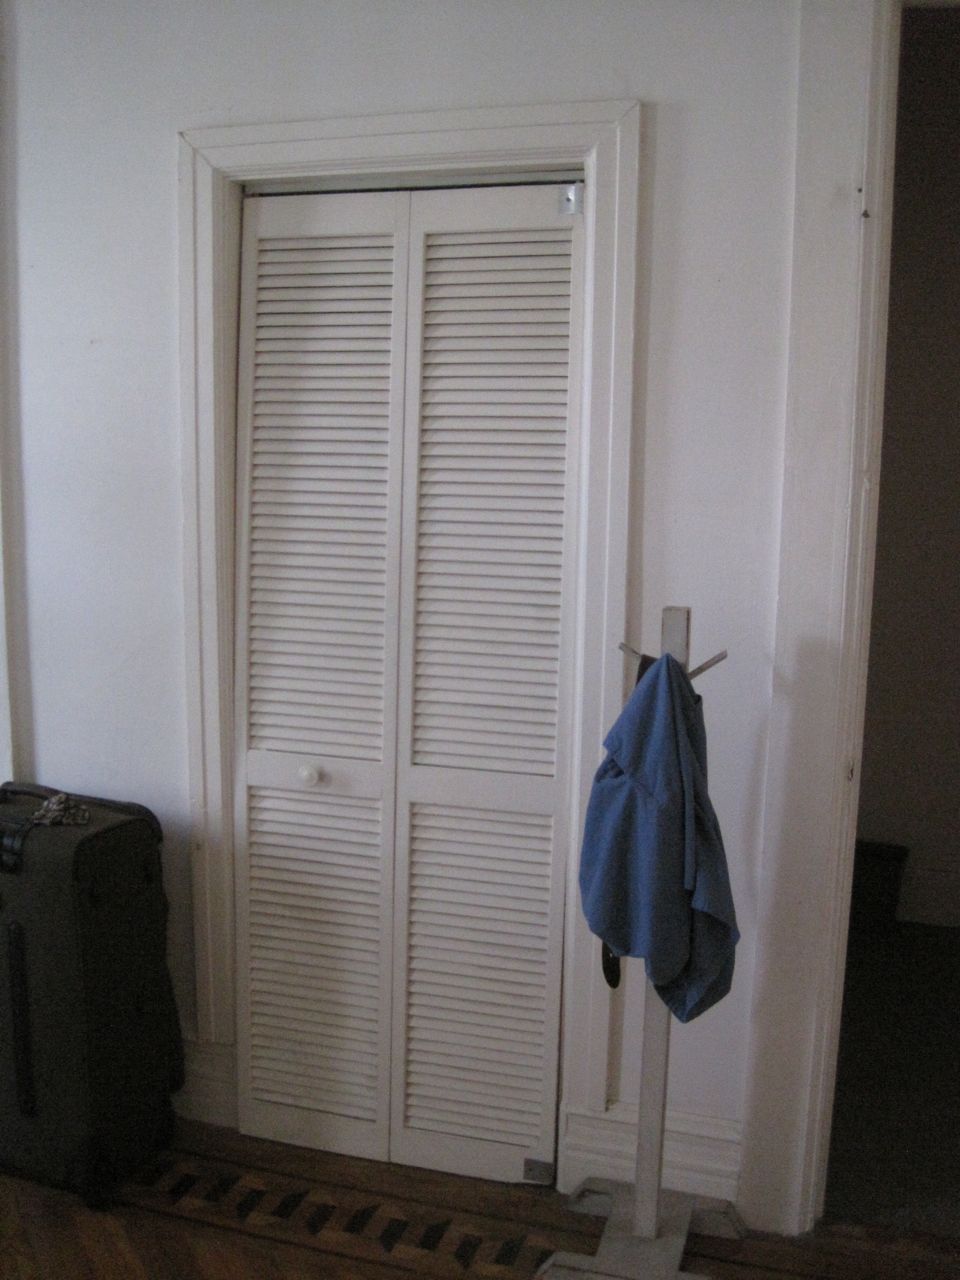
Brooklyn window and door: there were definitely some bumps in the road in terms of ordering our doors with Brooklyn window and door, but overall they are a very professional operation.  Our windows and doors are great and we are very happy with the final outcome.  Your money will be well spent getting solid, heavy doors – they make an enormous difference.  In terms of B W &D, one window came in sized incorrectly, but they turned it around quickly.  We also had an issue with getting the sticking on the doors right, and there was an upcharge that wasn’t mentioned (but we eventually convinced them to remove it due to the delays).  I would suggest if you go with them to hammer out the details as early as possible and insist on your timeline.  Also, if you want multiple quotes, don’t let them talk you out of them – our one regret is not having had them quote our windows with Marvin as well as Andersen.  We ended up with Andersen Windows and they are great, but you always wonder…in the end, I feel confident that we would use them again, but we might also request quotes from other sources.

Kuiken Brothers: absolutely beautifully crafted mouldings and casings.  Our parlour floor and some other areas of the home are outfitted with their products and the quality is noticeably higher end.  Definitely check out their products, but do get quotes from other sources if you are choosing a standard pattern.  They were able to meet or beat lower prices found elsewhere.  They also really saved us in a pinch when we ordered too little of one casing and THEN requested the wrong item to be delivered. They are a great honorable company with beautiful products.

Architectural depot: we were really eager to find a beautiful crown in our parlour floor to replicate the style of the original house, and architectural depot was a terrific source.  Really useful source.

10. Miscellaneous

Quality Bath: we bought the bulk of our bath fixtures from Quality Bath. We definitely bought a few things further in advance than we would have liked to take advantage of Black Friday specials, but in the end, we were very happy with just about everything (except for the wall mounted faucets – never too late to keep dissuading others from using them)

Wayfair: what a great site for all sorts of materials! From lighting to door stops to dish racks and decor. Plus they have a rewards program and offer kickbacks for leaving reviews. Love it.

Hay Needle: We purchased a number of lights, including our ceiling fans, from Hay Needle.

Trueform Concrete: concrete sink in the garden bathroom

Hardware Designs: our Lacava vanity was purchased from Hardware Designs. They had a great showroom in Fairfield, NJ and excellent staff. Incidentally, there are a TON of great bathroom, appliance and tile showrooms in Fairfield (Reno’s appliance, Mediterranean Tile, etc.), so if you are still in the early browsing phase, it’s a great place to go.

FLOR: carpet tiles in the playroom and kitchen. If you go this route, make sure you get a carpet pad for underneath, or they will continually slip and slide. Not sure if we would do this again – might actually prefer to get an inexpensive carpet that we’d have no qualms getting rid of a few years down the line.

Simpson Hardware - Cheap Emtek hardware.

A&H Turf – Cheap inserts for Blum cabinetry.

Home Hardware 4 Less - Always check here before ordering Emtek hardware. Sometimes had better deal than #12.

Amazon – not a huge surprise, but Amazon was also a great source for bathroom accessories.

***************************

I’m sure there are specific vendors we have missed, so if you have specific questions about anything featured on our blog, drop us a note! Having gone through this process both here and in our previous home, we know how incredibly stressful the renovation process can be. We relied a great deal on the wisdom and advice of others at many points in this renovation, and we are happy to pay it forward.  So, if you are embarking on your own project soon, good luck!!  Try to keep that beer cooler full and your swear jar empty.

Drumroll please…parlor floor before and after

7 Feb

And without further ado, the heart of our home.  *Please note: you can click photos for a larger version. There were so many in the post that the larger shots slowed the page down substantially*

The parlor was previously the top floor of the lower duplex space.  In the entry way, there was a large wall running along the staircase leading up to separate the two apartments.  That wall was removed to allow a much more pleasing view right as you enter the house.

ENTRY BEFORE:

The entry had an old stone slab with a diamond pattern in the center. We had hoped to preserve it but it unfortunately was damaged significantly during demolition.

IMG_6070


ENTRY AFTER:

IMG_0674_5_6_fused

Custom tile from the Cement Tile Shop lines the entry way, the old safety grates were removed from the front doors and extra lighting was added out front and in the entry vestibule, making what was a dark space into a welcoming entry point.


IMG_8156

We spent many an hour designing the color scheme of this tile, and the folks at the Cement Tile Shop couldn’t have been nicer. We are very happy with the final results.


PARLOUR STAIRS BEFORE:

The stairs heading up to the top floor were made of some odd non wood substance and they were edged by bands of metal.  The handrail was a beautiful mahogany piece but it unfortunately got chopped up when one of the early owners of the house split the home in two.  We had hoped to incorporate it into our new handrail, but holy cow is mahogany expensive to replace.  We hadn’t anticipated replacing the stairs altogether, but they were virtually collapsed after a few weeks of work, so everything is now new. We’ve kept the original handrails and hope to perhaps redo the rail at some point down the road.

IMG_6064

Parlour stairs leading to the top floor before. Not the heavy plaster wall on the left, which was removed to rejoin the house into a one family home.


living to entry

View of the stairs from the living room.

post

Refinished post close up.


View from the front to the back of the house. Wonderful to see out to the yard right when you enter the home. Makes for a really simple but dramatic entry vista.

View from the front to the back of the house. Wonderful to see out to the yard right when you enter the home. Makes for a really simple but dramatic entry vista.


We did, however, restore and have refinished the original parlor post, which we love having as our solid totem when our guests arrive.  It had been painted heavily in black, but it turns out that it had a beautiful inlay piece on all sides.  The light fixture is from Lightology. The wall color is light pewter. The entry doors are also the original doors.  The pocket doors are new and were supplied by Brooklyn Window and Door. The post and original doors were restored by the Tinker’s Wagon.

FRONT ROOMS BEFORE:

The front two rooms were originally used as bedroom and storage space for the previous family.  They were good sized spaces with potentially high ceilings (the ceilings were dropped) and we were hoping there was crown moulding we might be able to keep. Again, the creation of the apartment upstairs meant that the moulding under the dropped ceilings was actually chopped up and in some disrepair, and given the heavy cost of removing over 100 years of paint with little hope that the fragile surface would sustain the construction above, we opted to replace with something similar.

IMG_6077

IMG_6076

IMG_6073

LIVING ROOM AFTER:

IMG_0659_60_61_fused

IMG_0653_4_5_fused

Print by James Michalopoulos.  A wedding present from some dear friends, it somehow now captures the spirit of our home renovation process and holds a place of pride in our living room.

Print by James Michalopoulos. A wedding present from some dear friends, it somehow now captures the spirit of our home renovation process and holds a place of pride in our living room.


The chandelier is the Solaria Bubbles Chandelier, purchased from Clayton Gray Home. We waited for a nice coupon and are glad we did – it gives off the most amazing light in the room and makes everyone a little giddy when they walk in the space.  The wall color is Coventry Gray by Benjamin Moore, and trim work here (and in the rest of the house) is Benjamin Moore White Dove. The crown is from Architectural Depot and the moulding around the windows and baseboards is from Kuiken Brothers. Shutters are by Devenco (shutterblinds.com), also known as Americana. Flooring is again 5 inch wide character grade American Black Walnut, as it is throughout the house.

The room needs to be decorated at some point, but that may be years down the road after our young children have done their best to put their own “stamp” on our hum-drum safe Pottery Barn furnishings and Safavieh rug.  For now, we’re just happy to have a room to sit and share with friends and family.

MIDDLE AREA BEFORE:

The middle area of the parlour was a railroad room with a couple of closets connecting the front bedroom to the back bedroom.

IMG_6093

One of the scarier closets in the middle area.


PANTRY AND PARLOUR BATHROOM AFTER:

The middle area now includes a coat closet, pantry and parlour bathroom.

IMG_0671

IMG_0663

Our beloved rooster man painting from the very talented Edyta Franczak.

Parlour bathroom. Color is Benjamin Moore Baja Dunes.

Parlour bathroom. Color is Benjamin Moore Baja Dunes.


Sink and toilet are Toto Promenade, Tilting mirror and sconce are Restoration Hardware. Faucet and fixtures are Jaclo Roaring 20s line.

MASTER BEDROOM BEFORE:

It had a master bedroom in the back with a small bathroom and a large closet off to the right.

Master bedroom before.

Master bedroom before.

Master closet before. This is where our dining room is now.

Master closet before. This is where our dining room is now.

KITCHEN AFTER:

The kitchen was were we (and our contractor, engineer and architect) put our blood, sweat, and tears (read: every last cent) and we enjoy every minute we spend in here. It is the space we fantasized about for years and I still pinch myself daily that I get to cook and live in this amazing space.

IMG_0590_1_2_fused-1

IMG_0617_8_9_fused


IMG_0632_3_4_fused

IMG_3472

Hood is custom made by Modern Aire; rangetop is 48 inch with grill by Bluestar (best money ever spent); dishwasher is the Bosch 800 Plus Series; Miele fridge and freezer really are as enormous as they look and we love ever inch of them (36 inch fridge, 30 inch freezer – both counter depth, so in truth they are surprisingly shallow and thus not as big as you’d think) – we frequently fill them with cakes, stock, confections for upcoming parties, you name it; ovens are DCS (finicky but do a great job and have the best broiler I’ve ever seen in an electric oven); sinks by Blanco; Sharp under cabinet microwave; faucets by Waterstone, and yes, the main faucet is a work of art and a functional marvel.  Countertop is Super White (White Quartzite) supplied by Marble.com.  Cabinets were custom made by Naccarato Contracting (wood painted White Dove by Benjamin Moore in a satin finish).  Hardware is by Alno.  Lighting by Niche Modern.  Carpet tiles by FLOR. Wall color in the kitchen is Light Pewter by Benjamin Moore. The baking station slides in an out and was designed to be at the lower level that is preferred for bread kneading (maple top is by Boos).  Dining room furniture is by Crate and Barrel. Dish drying rack by Simple Human.

And yes, in case you were wondering, it is often the case that we have at least 4 of the burners and the grill on simultaneously. Huzzah.

Thanks to all for following on our great journey with us!  If you are reading this blog because you are in the midst of or about to embark on a renovation journey, GOOD LUCK!!! While so many days are painful and tedious, scary and full of anticipation, remember one key thing: like childbirth and plane rides to far away exotic places, renovation is a long and painful process which ends eventually, and everyone who goes through it has a story to tell in the end; hope yours is a good one.


Drumroll please…top floor before and after

30 Dec

The top floor was originally a separate 1 1/2 bedroom apartment, with a kitchen, bathroom, living area, and the typical small bedroom with one window, larger bedroom with 2 windows combination that is so common in Brooklyn brownstones. We wanted to transform this space into 3 bedrooms, 2 bathrooms, a linen closet, a laundry area AND keep the required access to the roof. A tall order, but nothing brownstoneboy, a protractor, scientific calculator and some good old fashioned ingenuity couldn’t solve.

First, the two kids bedrooms, to be constructed from the small/larger bedroom duo. There are a few ways to tackle this issue:

1. Leave the walls as is, otherwise known as the “who’s your favorite child” solution.

2. Make a zig zag wall, leaving one room with two windows, but giving them effectively the same amount of floorspace. Each room would have a large nook for a desk or bed.  Had our architect not come up with a really great alternative, we would have gone this route

3. Make a diagonal central wall.  I can certainly see the appeal of this in a more modern renovation, but we’re just a little too traditional for that solution.

4. The “King Solomon” solution: splitting the baby right down the middle.

We chose door number 4 and are very happy we did.  Both rooms feel ample enough, they get an equal amount of light, and there’s a fun secret chat window that our kids can leave open or closed. The dividing wall is extra insulated, and there’s soundproof, weather-stripped push latch windows as a secondary inner window.  The exterior window remains untouched, and the new shutters we installed are left closed, so that you’d never notice the solution from the outside. Genius.  Thanks again to Ben Herzog for this brilliant solution!

So, without further ado:

TOP FLOOR Larger BEDROOM BEFORE:

Front bedroom

Perfectly usable front bedroom before. But, as I said, King Solomon solution would be employed.


TOP FLOOR LARGER BEDROOM AFTER:

Brownstonetoddlerboy’s room. He alternately loves and fears the stars. The split window is on the left. Color is Benjamin Moore Silvery Blue.

Note the effort to find a similar moulding and the work on the split window.  Another item makes this bedroom feel more spacious: both chimneys in the house were removed (note the chimney on the right hand side of this room). Neither had working fireplaces, so it made for less complicated room shapes to remove them altogether.  It certainly would have been nice to restore one of them, but budgets are what budgets are, and with no fancy mantel to hold on to, it seemed the better option.  Also, note how much higher the ceilings are in the after: there was actually an additional foot of space above the ceiling, so the front room ceiling height is now over 10 feet, making the smaller rooms feel far larger.

The shutters are new and were created by Devenco at www.shutterblinds.com. We highly, highly recommend them.  They are a great company and do beautiful work.


TOP FLOOR SMALLER BEDROOM BEFORE:

Smaller room used as an office before. Dark and really too compact to be used as a bedroom.


TOP FLOOR NURSERY AFTER:

Brownstonebabygirl’s room. Color is Golden Straw, same as the playroom.


TOP FLOOR HALLWAY BEFORE:

IMG_6060

Hallway before. Technically, the Kids’ Bathroom is where this hallway really was before, but it serves as a visual.

A view of the before hallway in the other direction. This was the tenant apartment kitchen before, now part of our master bedroom.

A view of the before hallway in the other direction. This was the tenant apartment kitchen before, now part of our master bedroom.


TOP FLOOR HALLWAY AFTER:


TOP FLOOR BATHROOM BEFORE:

Upstairs bathroom before.

Upstairs bathroom before. Standard tub shower configuration – nothing wrong with it, just not located where it needed to be.


KIDS’ BATHROOM AFTER:

Kids bathroom after. Paint color is Iced Slate by Benjamin Moore. Grout is

Tile is penny tile from Supah Fish (Matte White Penny Rounds and Blue SD 244 Penny Rounds purchased from BuyTile.com).  We went with a slate grout on the floor, which is SO much easier to keep clean than a white grout. Sink is the Aquamedia line by Lacava (42 1/2 inches wide with double sinks) in cherry. Vanity mirrors are by Pottery Barn, light fixture by George Kovacs. There was originally a skylight in the upstairs bathroom but it was in a slightly different location. It was moved and modernized and makes all the difference with the interior windowless bathrooms so common in Brooklyn.


TOP FLOOR BACK ROOM BEFORE:

IMG_6057 IMG_6056


The top floor back room was the living space in the old tenant apartment. Note the chimney, which has since been removed, leaving more space for shoes!

TOP FLOOR MASTER AFTER:

Master bedroom.  Paint color is River Reflections by Benjamin Moore.

Custom wall to ceiling closets were a compromise instead of a walk-in closet, but we’ve got his and hers on either side, and our bedroom feels far more spacious than if we had opted for the walk in. Overhead light by zGallerie, bed and tables by Pottery Barn, door hardware by Emtek. No window treatments yet, but we’ll get there!

TOP FLOOR MASTER BATHROOM AFTER:

Our master bathroom. Color is Grey Owl by Benjamin Moore.

There was no ensuite bathroom in the old tenant apartment, but we made that a priority in the limited space. We’re very happy with the results.

Double showerheads were a must (these are by highpressureshowerheads.com and are spectacular). Doors were done by ABC Shower Door, vanity is 60 inch custom mahogany veneer over solid maple, created by our wonderful contractor, Naccarato Contracting. Stone and backsplash are white quartzite from marble.com. Wall-hung faucets (aka my nemeses) and all accessories by Grohe. Mirror and lighting by Robern. Sinks are Kohler Archer undermount sinks in White. Drains are Kraus PU-11CH Pop Up Drain with Overflow, Chrome (I know it seems silly to mention the drain, but we had a hard time figuring out what sort of drain is needed with an undermount sink and wall mounted faucets. These were the right kind). The skylight is new. Tile is Akdo basketweave carrera bella with lunar gray glass dot inserts, carrera bella 3/4 inch mosaic in the shower floor, and Canco’s white wall tile on the shower walls. Thermostatic valves in the shower are by Grohe Atrio.

Best thing in the bathroom, though, is the fan on a 60 minute timer (see our previous post on the 5 best things we’ve done thus far).  Not a mildewy towel among them.

TOP FLOOR LAUNDRY AFTER:

Laundry.

Laundry.


One more item needed to be squeezed into the top floor: the laundry. The laundry was off of the garden floor kitchen in an extension that has since been demolished, so we wanted it to be accessible in the most practical space. If you can put your laundry near your bedrooms, we highly recommend it (with extra thick doors for those late night washing/drying emergencies).

Machines are Electrolux IQ Touch. Great machines, though if we were to do it again, I’d recommend the Wave Touch. The salesperson we initially spoke with swore the machines are identical, but the Wave Touch has one feature (alternating tumble) that would be nice to have for keeping sheets untangled during extended tumble periods. Regardless, they really are amazing machines and we are very happy with them.

The top floor was truly a jigsaw puzzle and the rooms aren’t huge, but we’ve managed to fit everything we need for 2 adults and 2 kids in the space. Each room is light and bright, and the whole space really flows well.

Next up, the final space: the parlor floor! We are saving the best for last.

Drumroll please…garden level before and after

15 Dec

All inspections finally behind us, the packaging removed from the appliances, the permits down from the windows and the lovely sounds of birds, children and other people’s construction far, far away all that remains, we are at last ready to share the final results of our year long journey down the Brooklyn Brownstone Renovation Rabbit Hole.

So, without further ado, here are the before and afters, floor to floor. We’ll save the parlor for last:

GARDEN FLOOR:

The front room is our office/gym and is yet to be properly set up.  We’ll leave that space to your imagination for now but will edit this page once it is organized.  It was originally a living and dining set up and is now our catch all room that hurts to think about getting into order. We’ve started to sift through things, but I’d give it another 6 months before it will be in ship shape.

GARDEN ENTRY BEFORE:

The garden entry area was originally a dark, carpeted space that was impeded by a large closet area.  We removed that closet and plan to update with a more open set of mudroom furnishings in the next year or so.

Garden entry before

GARDEN ENTRY AFTER:

All cleaned up, nice and wide for stroller storage, the aforementioned mudroom area yet to be defined.  The color on the wall is Benjamin Moore Light Pewter, a great neutral light grey that seems to blend very well with all color schemes; it is used in all hallways throughout the house.  All trim in the house is Benjamin Moore White Dove.

We were able to strip and refinish the original post, but all handrails and staircases are new in the house.  The doo-dads on the walls and ceilings are the thermostat for the new HVAC system, alarm system components, doorbell (different ring tone for the garden and parlour that sound throughout the house) and other niceties.  The doors are 5 paneled doors meant to replicate the feel of the original doors in the house. They were purchased from Brooklyn Window and Door and are 1-3/4″ MDF door with Ovolo Sticking w/ 5/8″ flat panel, Karona brand. It was a pain to get these right, but they are beautifully solid, quite soundproof doors, and we are glad to have the extra thickness.

Post has been restored, floors redone, cabinet removed, clean view to the back bathroom.

The house’s original post has been restored, floors are character grade walnut from PC Wood Floors with a Bona oil modified finish. The old entry cabinet was removed, and there is now a  clean view to the back bathroom.

The back of the garden floor was originally a kitchen and bathroom space.

GARDEN BATHROOM BEFORE:

Garden bathroom pre-renovation. Wish we could have saved the wallpaper, if only for posterity!

Other end of the bathroom.

GARDEN BATHROOM AFTER:

Our garden bathroom. Concrete sink, saddles and tub surround from Trueform Concrete (custom Lavare sink, 48 inches, wood base color is Chocolate, concrete color is Cobblestone), Kohler soaker tub in the shower/tub wet room. Floor tile is honed Akdo Slate Trellis in Desert Sand. Wall tile is 4 x 12 glossy tile in Medium Gray (purchased from Home and Stone on Coney Island Ave. in Brooklyn). Wall color is Tapestry Beige.

Cobblestone

NORTH GARDEN ROOM BEFORE:

The North Garden room was the original location of the kitchen. It was a nice sized space but we wanted our kitchen to be on the parlor to maximize the light. We also wanted to create direct access for our future playroom out to the garden, so everything in this space was replaced.

The wall on the right had an odd shape and of course needed to be reconfigured. The door lead to the old extension, which we discuss below.

This old kitchen treated us well for the few months we lived here before our plans were approved. However, it all had to go!


PLAYROOM AFTER:

Playroom looking out.

What was once a dark, dated kitchen is now a playroom for our kids and their friends. Color on the walls is Benjamin Moore Golden Straw. White organizational units are from IKEA, carpet tiles from FLOR. Fan is Minka Aire – 52″ Concept II 3 Blade Ceiling Fan in Oil-rubbed bronze finish (and oh so quiet). It is so light and bright and has great access to the backyard. TV not yet installed and we’re still sitting on our old futon, but there will hopefully be time (and funds) for niceties next year.

EXTENSION BEFORE:

Extension

Original extension off the back of the house. It wasn’t built well and thus would either need to be rebuilt to code or demolished. We opted to remove.

BACK OF THE HOUSE BEFORE:

Extension.

Outside view of the extension.

Back of the house looked fairly standard.

BACK OF THE HOUSE NOW:

New back of the house freshly painted white with black trim. Newly poured concrete a great place for the kids to play. Windows and doors are Andersen A Series.  External lighting, electrical and plumbing added.

The steel deck (by Lopopolo Ironworks) lies about where the extension once was and new glass sliding doors give easy access from the playroom to the outdoors. Deck furniture from IKEA.

Next up, we’ll cover the top floor!

Where the magic happens…

3 Aug

So we are officially at the punch list phase with fewer than 50 items, big and small, left to go.  Small items include things like touching up a paint spot here and there; larger things include finishing the pantry or redoing a broom closet that ended up extending too far to allow our mammoth fridge door to open. Our contractor’s team is trucking through it all, but some require outside finish work, and these things just take time.

In the interim, here are some photos of our 90% finished kitchen. Missing is the finish work on the pantry, the panel work around the fridge and freezer (more on that below), the aforementioned broom closet, the final installation of our baking station and the final bit of moulding at the top of the cabinets to tie it all together. Nearly there!

Regarding the fridge/freezer: a few works of advice for anyone intending to purchase the Miele fridge/freezer combo: they are awesome. They look huge, but the counter depth actually means they store less than you think, but the quality is top notch. It’s amazing how much longer things stay fresh. We’re very pleased with their function.

What aren’t we pleased about? The whole overall installation process. These babies come with a fancy monitoring system that will actually send you an email when something has gone awry. However, one needs to have a PhD in Miele refrigeration to be able to install them. Luckily, they are willing to send a technician out who will hopefully help us through the process.  Another point of frustration is that the units require merging kits and heat pads that weren’t supplied, and we weren’t informed by our salesperson about the need to use them.  We thankfully hadn’t finished the panel work, but even still, this has created a bit of a spacing issue. If you do decide on this duo of pricey appliances (or any other) be sure to ask your salesperson about any installation accessories you might need to complete the job.

Ok – on to the kitchen! More complete photos to come once our terrific architect, Ben Herzog, is able to come in and take fancy shots:

Our beautiful Modern Aire hood.

Our beautiful Modern Aire hood and Bluestar range top. Paper will be removed ceremoniously when all work is finally completed!

We opted for Super White Quartzite (beautiful), a Bluestar 48 Range with grill (awesome), a Modern Aire hood (powerful and really beautiful), beaded face-frame cabinets in White Dove and Alno pulls (heavy, beautiful and very high quality). The mess in the cabinets and corner will be eliminated once our pantry is finished.

IMG_8186

Miele fridge and freezer, Bella pendants from Niche Modern, prep sink by Blanco, prep faucet by Waterstone, double ovens by DCS. Unfinished pantry and missing framing around the fridge and freezer visible.

So far, the DCS ovens have been a little dicey. The upper oven often seems to be heating up but ultimately doesn’t, and they take forever to cool down (emitting a fan noise for hours after they are turned off). When they do cook, they are sensational, but we’re already scheduled for our first service call this week. Here’s hoping they can repair the problem, but a word to the wise for those in the market.

IMG_8174

Main sink faucet by Waterstone, main sink Blanco Silgranit. Structural opening was pricey and time consuming, but she sure is pretty.

This faucet really is a sight to see, and the function is top notch. It does however have a design flaw: the hand spray gets extremely hot to the touch. We’ve contacted Waterstone to notify them of the issue, but alas, we’ve not heard back. Again, something to consider.

View to the dining area from the entry point of the house. Niche modern light fixture, Anderson doors to the deck.

View to the dining area from the entry point of the house. Niche modern light fixture, Anderson doors to the deck. Our home’s original post all cleaned up.

Dining area up close. Carpet tiles by Flor, dishwasher Bosch 800 Plus series. More dreamy glass to flood our home with light from sun up to sun down.

Dining area up close. Carpet tiles by Flor, dishwasher Bosch 800 Plus series (still covered). More dreamy glass to flood our home with light from sun up to sun down. Amazing drying rack by Simple Human visible on the left of the photo.

View looking back from the kitchen to the front of the house. Light fixture purchased at Lightology, Sharp under cabinet microwave on the right - cabinetry not complete around or below for our baking station.

View looking back from the kitchen to the front of the house. Light fixture purchased at Lightology, Sharp over the counter cabinet depth microwave on the right – cabinetry not complete around or below for our baking station, which is now serving as the construction materials way station.

We were able to restore the original front door and front interior door, but unfortunately the beautiful etch glass that the secondary door contained was shattered in the process. We really had no choice about doing the work because the doors needed new locks and a fair bit of love overall, but it really was a shame to lose the beautiful detail.

We hope our next post will be a final “before and after” of the whole house room by room! Wish us luck for the next phase – the final DOB inspections.