Master bath…or, hallelujah, no more kicking the potty!
7 Apr
When you go from rental to rental for what seems like years (and in our case, actually was years), you end up compromising on lots of things. In just about every sublet we stayed in, we were lucky to have a space large enough to hold all the standard toddler trappings (potties, bath toys, etc.) but not much more than that. It was therefore imperative for us to make sure we had a master bath separate from the kids’ bathroom, not a small feat on a floor already tight with 3 bedrooms and a laundry room!
Our master bath won’t be enormous and won’t have a tub, and our bedroom itself will not have a walk-in closet, but we feel this is a worthy trade off for a pretty, clean bathroom space of our own. Here are some of the highlights of our bathroom choices:
Tile and Wall Paneling
Floor tile: this was one of the first items we selected in the house. Having seen this beautiful basketweave carrara bella tile with gray glass dots by Akdo, we were instantly smitten. Another version had blue glass dots, which was even more to our liking, but the thassos main portion of the tile would have been far too much effort to maintain, so gray dots it is.
Shower floor tile: we are carrying the carrara bella into the shower with a 3/4 by 3/4 mosaic floor, also by Akdo.
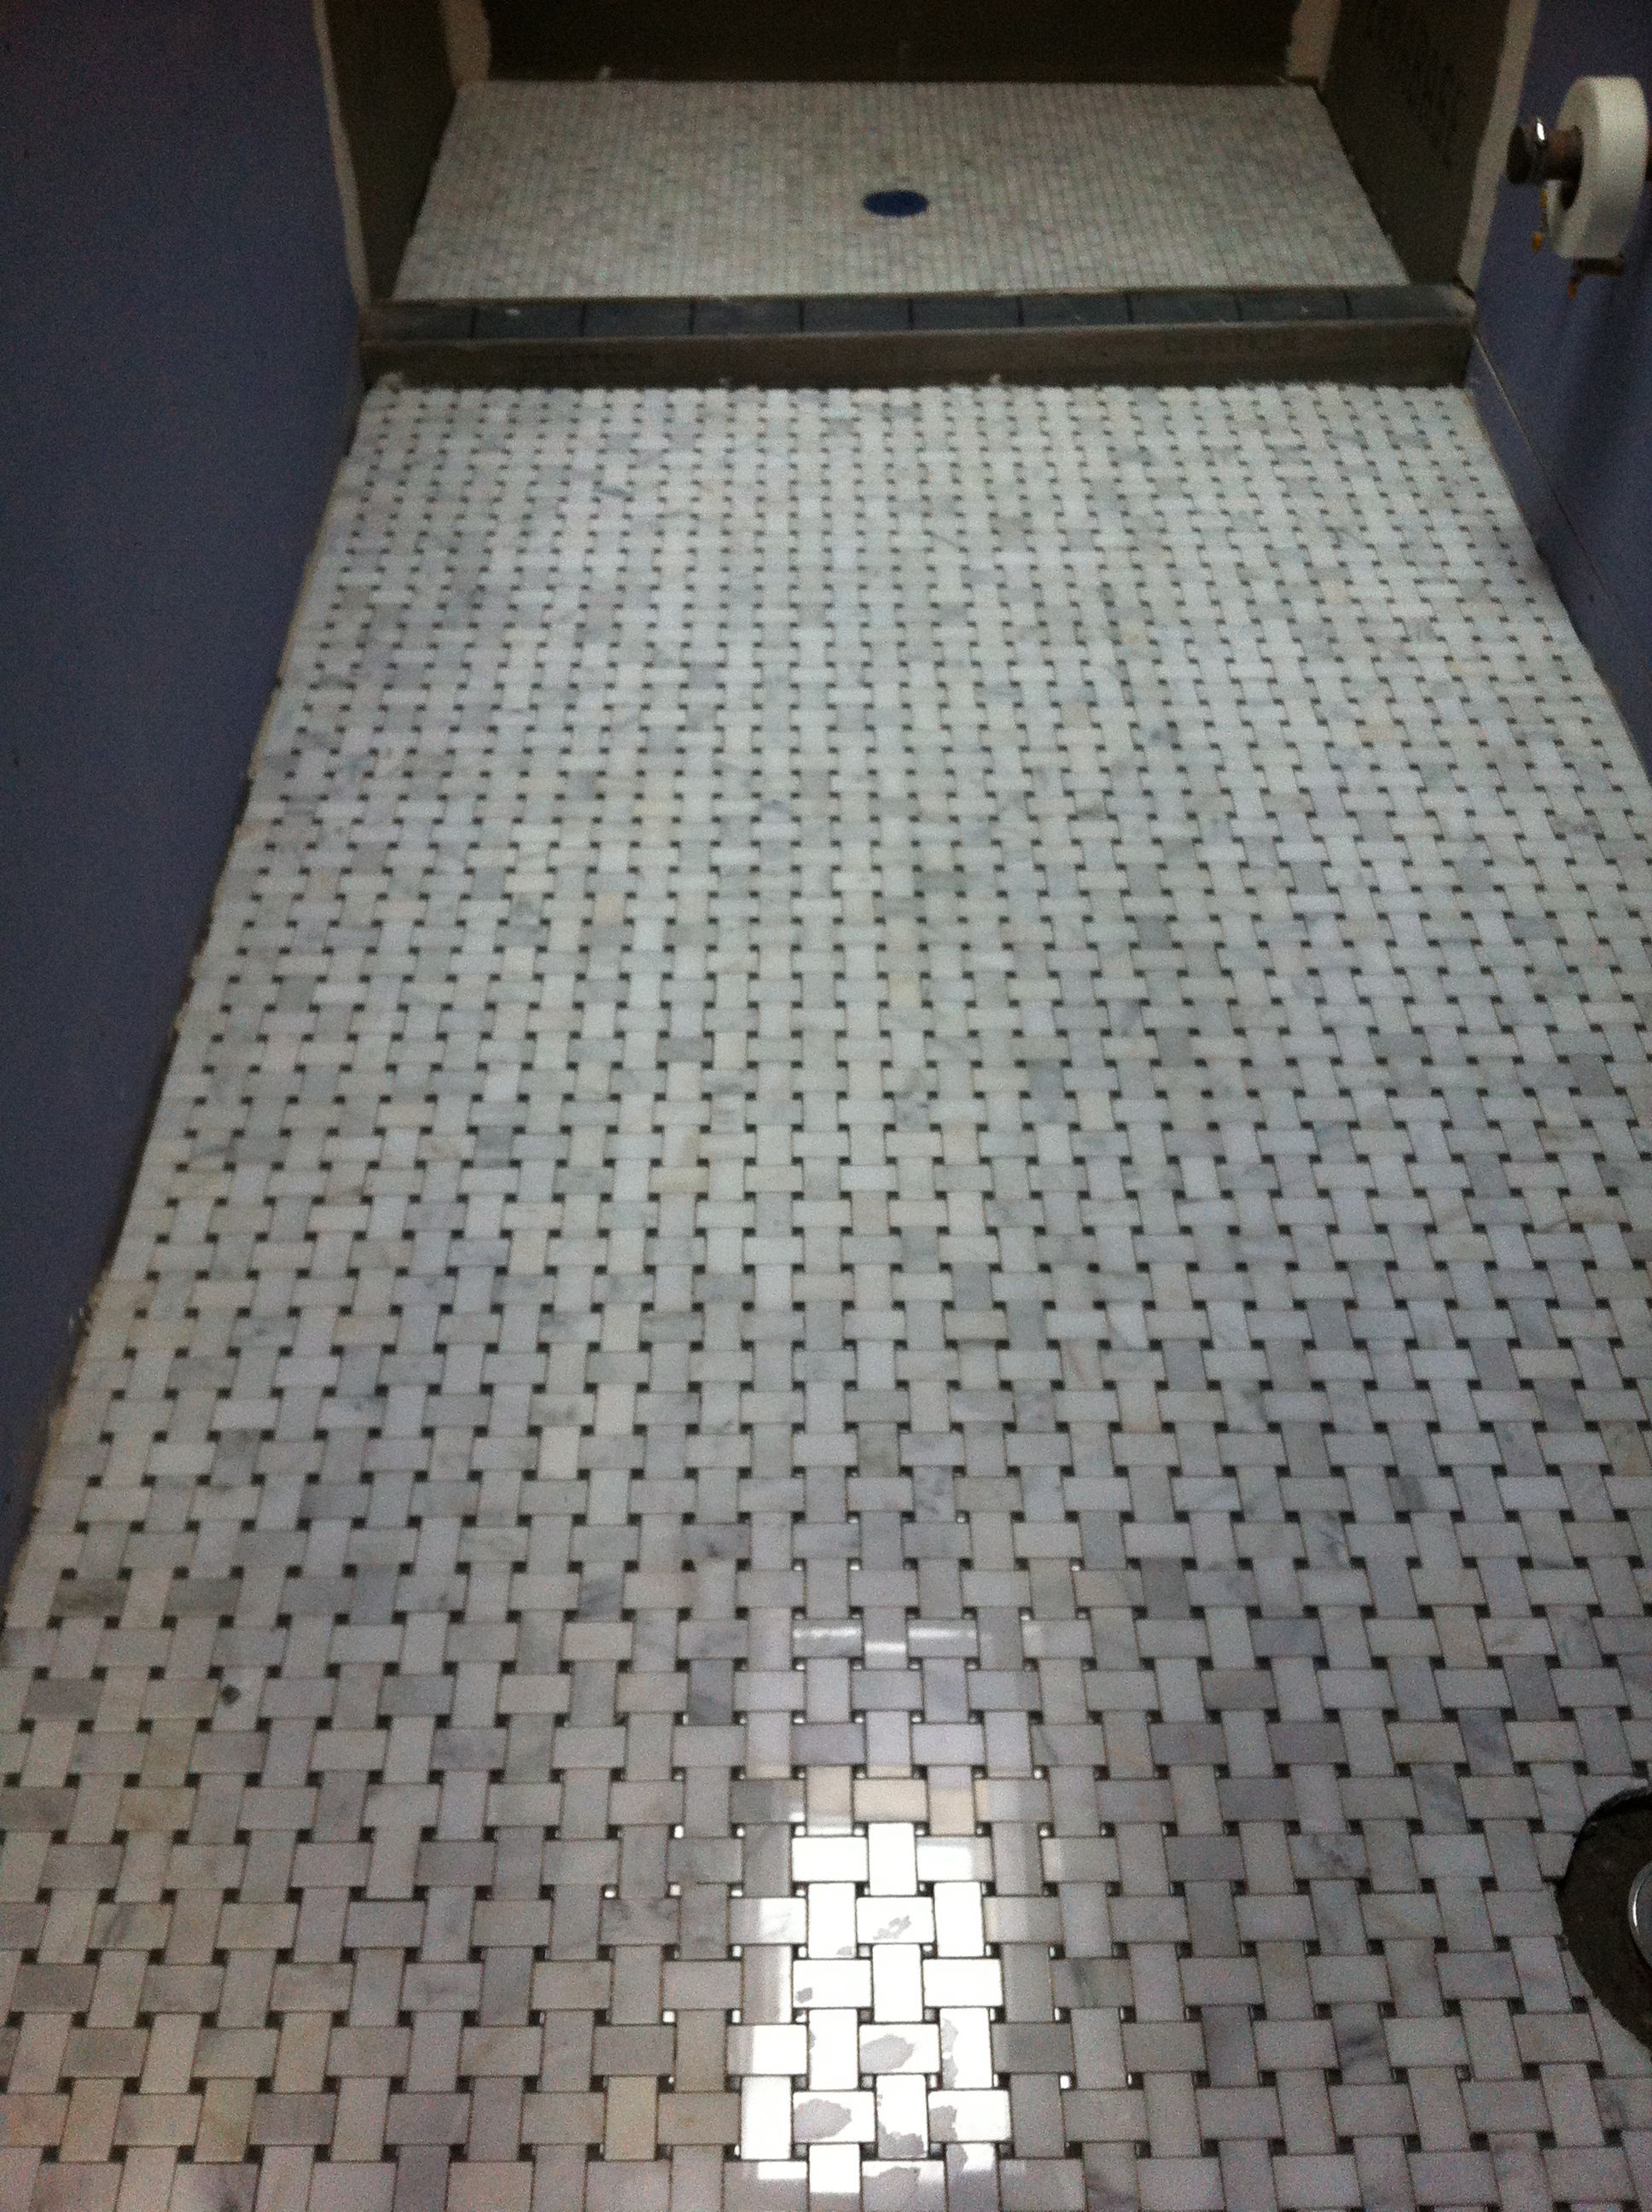
Basketweave tile for main floor and 3/4 by 3/4 tile shower floor. This photo is of the installation, pre-grouting. We’ll use a light grey grout to highlight the lines of the tile.
Shower wall tile: We really wanted a larger tile for our shower laid in a vertical pattern, and this textured tile from Cancos really caught our eye. It is also extremely affordable, so it was overall a great find.
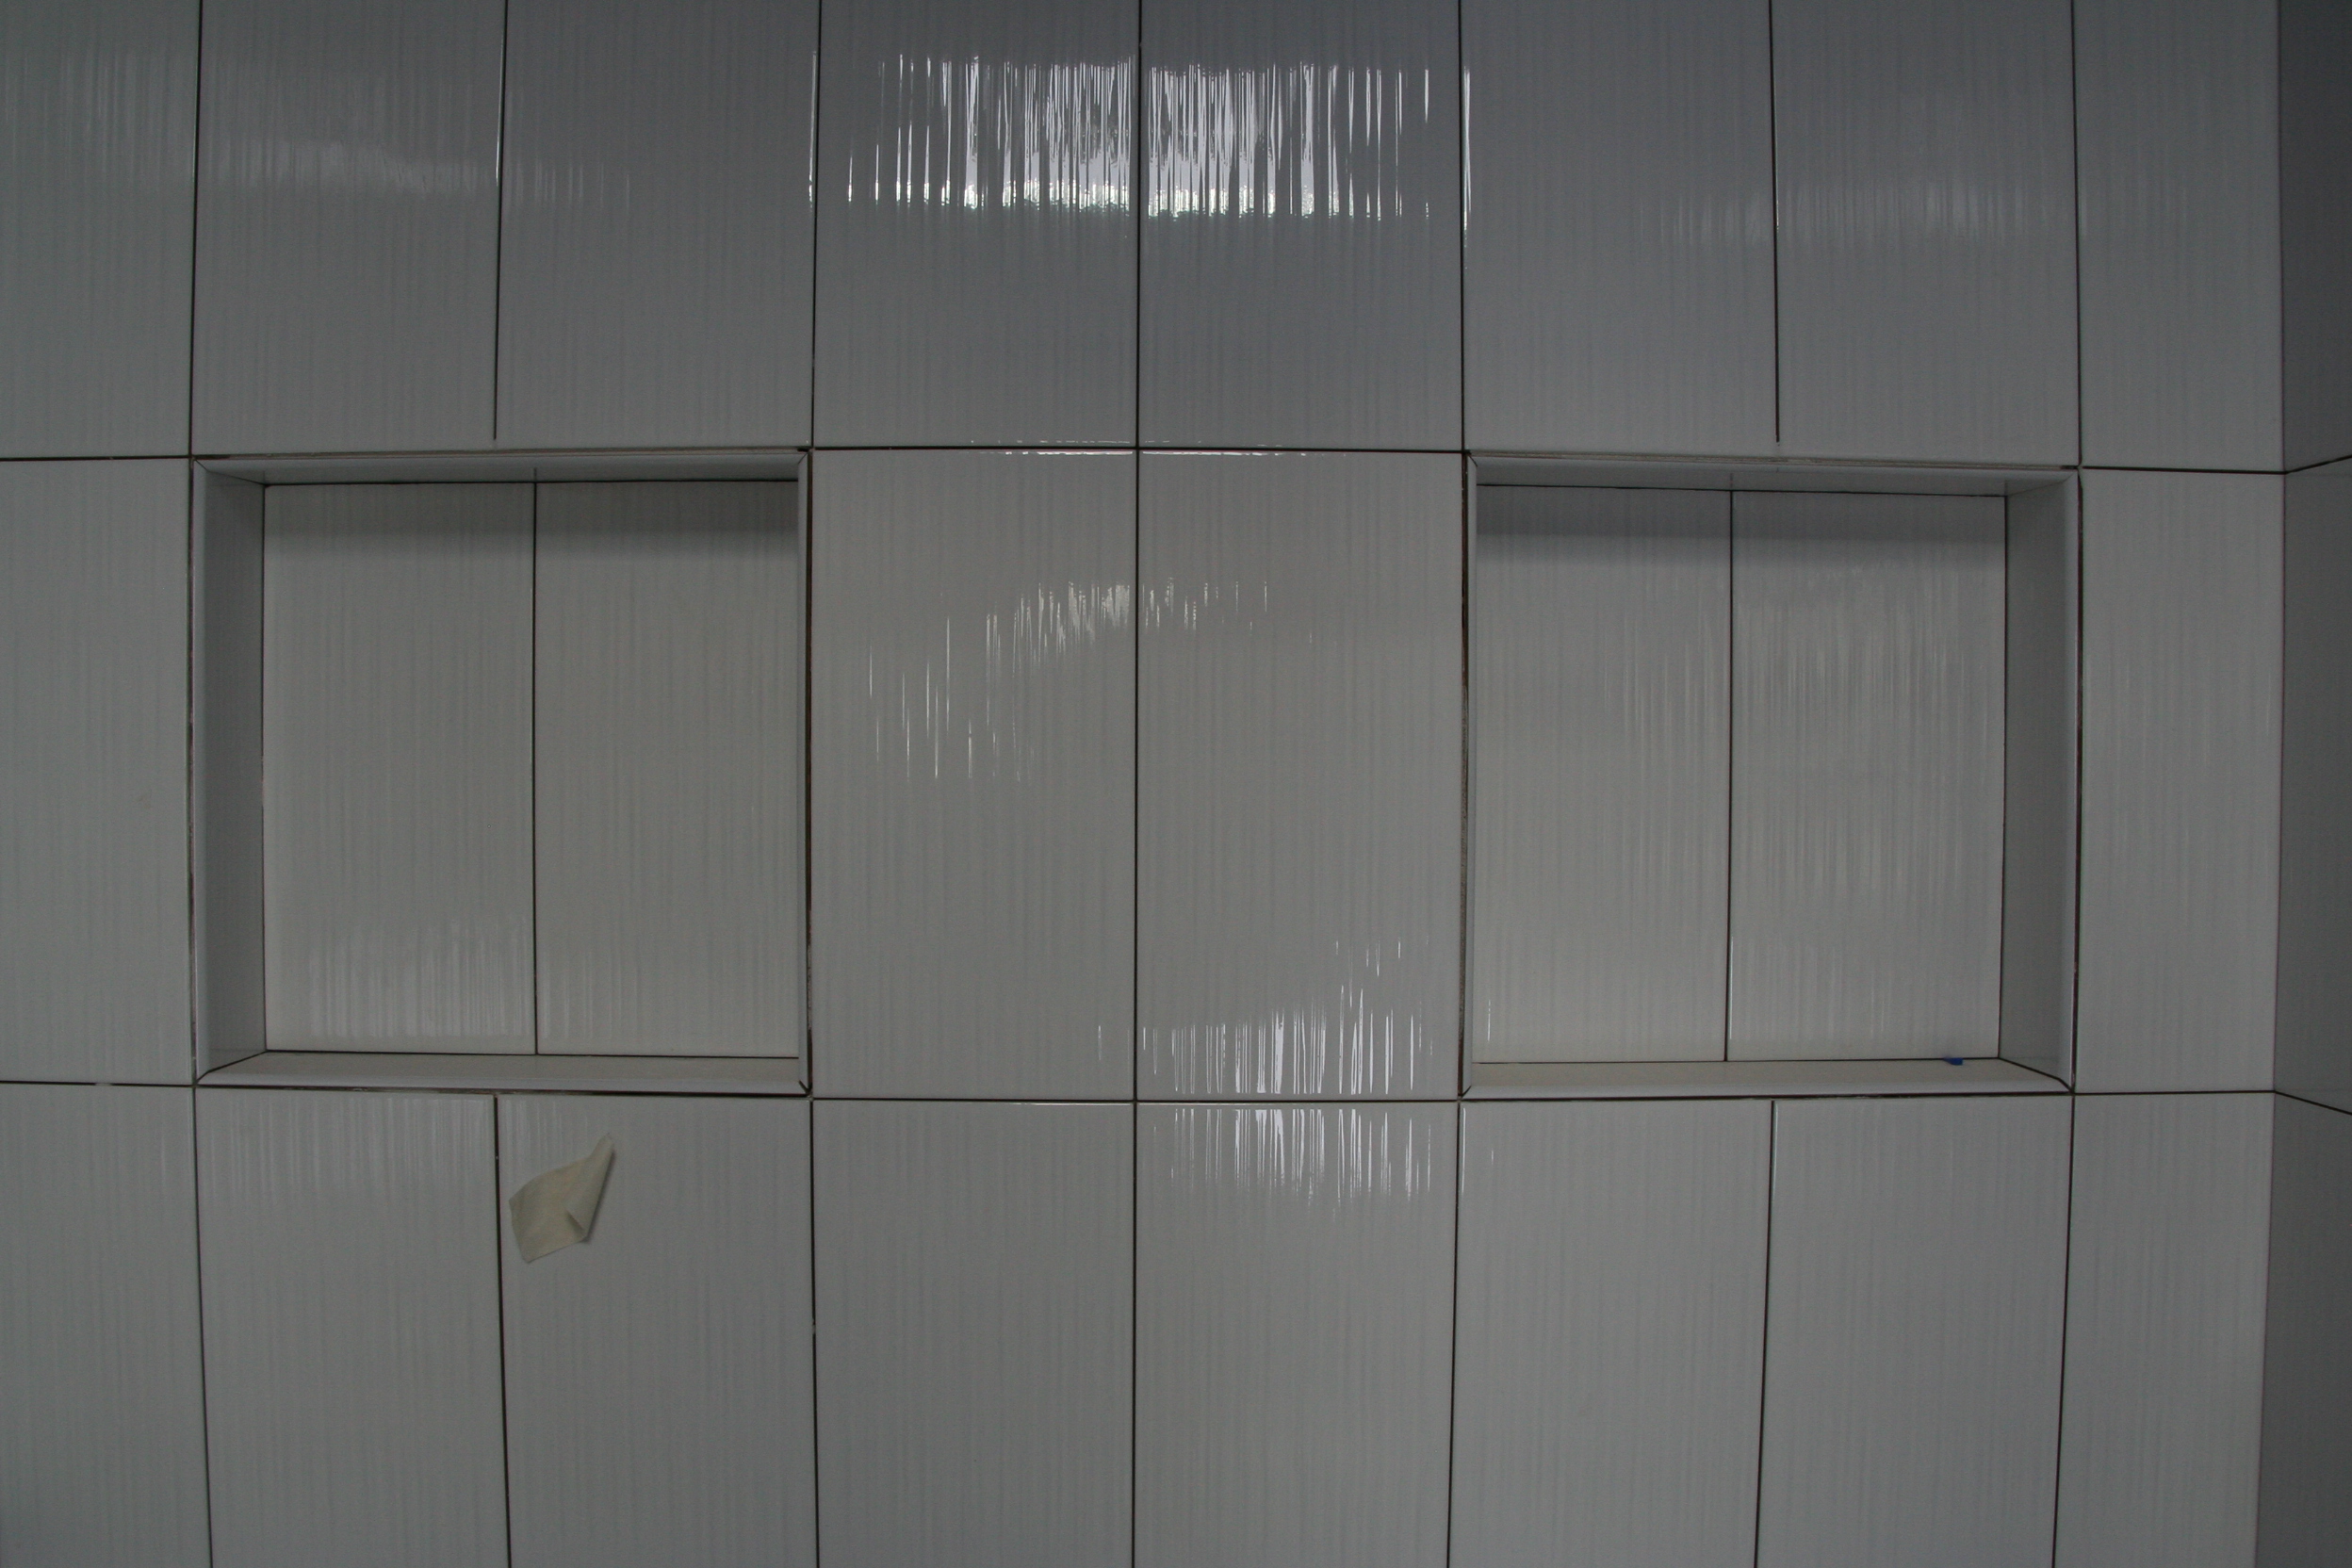
Cancos wall tile. Brownstoneboy spent a great deal of time with our architect and contractor getting our tile in beautiful alignment, and it really looks great. We’ll use white grout for a seamless look.
Picture frame molding wainscoting: We love the classic look of picture frame molding wainscoting in a simple, elegant bathroom space, so we’ve opted for this instead of standard wall tile finishes.

Picture frame molding.
Fixtures
Faucets: We liked the look of wall mounted faucets, so that’s what we ultimately chose. However, I would caution anyone else against this decision. It actually made the plumbing far more complicated and limited a number of other choices. It will prove far more costly in the end as well, as there were a number of other financial factors it elevated (the faucets themselves, the rough in valves, the plumbing work and the requirement to have a backsplash). They will be very pretty, but I’m not sure we would do it again if we had realized the added expenses.
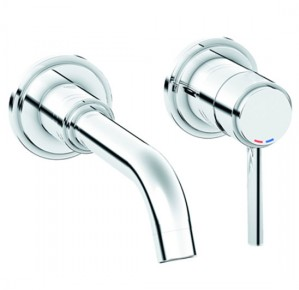
Grohe atrio single handled wall mounted faucets. Pretty, modern, but pricey installation.
Double vanity: We have just enough space for a 60 inch double vanity, which our contractor will be building. It’ll be a fairly simple European door construction, mahogany veneer over plywood (veneer will be supplied by Everwood in Gowanus on 7th street – if you are looking for veneer products, their stuff is really beautiful). A white quartzite vanity top will be purchased from Marble.com when we template our kitchen countertops, and the hardware will be similar to what is featured below. Nice clean lines.

Vanity inspiration. Ours will be built by our contractor with Mahogany veneer supplied by Everwood in Gowanus. Similar hardware will be used.
Double shower heads: Something we really liked in our last renovation and always planned to do again was a nice walk in shower with double shower heads. Last time, we opted for a three way diverter that allowed us to have either shower head on or both, but they were on the same temperature and pressure valve. Brownstoneboy isn’t as fond of the heavy fire hose level of pressure I prefer, and I definitely like my showers a bit hotter than him as well. Since we were doing a gut renovation, it was a no brainer to run separate plumbing lines with individual thermostatic valves. The trim will be Grohe Atrio, and the heads will be our favorite find from our last renovation, the super cheap and super awesome rain shower head from highpressureshowerheads.com. A real bargain at about $35.

Rain shower from highpressureshowerheads.com http://www.highpressureshowerheads.com/high-pressure-shower-head-rain.html
Medicine cabinets: After weeks of harassing our contact at Home and Stone, we were able to negotiate a very good deal on a beautiful Robern three part medicine cabinet. It will extend 60.75 inches and have two long lights, plus hidden outlets within. This was still a pricey splurge, but in the smaller space, we’ll definitely need the extra storage. She’s going to be very pretty!
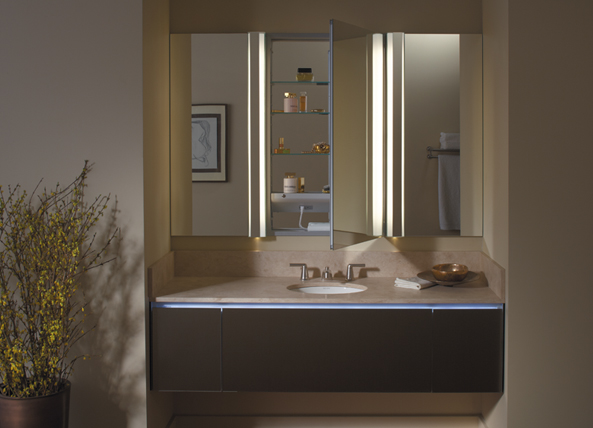
Robern medicine cabinet. 3 cabinets ganged together with interior outlets and vertical lighting. Sweet.
The master bath has come a long way this week! Here’s hoping (knocking on wood) that it’ll be ready to use when we move in at the end of the month!